Panel Manager
Panel Manager configures global settings for the project.
-
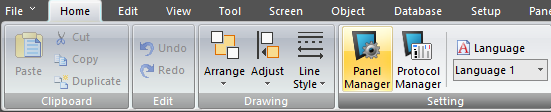
On the Home tab, select Panel Manager
— or — -
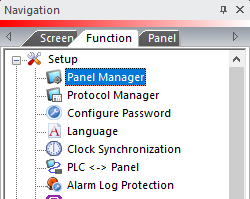
from the Navigation window, click the Function tab and select Panel Manager.
-
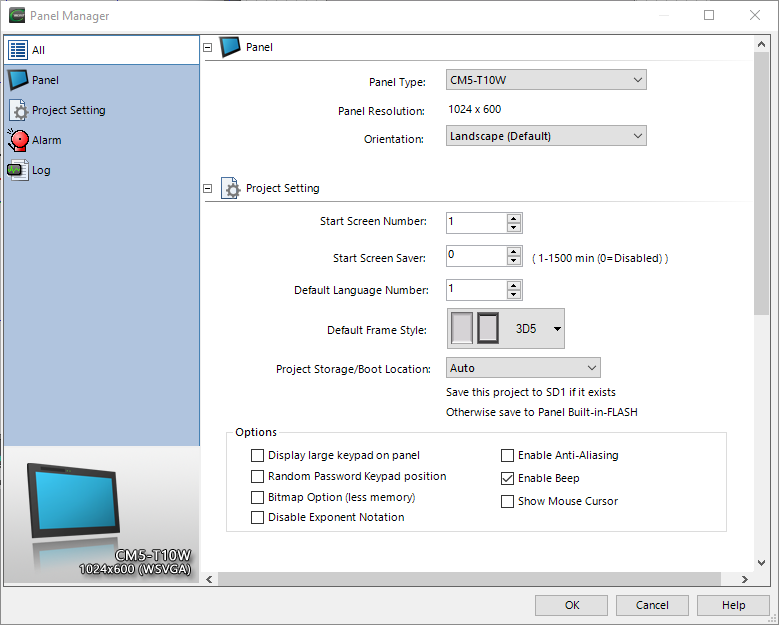
The Panel Manager window opens. You can scroll through the sections of the Panel Manager settings or select the tab to the left to show only that section.
Panel

Panel Type
Select the C-morepanel part number you use in the project. When you change the panel type, you may need to adjust the project. If changes are necessary, the software prompts you to make decisions for handling these changes. See Project Resolution Difference for more information.
Orientation
Set the panel to view the screens right-side up:
-
Landscape (Default)
-
Portrait (90 Degrees clockwise)
-
Landscape (180 Degree - Upside-down)
-
Portrait (270 Degrees Clockwise)
Project Settings
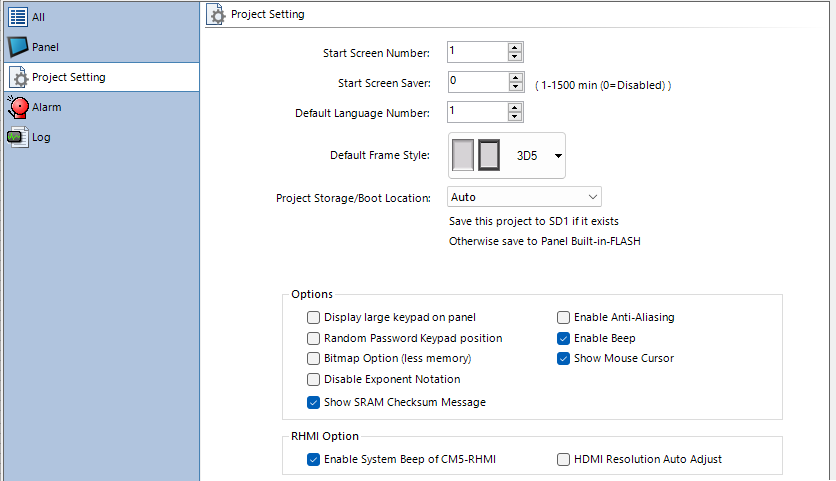
Start Screen Number
Select the panel screen number to display when you power up or restart.
Start Screen Saver
Select 0 to disable the screen saver or enter a number between 1 and 1500. This number is the number of minutes the panel waits before activating the screen saver and turning off the backlight.
Default Language Number
When you configure the project with more than one language, enter the number assigned to the default language for panel startup and reboot.
Default Frame Style
The selected style becomes the default frame for all objects. You can override this for individual objects in each object configuration window.
Project Storage/Boot Location
Select the target storage and boot location for the panel. For more information, see Project Storage/Boot Location.
Options
Select this checkbox to display a larger keypad for objects such as Numeric Entry and Text Entry. The larger keypad fills the screen.
This setting applies only to system keypads. It does not apply to User Defined Keypads. Create User Defined Keypads with a size appropriate to the project.
Random password keypad position
Select this checkbox to place the password keypad in a random location on the panel screen. This prevents screen wear from repeated touches in one location.
Bitmap Option (Less Memory)
When you use bitmaps in various objects such as the Multi-State Bitmap or Static Bitmap Objects, the project size may exceed the allowed project memory size. To reduce project size, use bitmaps less than 65535 colors, such as 8-bit or 4-bit bitmaps. These bitmaps do not require as much memory. To take advantage of smaller bitmaps, select this option. This feature does not reduce project size in which all of the bitmaps are 16-bit or higher.
| Note: | Selecting the Bitmap Option may reduce the performance of the panel. Determine a balance between the project size and panel performance. |
Disable Exponent Notation
This setting disables scientific notation for all Floating Point Data display objects. If you use a Floating Point Data Type with Numeric Entry/Display, Slider, Bar/Circle Meter, Line Chart, sometimes the exponential notation affects the data view. Tick this box to disable any exponential notations.
This setting also affects simple shapes (Line and Circle) and the Analog Meter. All of these objects use this setting by default, but you can override each one in the object configuration window.
Tick the anti-aliasing box to improve the appearance of diagonal lines. Note that anti-aliasing may affect panel performance.
| Note: | This setting does not control the Audio Line Output port. |
Show Mouse Cursor
When enabled, an arrow cursor appears on panel screens, similar to a PC mouse cursor. If you connect a mouse to the USB port, the arrow cursor behaves like a PC mouse cursor. This setting is off by default for all panel types.
RHMI Options
Enable System Beep of CM5-RHMI
The CM5-RHMI headless HMI has several beep patterns that play when you power up and connect the HDMI display. These patterns are on by default. Clear this box to disable the beep patterns.
If a connected display does not support the selected resolution, the panel may display incorrectly. To correct this, clear the current selection and choose a resolution the monitor supports.
Alarm
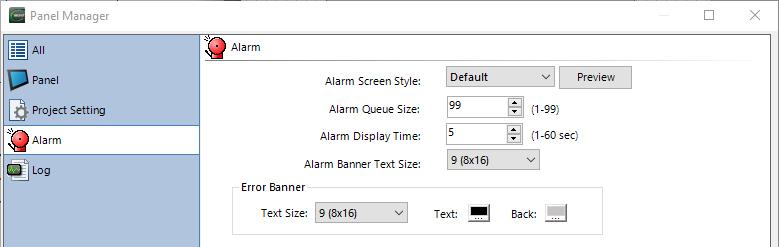
Alarm Screen Style
Select the Alarm Screen Style from the drop-down. Use this setting when converting from EA7 to ensure Alarm Message objects display as intended.
-
Default - New Style
-
Classic - Legacy EA7 style
Alarm Queue Size
The number of alarms that queue and cycle through the Alarm Banner on the panel screen.
Alarm Display Time
Sets the time, in seconds, that each alarm displays in the alarm banner on the panel screen.
Alarm Banner Text Size
Select the text size of the alarm banner. A larger text size makes the banner easier to read on high-resolution panels or smaller screens.
| Note: | If the alarm banner covers an object, the banner still activates when you touch the screen. |
Error Banner
The error banner shows PLC and RTE errors at the top of the panel screen. Use the settings below to adjust the banner appearance for different panel sizes.
Text Size
Select the error banner text size. Options use Windows font sizes.
Text and Background colors
Select the text color and background color for the error banner.
Log
Add Header Row to Log File
All log files include a header row by default. If your application does not support a header row, clear this checkbox.
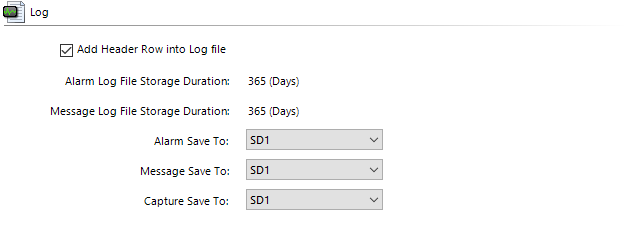
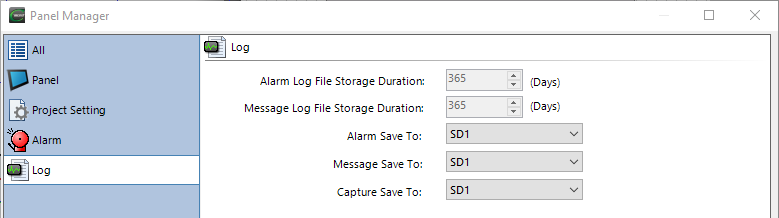
Log File Storage Duration
The default storage duration is 365 days. This value does not change.
Save to Location
You can save alarm log files, message log files, and screen capture files to an SD Card in the SD1 slot or to one of the USB ports with a USB memory device connected.
CM300