Create a Project in C-more Software
C-more software is used to configure the C-more series Human Machine Interfaces (HMI) panel.
A project is the configuration for the panel, including all screens, objects, PLCs, and PC communications.
This topic provides a high-level overview to start a project. Links to more detailed information are provided.
Before You Begin
-
Power up the C-more touch panel.
-
Find your PLC manufacturer model number and protocol.
-
Become familiar with the tool bars, menus, and icons used in C-more software.
Create a New HMI Project
-
Select your C-more panel type.
-
Select the orientation.
-
Select the PLC manufacturer and protocol.
-
Set up the protocol parameters.
-
Add screens.
-
Add and configure objects.
-
Add tag names.
-
Add screens.
-
Simulate the project.
-
Download the project to the C-more panel.
To create your project:
-
Start the C-more software on the PC connected to the C-more panel.
-
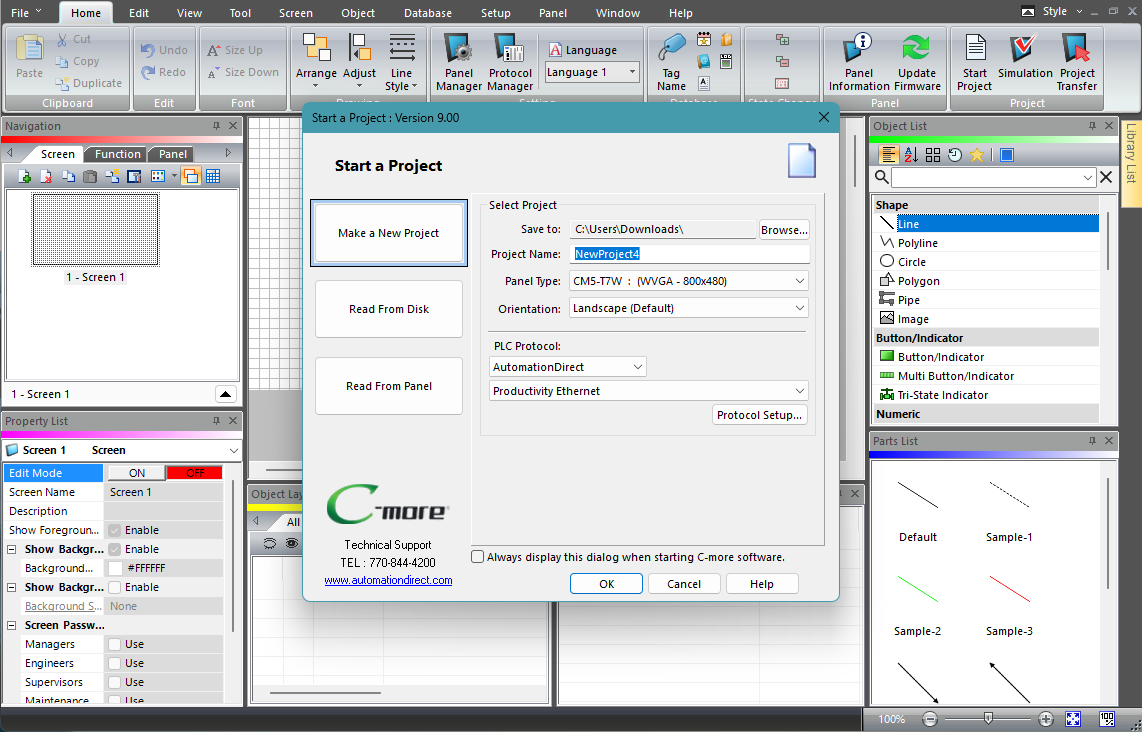
The Start a Project window opens.
-
Select Make a New Project
| Note: | You can choose not to see the Start a Project window when you open the software. Tick the box beside "Always display this dialog when starting C-more software". If you do not see this window, click the File menu in the far left corner of the top toolbar and select Start Project. |
-
Select Make a New Project and complete the fields on the screen.
In this example, we are using Panel type CM5-T10W and PLC protocol AutomationDirect CLICK Serial.
See Add a PLC Device to a Project for more information about your specific PLC.
| Start a Project | |
|---|---|
|
Screen Feature |
Description |
|
Where you want to save this C-more project |
|
|
Project Name |
Project name |
|
Panel Type |
The AutomationDirect panel to configure; for example, CM5-T10 Click the drop-down arrow and select the panel type |
|
Orientation |
Select one of four possible orientations: Landscape (Default), Rotate clockwise 90°, 180°, or 270° |
|
PLC Protocol |
Select PLC Protocol for the C-more panel controller Select the manufacturer and model in the top drop-down and network type and protocol in the second drop down For example, we are using AutomationDirect Click Serial |
|
Match the settings for the PLC connected to your panel See Add a PLC Device to a Project to see protocol setup for all PLCs |
|
-
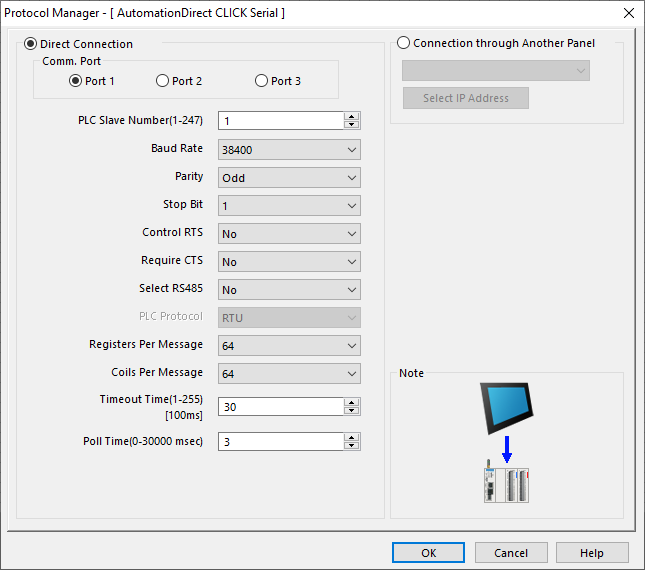
Click Protocol Setup.
-
Complete the fields in the Protocol Manager window using information in the help topic for your chosen PLC protocol, found here: Add a PLC Device to a Project.
-
For example, for the AutomationDirect CLICK Serial protocol, see AutomationDirect CLICK Serial Setup.
-
Click OK to accept the protocol settings.
-
Click OK again to accept the New Project settings.
-
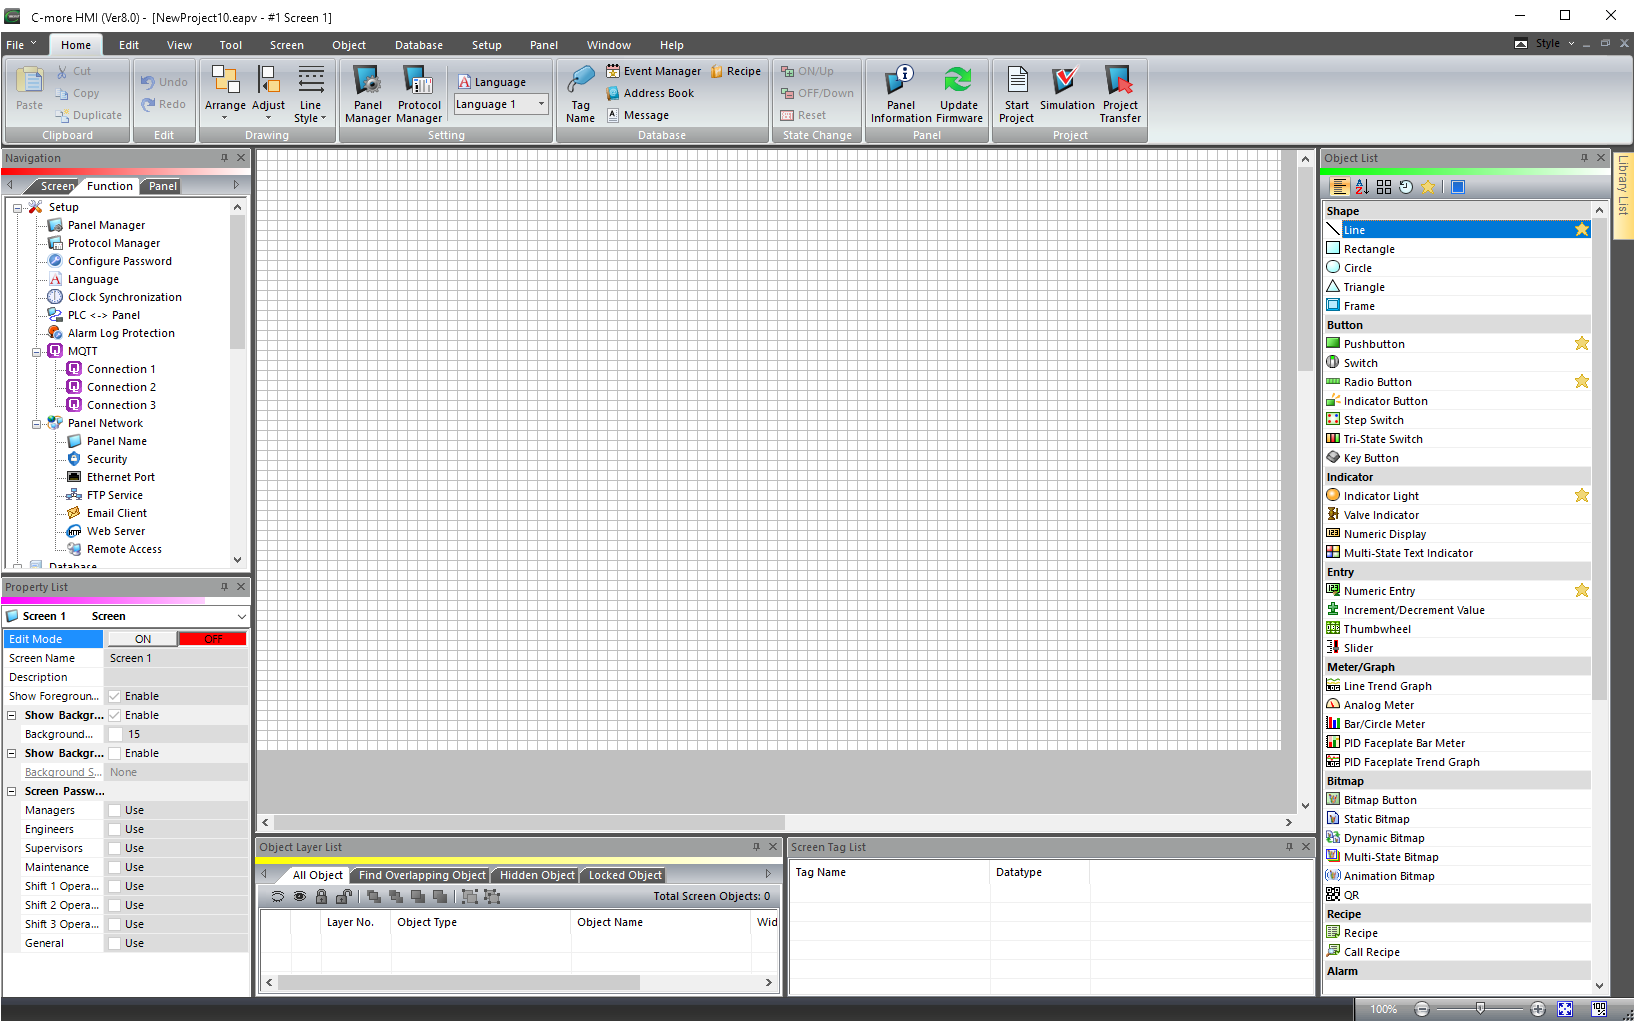
The Workspace screen appears.
Add Screen(s)
A new project always opens with one blank screen. Screens allow you to organize objects.
-
To add a screen to a project, select New Screen in the Screen tab.

-
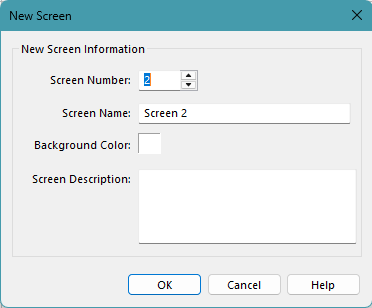
The New Screen window opens.
-
Give the screen a unique number and a name.
-
Select a background color and give the screen a description for documentation purposes, if desired.
-
Click OK.
-
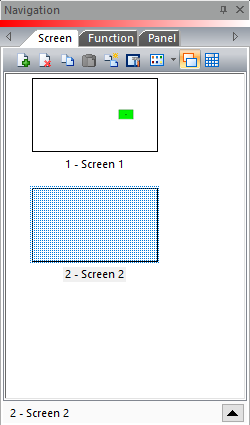
The new screen is in the main window work space and also in the Screen tab of the navigation window.
-
Now you can add new objects to the screen as with Screen 1.
-
Control navigation between screens by adding a Screen Change or Screen Selector object.
Add and Configure Project Objects
Objects and Screens are the foundation of C-more. A new project opens with one blank screen where you can add objects to your project.
An object is the main control interface in C-more. You can interface to the PLC memory with screen objects. The objects represent the real world device.
 Example:
A button that turns on the address in the PLC to start a motor:
The operator does not have to understand the programming, just that the button, labeled, "Motor Start" will start the indicated motor.
There are pre-made objects in the C-more software.
Examples:
-
Button/Indicator
-
Numeric Entry/Display
-
Thumbwheel
-
Text Entry/Display
To use an object in your project, add it to a screen and configure it. When you configure an object, assign a tag name. You can give it a name, add color, and determine how the object behaves in your project.
Example:
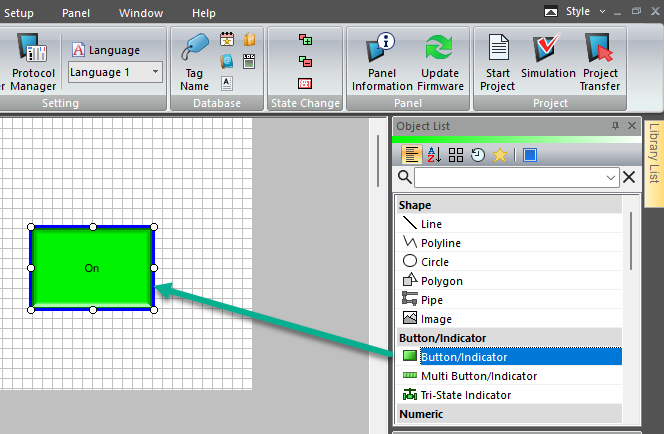
A button on Screen #1 that is gray when inactive but turns green when activated:
-
Assign a Tag Name to the button to link it to a particular PLC address.
-
Click the Button/Indicator Object in the Object List window and drag it to the screen.
-
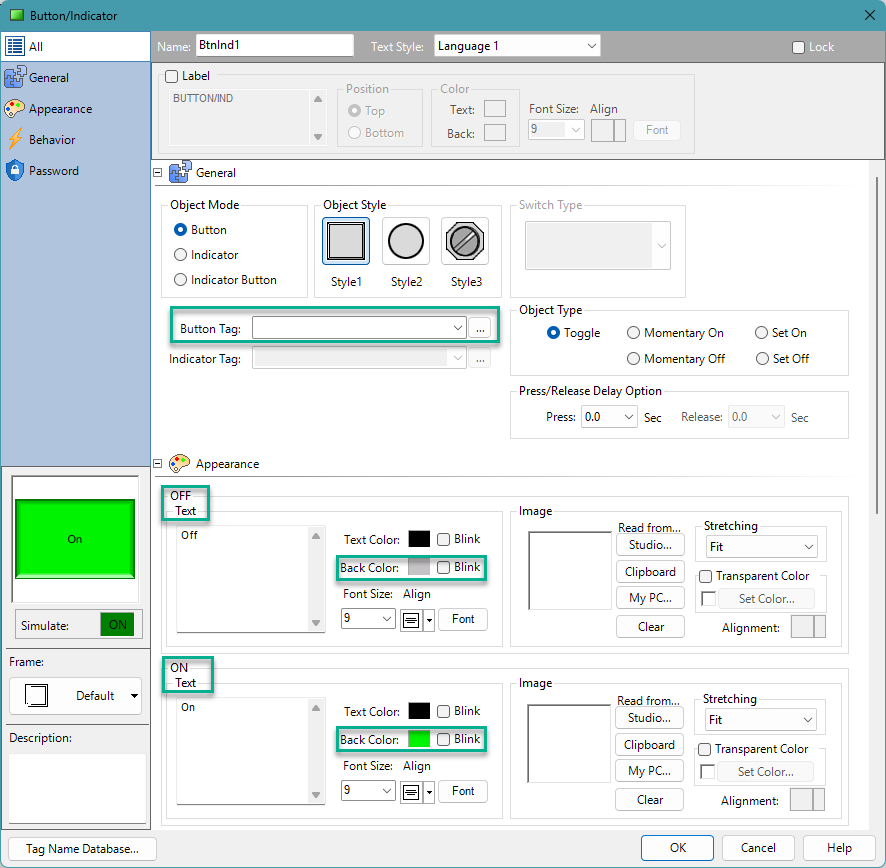
The Button/Indicator configuration window opens:
Background Color
The Off state background color is gray and the On state background color is green. If you need a different color, click the color icon and choose a different color.
On and Off Text
The default Off and On text are "Off" and "On". You can change these to suit the control process.
Example:
"Start" displays when the button is off to indicate pushing it "starts" a process, and "Stop" displays when the button is on to indicate pushing the button "stops" a process.
Tag Name
Most objects require a tag name. The tag name is the interface to the control system.
-
Enter "Motor Start/Stop".
-
Click OK.
-
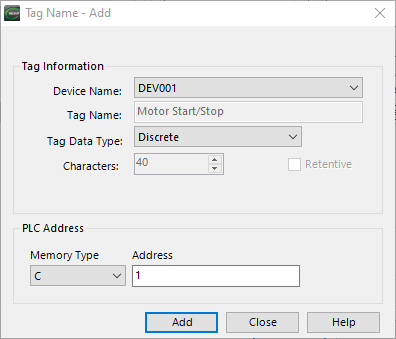
Since this is a new tag name, the Tag Name - Add window opens:
-
Select the PLC device.
-
In this case DEV001 is the CLICK Serial Protocol connection initially configured. The button is a discrete object, so it is a Discrete Tag Data Type.
-
Click the Memory Type drop-down to see the choices for CLICK PLC Memory types.
Examples:
-
C
-
CT
-
SC
-
Enter a valid address for the Memory Type chosen.
-
The software only allows valid addresses. See your PLC documentation for valid PLC addresses.
-
Click OK to accept the configuration.
Add Tag Names to a Project
Right now, there is one Tag Name in the Tag Database.
Tag names represent information in a memory location, usually an address in the PLC or the C-more panel.
Example:
For our test project, a tag name "Motor Start/Stop" in the C-more represents CLICK address C1.
Most tag names are used in objects. Most objects use one or more tag names.
Example:
You may assign an indicator light object on the screen tag name "Motor Running". The indicator light is ON when PLC address C1 is on.
Add tag names to projects in one of these ways:
-
Create tag names and save them in the Tag Database before you begin your new project
-
Add tag names manually as you add objects
Tag Names and the Tag Name Database
See Tag Name Database to learn how to add a new tag and field details for screens.
Screen Area
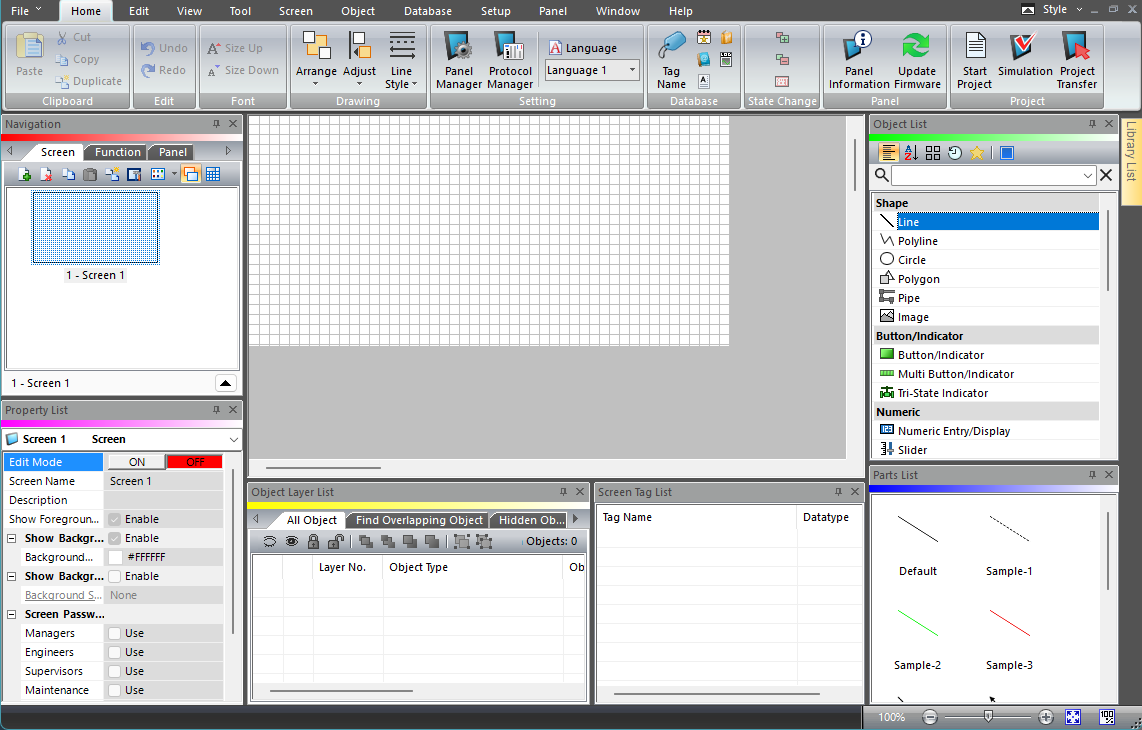
The screen contains two areas:
Work Area
The white area with grid lines is the work area.
The work area is white (default screen background color) with a grid (by default). This is the display area on the C-more panel screen.
Development Area
Light gray in the image above is the development area where you can work while you develop your project.
Objects can be active in the development area even when you send a project to a panel.
Example:
You can place pop-up window objects off the work area. They pop up in the screen view area when called. You can place message box objects to log text data here.
Simulate a Project
After you add objects to your project and assign tag names to them, make sure they work. Simulate your project to see how it behaves in the real world.
Click Simulate in the toolbar.

See Simulation for more details.
Transfer a Project to Panel
When you are satisfied with your project, transfer it to the panel.
Click Project Transfer in the Home or Panel tabs.
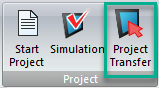
For details on how to transfer a project, see Project Transfer.
CM024