Animation
Applies to:
| Note: | If you use any of the above images in a Grid object, animation is disabled. |
Screen Coordinates
The top left corner of all screens is 0,0 regardless of portrait or Landscape mode.
|
Landscape |
Portrait | |||
|---|---|---|---|---|
|
Model |
Right |
Bottom |
Right |
Bottom |
|
CM5-T4W |
320 |
240 |
240 |
320 |
|
CM5-T7W |
800 |
480 |
480 |
800 |
|
CM5-T10W |
1024 |
600 |
600 |
1024 |
|
CM5-T12W |
1280 |
800 |
800 |
1280 |
|
CM5-T15W |
1366 |
768 |
768 |
1366 |
|
CM5-T22W |
1920 |
1080 |
1080 |
1920 |
|
CM5-RHMI |
1920 |
1080 |
1080 |
1920 |
Axis Animation
Animation Style
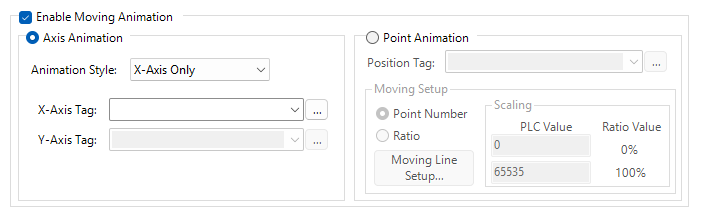
Axis Animation moves an object along the X-axis (horizontal), the Y-axis (vertical), or both.
Configure a tag to control the object position in pixels, relative to its original screen position. A value of 0 keeps the object at its original position.
 Example:
On a CM5-T10W with a screen resolution of 1024x600, place a line at the center of the screen with a left position of 512 and a top position of 300. The X-axis tag range is –512 to 512 and the Y-axis tag range is –300 to 300.
| Note: | Large position values can move the object off the screen if the length and angle do not fit. |
Point Animation
Draw a path of a discrete number of points (like a dot-to-dot picture). Set the Position tag to a nonexistent point number and the object displays at its original location (point 0).
Point Number
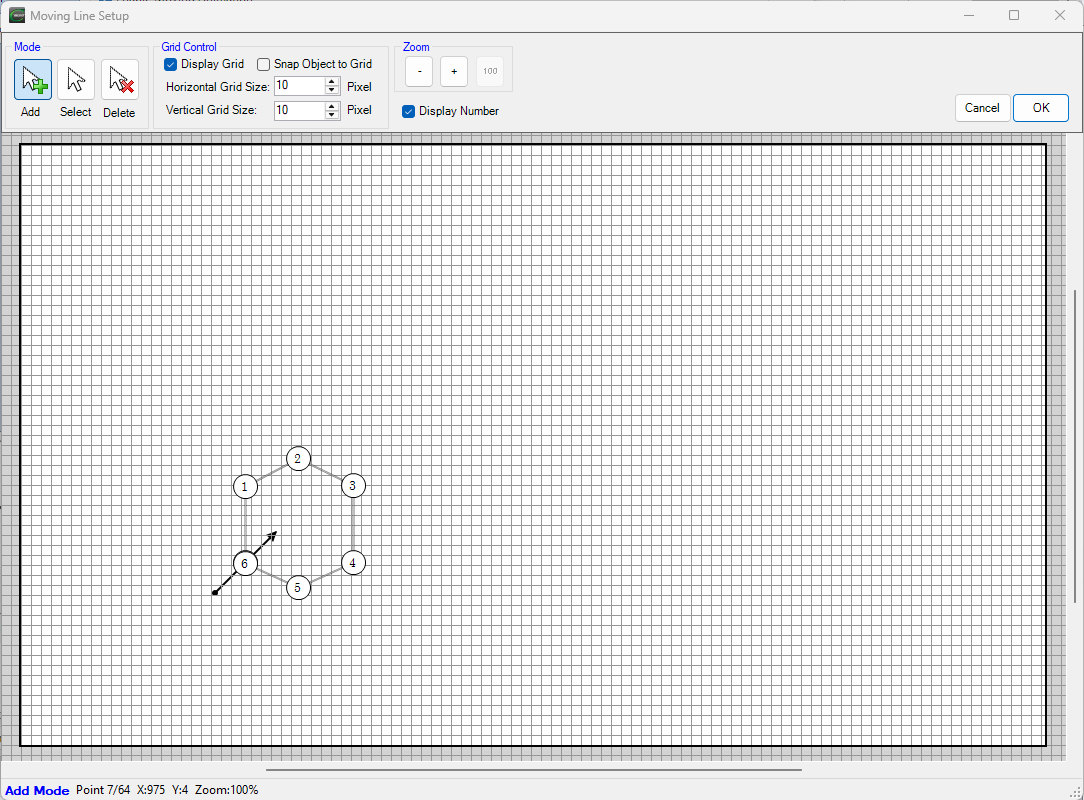
Move the object to a specific point on the animation path. Use a tag to select the point number at runtime. Use the Moving Line Setup screen to add, edit, or delete points on the animation path. Tick the box beside Display Number to show the point number label on each point to identify and select the correct point.
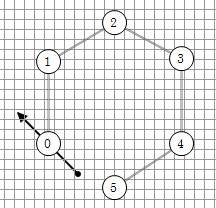
The image below represents an object moving on a 6-position rotary table. Each position has an index value from position 0 to 5. Set the Position Tag to 3 to move the object so the center is at point #3:
Ratio
Scales the animation path to a percentage, which helps smooth motion. In the rotary table example above, instead of mapping to a specific position, configure the tag to use an encoder value.
Example:
If the encoder has a resolution of 4096 ppr, set the PLC value range to 0–4096. Ratio then scales this to 0–100% of the full path.
Select the Moving Line Setup to draw the path:
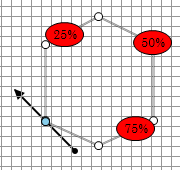
In this example, 0 and 100% positions are the same: indicating a closed loop. As the encoder increases from 0-4096, the line smoothly translates around the hexagonal set of points.
Rotation Animation
Applies to:
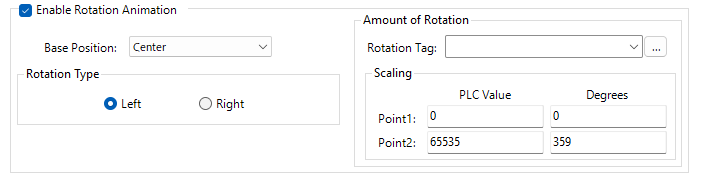
Base Position
Set a point around which an object rotates.
Center: center of the bounding box
Left: top-left corner
Right: bottom-right corner
For vertical lines, Left rotates around the top point and Right rotates around the bottom point.
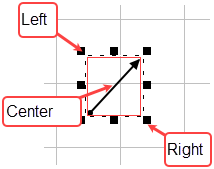
Rotation Type
Right: clockwise rotation
Left: counter-clockwise rotation
Specify the PLC range and the corresponding rotation in degrees. If the PLC sends a value above or below this range, the system ignores the PLC value and uses this max or min value.
Length Animation
| Note: | Only applies to the Line Object. |
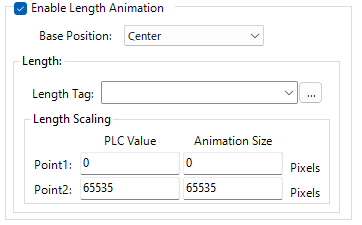
Base position
Center
Stretch the line equally from the center.
Left
Hold the left point in a fixed position and stretch to the right. A vertical line stretches down.
Right
Hold the right point in a fixed position and stretch to the left. A vertical line stretches up.
Length
Use a tag as a line relative additional length. A Length tag with a value of 100 adds 100 pixels to the line. A value of -100 reduces the line by 100 pixels. If the PLC sends a value above or below this range, the system ignores the PLC value and uses this max or min value.
Length Scaling
Extend or shrink a line based on a PLC value. Set the PLC range and the minimum and maximum pixel values to control how much the line length changes.
Example:
An Animation Size of 0–100 allows the line to grow up to 100 pixels but never shrink, regardless of the PLC value. An Animation Size of -100–100 allows the line to grow or shrink by up to 100 pixels in either direction.
Size Animation
Applies to:
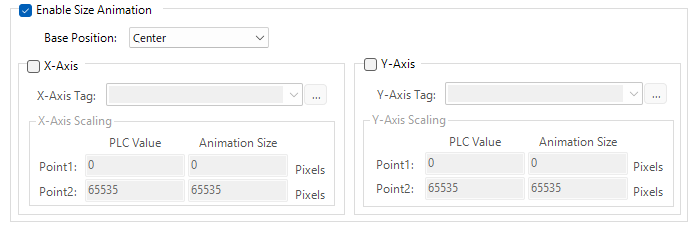
Base Position
Pin and object and stretch it equally:
-
Center: left/right or up/down
-
Top/Left: right and down
-
Top/Right: left and down
-
Bottom/Left: up and right
-
Bottom/Right: up and left
X- and Y-Axis
Animate the X-axis (horizontally), Y-axis (vertically), or both.
Configure a tag to set the relative size in pixels. 0 is the original screen object size.
Example:
A 300x300 Pixel Circle (enable ellipse)
Set the X- and Y- axes to 0 to display an object as original size.
Change the X- and Y-axes to 300 and 300 makes the circle 600 x 600 pixels.
| Note: | Using a negative number does not make the object smaller than the original. |
CM271