Adding Event Actions |
Topic:
CM142 |
The Basics
The following basic steps are the same for adding any Event Action to an Event. Details for completing the addition of each Event Action are available in the online Help. Click a link in the table below to go to an Event Action.
|
|
To configure an Action, do the following:
- From the Database menu in the top toolbar, select Event Manager Database.
- The Event Manager window opens.
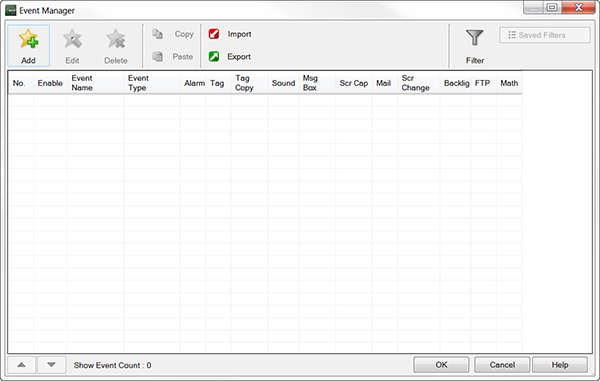
- Click Add.
- The Event Add window opens.
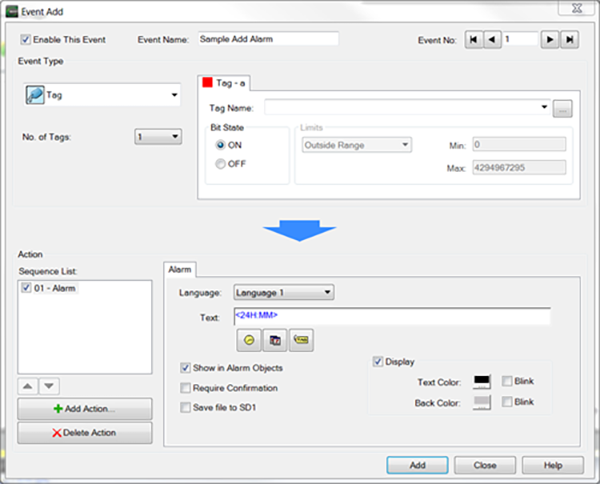
- Click the Event Type drop-down list and select the Event Type to be associated with this Event Action. For details on Event Types, see Add Event - Tag, Add Event - Day and Time, or Add Event - Screen Change.
- By default, in the lower section of the window under Action, an Alarm Action has been added. This may be configured or deleted.
- To add a new Action, click Add Action. The Add Action window opens.
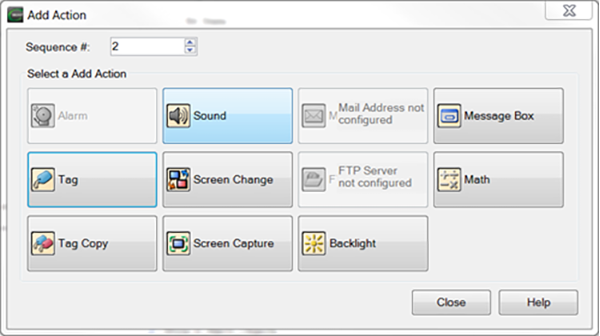
- Click to select the action you want.
- The Add Action window closes. Notice that in the Event Add window, a new tab labeled with the Action you selected has been added to the lower half of the screen.
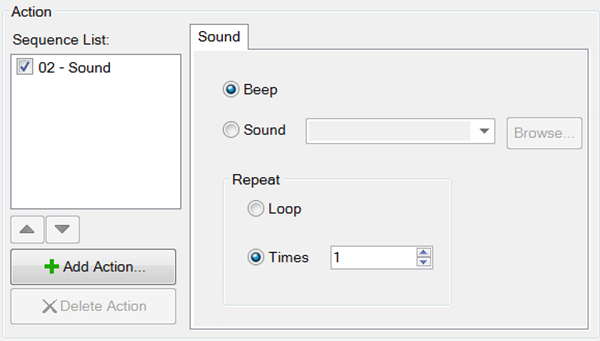
- A new tab will appear. In the example below, the Sound event action was selected.
- Continue to the details for the specific event action that describe how to complete the fields on the screen. See the list of Event Actions below.
- After completing the fields on the screen, click Add.
|
|
