Add Event Action — Mail |
Topic: CM028 |
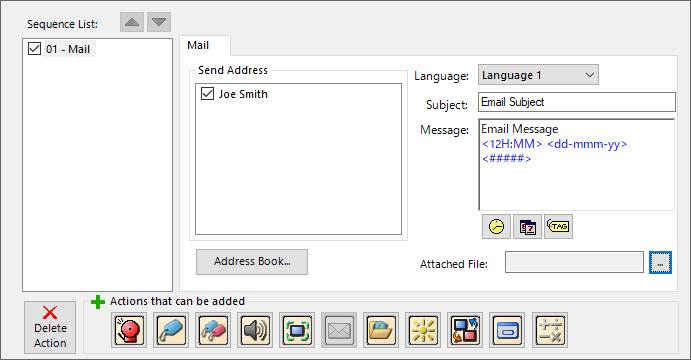
The Mail action allows you to send specified Mail (email) messages with attachments to addresses through a specified Mail server.
|
|
Note: To configure a Mail action, you must assign at least one email address in the Address Book. |
Configure an Action
The basic steps are the same for adding any Event Action to an Event. See Adding Event Actions - The Basics.
From the Mail tab, a list of email addresses configured in the Address Book Database display in the Send Address field. See Address Book to learn more about setting up email addresses.
| Mail Action | |
|---|---|
| Field | Description |
| Send Address | To select recipients for this email, click on the appropriate check boxes. See Address Book to configure eemail addresses. |
| Address Book | If the Recipient is not listed, select this button to open the Address Book and add it. |
| Language | Select the language for the text in the Subject and Message body. You may enter different text for up to 9 languages. See Language. |
| Subject | Enter the subject for this email. If the Subject field is left blank, the first line of the email Message is subject in email received. |
| Message | Enter the Message body to send with this email. A you can embed a maximum of six tags, time, and date in the email Message body. See also Configuring Embedded Data value in a Message. |
Embed Time, Date, or Tag in Email
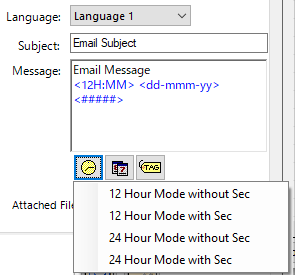
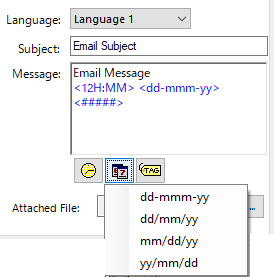
- To embed a tag, time, or date in the body of the email, click one of the icons directly below the Message text box.

- Click the Clock icon and select the hour mode.
- Click the Date icon and select the date format.
- Click the Tag icon and the Embedded Data value window opens.
- See Embedded Data value Configuration in the topic Message Database.
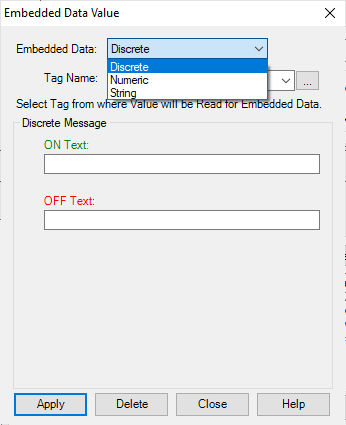
- Click the Embedded Data value drop-down list and select the type of tag you wish to enter: Discrete, Numeric, or String.
- Complete the fields for the type of tag you select
To Attach Files to a Mail Action
The Attached File feature enables you to attach one log file or screen capture to the Email.
- Click the Attached File Browse button to open the Select Attached File for Email dialog box as shown below.
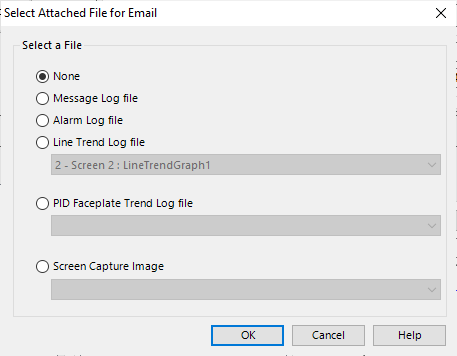
You can select the following files from the dialog box to attach to the Email. Some of these log files are created daily. Only the latest file is sent.
| Mail Action - Attach Files | |
|---|---|
| Field | Description |
| Message Log file | Attaches the latest log files produced from the Message Database |
| Alarm Log file | Attaches the log latest files produced in the Event Manager Alarm Action |
| Line Trend Log file | Attaches the selected Line Trend Graph Data Log files |
| PID Faceplate Trend Log file | Attaches the selected PID Faceplate Trend Graph Data log files |
| Screen Capture Image | Attaches the latest Screen Capture JPG file images generated by the Event Manager Screen Capture Action |
|
|
Note: If the selected file does not exist, the system ignores it and sends only the files avaiable to send. |
