Panel Network — Web Server Setup
The C-more panel can function as a simple Web Server. Enable the Web Server in the C-more programming software before you transfer the project.
A default set of HTML, CSS, and JS files install on the panel, but you can use custom HTML files with the Data Maintenance tool in the Panel tab.
-
The panel does not support CGI programming. All source is for client-side execution.
Remote Access
The Web Server provides access to the panel Remote Access feature. If you configure a password in the Panel Network Remote Access section, the default web page includes a link to download the Remote Access console.
Open Ports
For the web server to work correctly, make sure two ports are open in your network.
-
Web Server port number: by default, this number is TCP port 80 (http) or TCP port 443 (https). Open the configured port.
-
Web Socket port number: Web Server uses Web Socket which requires TCP port 10902. You cannot change this number.
Configure Web Server
To configure a Web Server:
-
Select Web Server in the Panel Network Setup window.
-
The Web Server window opens.
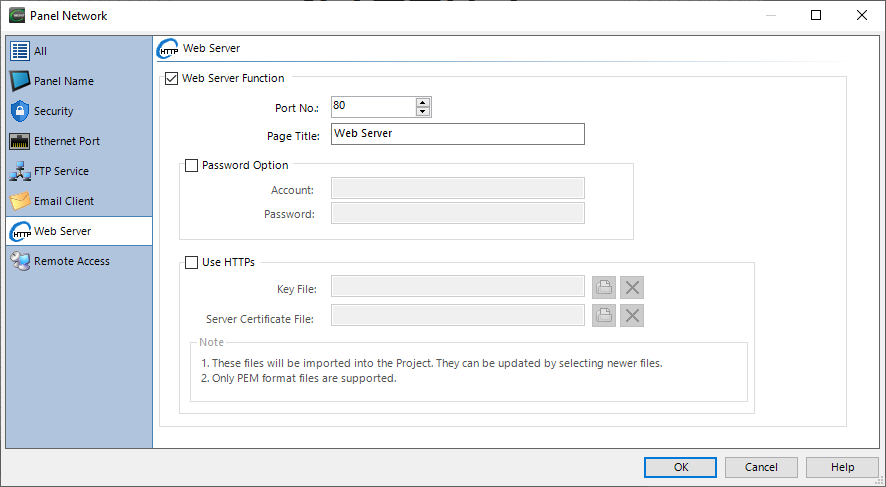
| Panel Network — Web Server | |
|---|---|
|
Field |
Description |
|
Web Server Function |
Select the Web Server Function check box to enable the Web Server feature in this panel. |
|
Port Number |
You may change the Web Server Port Number if required by the C-more network. |
|
Page Title |
The Web Page title in the Web Browser tab when you access the C-more panel Web Server. For this field to work properly, you must use the tag %TITLE% in the HTML code. |
|
Password Option |
Select if you want to restrict access to the Web Server. You can require an account and password. |
|
Account |
Enter a User name or ID required to access the Web Server on the panel. |
|
Password |
Enter a password required to access the Web Server on the panel. |
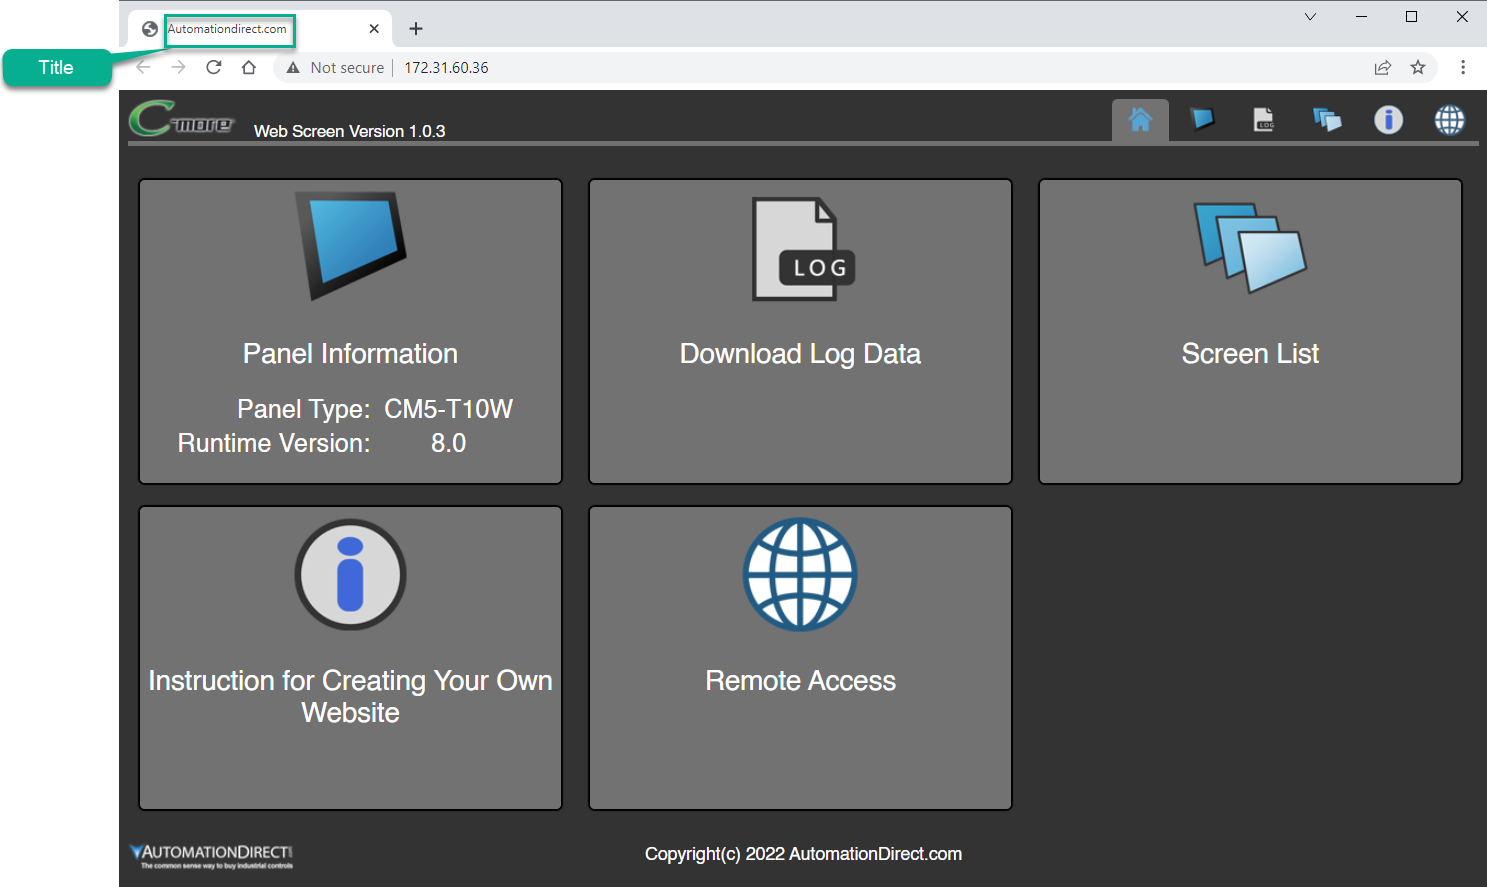
Once you download the project to the panel, enter the IP address in a Web browser on the network to access the Web Server.
Use Web Server
-
To make the Web Server connection more secure using TLS, select the Use HTTPS box.
-
The default port for Web Server is port 443.
-
HTTPS requires both a private key file and a server certificate file in PEM format.
-
For a secure connection, the client PC must also have the same trusted certificate installed.
Key File
The key file is a private Key for data encryption/decryption between the specific C-more Web Server and the client Web Server. The certificate owner creates a private key at the same time as the certificate. The certificate is usually for a specific domain or IP address.
Server Certificate File
A certificate file is a digital certificate that authenticates the C-more Web Server identity and enables an encrypted connection between the web browser and the C-more panel Web Server.
-
Click the folder icon and browse for a Key File and Certificate file.
-
To remove the key for certificate from the project, select the red X icon.
-
Open any web browser and type the panel IP address in the address field. If you don't include HTTPS, the default is HTTP.
-
If the client PC does not have the certificate installed as a trusted root certificate for the specific server (C-more panel), the client browser displays a warning.
If you proceed without the certificate, the connection is not encrypted.
For a secure encrypted connection, install a trusted root certificate on the client PC that matches the certificate on the C-more panel.
Install the C-more Web Server Certificate on Your PC
| Note: | Only install certificates from a source that you trust. If you are not sure what source certificates you can trust, see your IT support staff. |
-
Open the PC User Certificate Manager.
-
Select the Store Location: User.
-
Browse for the Certificate File.
-
Select Place All Certificates in the following Store: Trusted Root Certification Authority.
Default Web Pages
Default web pages include links to view the panel Information and download the remote access application, download log files, and view static images of all screens.
Index.html is the entry point for the panel web site. You can modify the source files to suit individual needs. Only a website developer familiar with HTML, CSS and JavaScript should modify these files or create new ones.
Use the Data Maintenance tool in the Panel tab to access default HTML files or to copy customized HTML files to the panel to access the Web Contents folder.
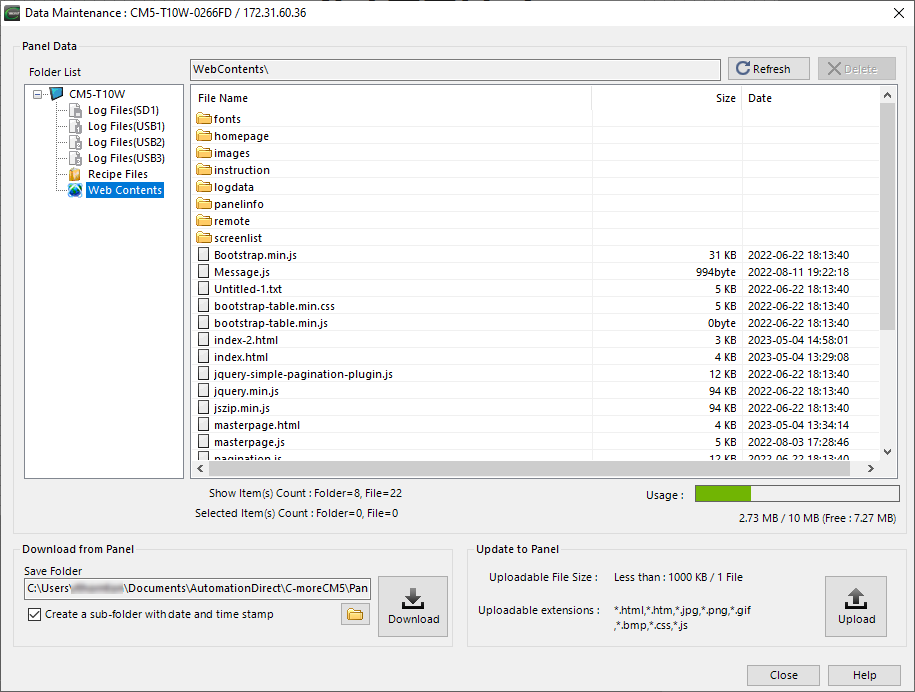
Reset Default Web Pages
In the Panel tab, click Reset Web Server Contents to restore these pages to the panel.
Web Server Specifications
There are 11 tags to display different information in the panel.
%TITLE%
The text displayed on the browser tab. The Page Title field in the Web Server configuration determines this tag text.
 Example:
<head> <title>%TITLE%</title> </head>
Result:
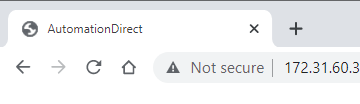
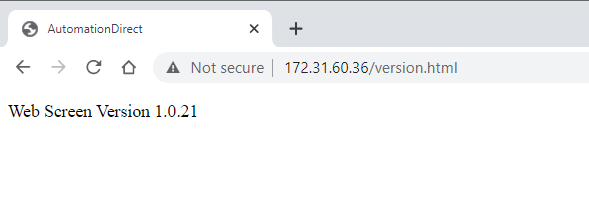
%VER%
This tag displays the version of the Web Server.
Example:
<div> Web Screen Version %VER% </div>
Result:
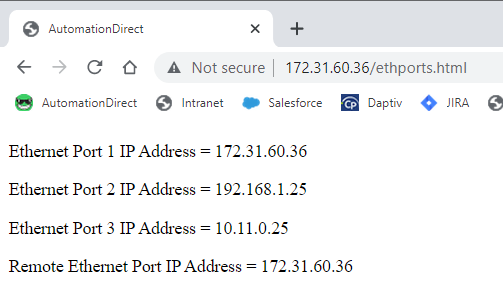
%IP=Ex%
The C-more panel has up to 4 possible IP addresses: one for each port and one for remote access from an external network. Display these IP addresses with their associated tag.
Example:
<p> Ethernet Port 1 IP Address = %IP-E1%</p>
<p>Ethernet Port 2 IP Address = %IP-E2%</p>
<p>Ethernet Port 3 IP Address = %IP-E3%</p>r
<p>Remote Ethernet Port IP Address = %IP-RMT%</p>
Result:
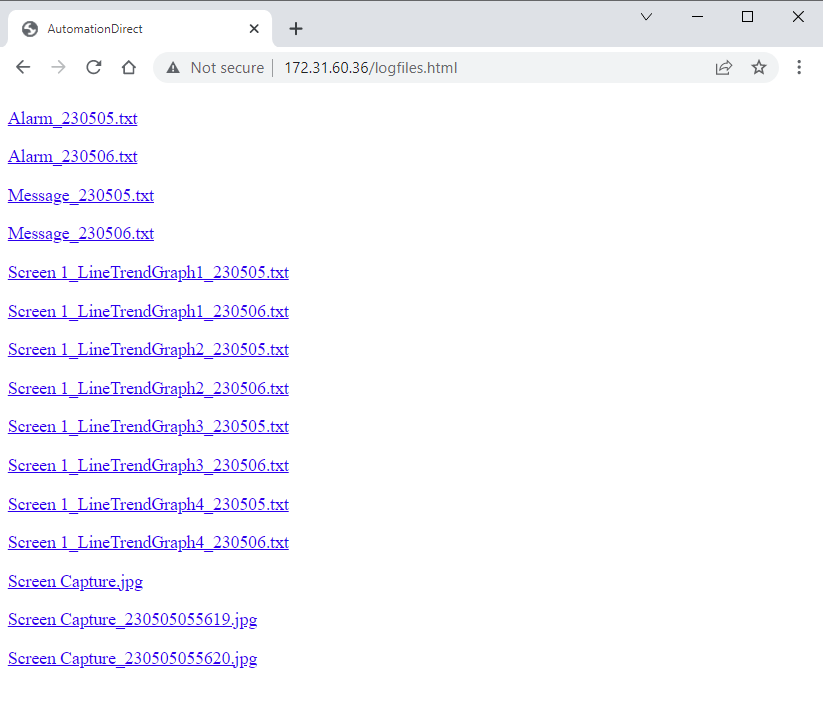
%FILE%
The %FILE% tag displays any of the panel log files, in this order:
Then by date.
Example:
<p>%FILE%</p>
<p>%FILE%</p>
<p>%FILE%</p>
<p>%FILE%</p>
<p>%FILE%</p>
<p>%FILE%</p>
etc.
Result:
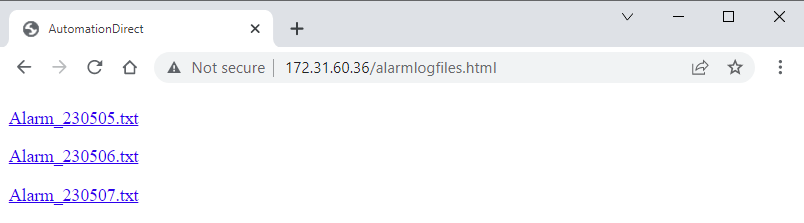
%ALARMFILE%
The %ALARMFILE% tag displays only alarm log files created by the Event Manager Alarm Action, in order by date.
Example:
<p>%ALARMFILE%</p>
<p>%ALARMFILE%</p>
<p>%ALARMFILE%</p>
Result:
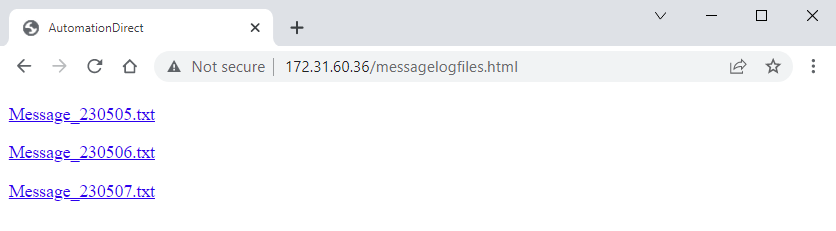
%MESSAGEFILE%
The %MESSAGEFILE% tag displays only log files created by the Lookup Text Object and Message Database, in order by date.
Example:
<p>%MESSAGEFILE%</p>
<p>%MESSAGEFILE%</p>
<p>%MESSAGEFILE%</p>
Result:
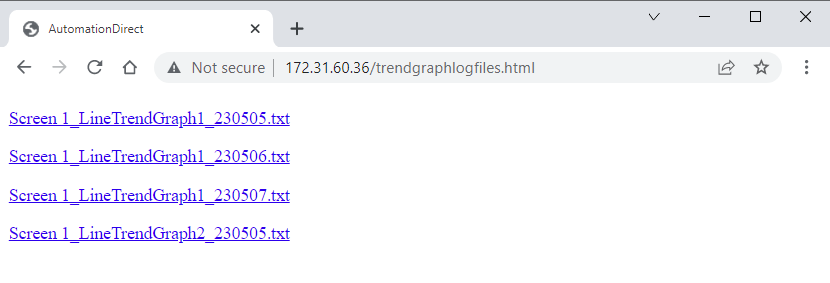
%TRENDGRAPHFILE%
The %TRENDGRAPHFILE% tag displays only Line Trend Graph log files created by the Line Trend Graph objects, in order by date, then by screen and object name.
Example:
<p>%TRENDGRAPHFILE%</p>
<p>%TRENDGRAPHFILE%</p>
<p>%TRENDGRAPHFILE%</p>
<p>%TRENDGRAPHFILE%</p>
Result:
%SCREENCAPTUREFILE%
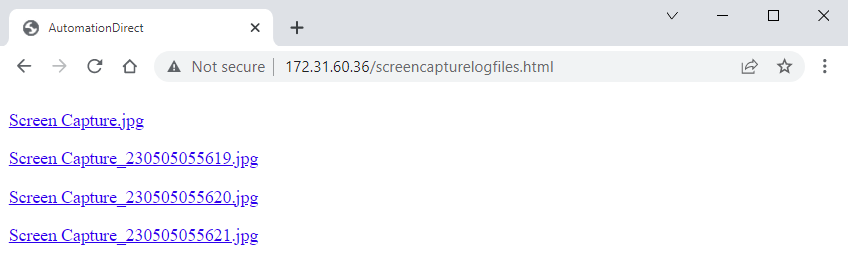
The %SCREENCAPTUREFILE% tag displays only Screen Capture files created by Event Manager and Screen Capture Action. The most recent screen capture appears first; the remainder appear in order by date.
Example:
<p>%SCREENCAPTUREFILE%</p>
<p>%SCREENCAPTUREFILE%</p>
<p>%SCREENCAPTUREFILE%</p>
<p>%SCREENCAPTUREFILE%</p>
Result:
Display Screen Panel Image
To display an image of Screen 1 with a height of 600 pixels on your panel web page, add this code to your HTML file.
<div><img src='/1.jpg' height="600">
</div>
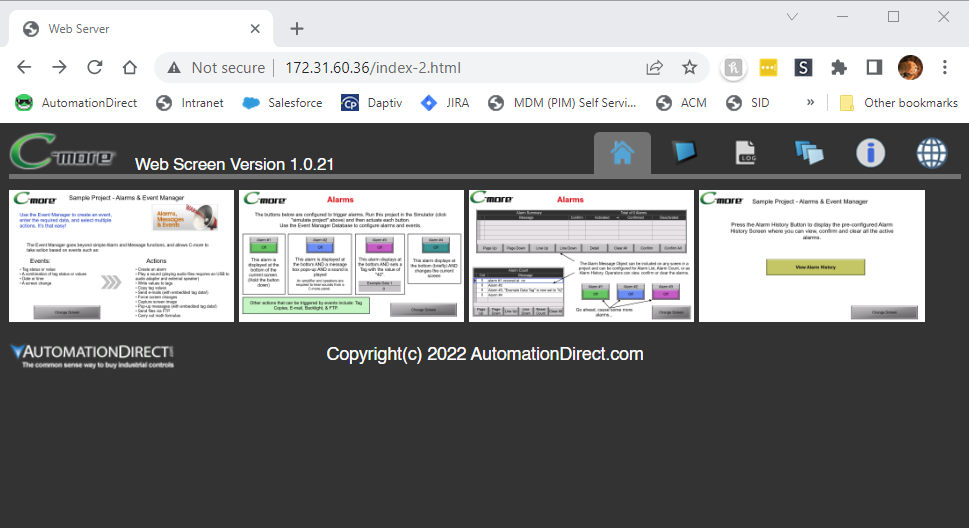
This code displays smaller images with a link to a separate web page with a larger image.
<div>
<a href="screen1.html"> <img src="/1.jpg" height="120"></a>
<a href="screen2.html"> <img src="/2.jpg" height="120"></a>
<a href="screen3.html"> <img src="/3.jpg" height="120"></a>
<a href="screen4.html"> <img src="/4.jpg" height="120"></a>
</div>
CM455