Log Data

Overview
Data logging allows the C-more panel to capture and save process data to a CSV and SQLite database file for future reports. Each log file captures up to 16 process variables, and you can configure up to 16 log files per panel, for a total of 256 recorded values.
The panel logs all values continuously, regardless of which screen is active.
Add a Data Log
Open the Data Log Manager
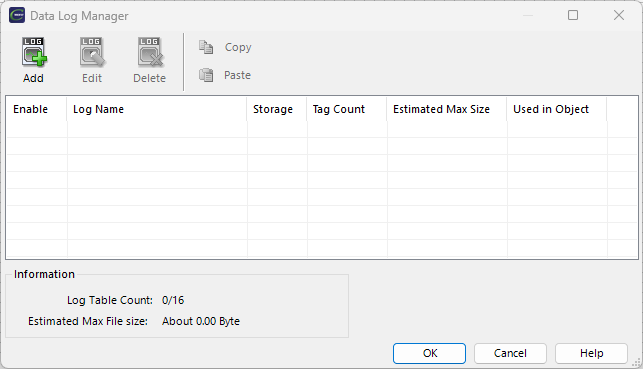
In the C-more programming software, open the Log Manager to configure a data log.
Add a Data Log
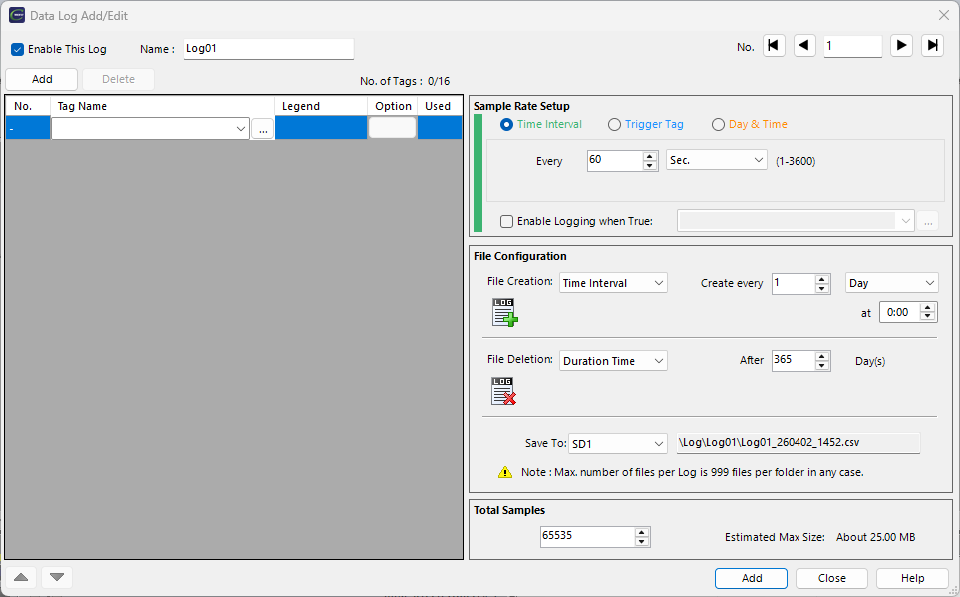
Click Add to open the Data Log Add/Edit window.
Specify Tags
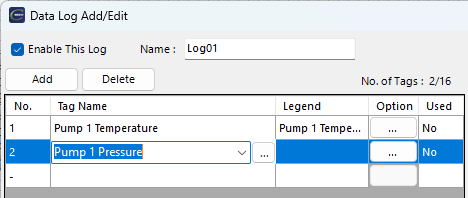
Tag Name
Click the first empty cell under Tag Name and select the tag to capture.
Legend
When you click the next tag area, the software enters the tag name as the Legend text automatically. You can edit Legend text. The Legend is a column header in the CSV log file.
Option
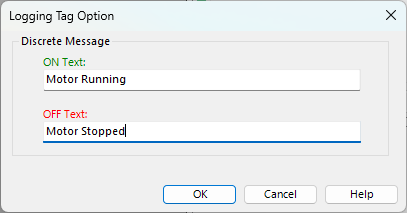
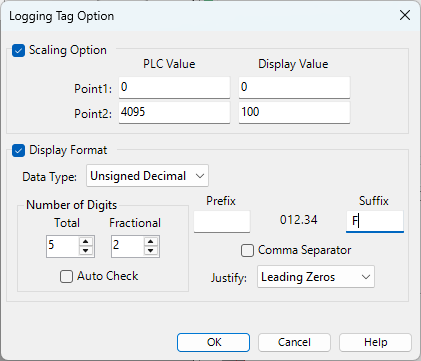
Click … under Option to open the Log Tag Options window.
Discrete
Enter the text to log for the On and Off states. For example, log "1", "ON", or "Motor Running" for the On state, and "0", "OFF", or "Motor Stopped" for the Off state.
Numeric
Scale data from the PLC, insert implied decimals, or add a prefix or suffix to include units in the log file.
Used
This field indicates a Line Chart using the log.
Sample Rate Setup
Enable Logging when True
Trigger types include an option to add a tag to enable and disable logging. You can disable logging during start up or when data may be inaccurate, such as when replacing a sensor.
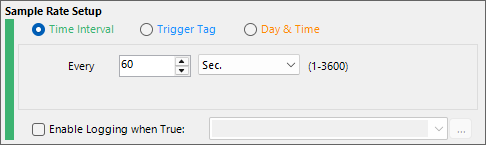
Time Interval
Logs a data point at a consistent, repeating interval. Enter the interval value in seconds, minutes, or hours.
Trigger Tag
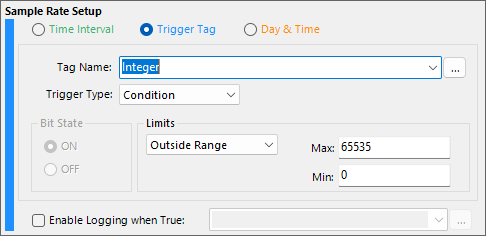
Logs data based on a tag state or value rather than on a fixed time schedule.
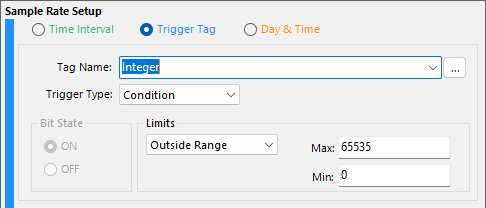
Tag Name
Select the tag to monitor as the logging trigger. Use the drop-down to choose from available tags, or click [...] to browse.
Trigger Type
Select how the tag triggers logging. Two options are available:
-
Condition: logs data when the tag meets a specified condition. See Condition Settings.
-
Value Change: logs data when the tag value changes. See Value Change Settings.
Condition Settings
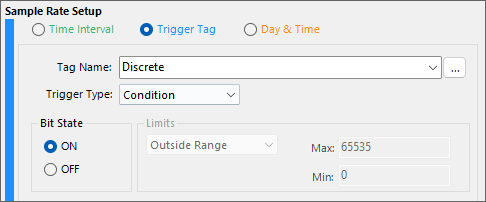
Bit State (Discrete tags only)
Select the bit state (ON or OFF) that triggers the log entry.
Limits
Select a comparison operator from the drop-down and enter the required value to specify the condition that triggers logging.
Value Change Settings
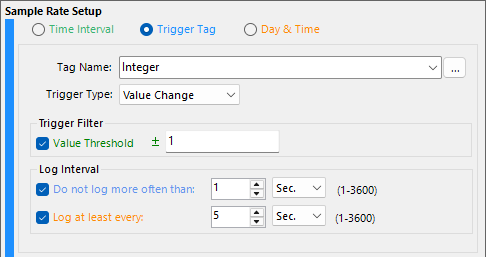
Trigger Filter
A threshold to prevent minor fluctuations from triggering excessive log entries.
-
Value Threshold: the panel logs a change only if the value has changed by at least the specified amount (± value).
Log Interval
Controls the minimum and maximum frequency of log entries, regardless of how often the value changes.
-
Do not log more often than: sets a minimum time between log entries to prevent over-logging. Enter a value and select Sec., Min., or Hours.
-
Log at least every: ensures the panel records a log entry at a minimum frequency even if the value has not changed enough to trigger one. Enter a value and select Sec., Min., or Hours.
Day and Time
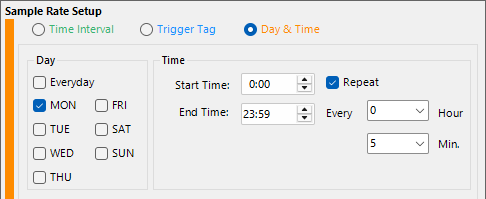
Logs data on a scheduled basis, at specific times on days of the week you choose.
Day
Select the day or days to log. Select Everyday to log on all days or select individual days.
Time
Start Time
Enter the log start time in HH:MM format.
End Time
Enter the log stop time in HH:MM format.
Repeat
Logging repeats at a fixed interval between the Start Time and End Time. Configure the repeat interval using the Hour and Min. drop-downs.
File Configuration
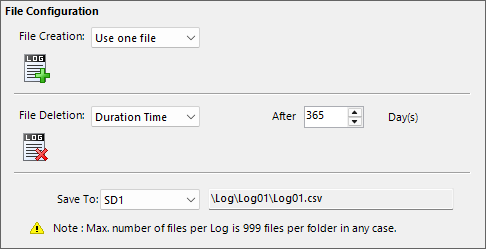
Controls how the CM5 panel creates and deletes log files, and where it saves them.
File Creation
Select when the panel creates a new log file. Three options are available:
-
Use One File: the panel writes all log data to a single file for the life of the log. The file name does not change.
-
Time Interval: the panel creates a new log file at a recurring time interval. Specify the interval value and unit (Hour, Day, Week, Month, or Year) and the specific minute, time, or day the panel creates the new file.
-
Tag: the panel creates a new log file when a specified tag meets a condition. Select the tag using the drop-down or [...] browser, and set the trigger state (ON or OFF). The minimum creation tag interval is 1 minute.
File Deletion
Select when the panel automatically deletes old log files. Three options are available:
-
Duration Time: the panel deletes log files after a specified number of days. Enter the number of days.
-
Number of Files: the panel deletes the oldest log file when the number of files exceeds a specified limit.
-
Tag: the panel deletes the oldest log file when a specified tag meets a condition. Select the tag using the drop-down or [...] browser, and set the trigger state (ON or OFF). The minimum deletion tag interval is 1 minute.
Save To
Select the storage destination for log files from the drop-down. The file path appears to the right of the drop-down.
The panel saves log files to the parent directory \Log, with a sub-directory for each log configuration. The file name starts with the log name followed by a date stamp in YYMMDD_HHMM.csv format that indicates when the panel created the file. If File Creation is set to Use One File, the panel omits the date stamp from the file name.
| Note: | The maximum number of files per log folder is 999. |
Total Samples

This field shows a memory use estimate based on the captured tag number and data type. This is not an exact value. Use it for memory size planning only and leave a sufficient buffer to prevent data loss.
Download Log Files
Four methods are available for downloading log files:
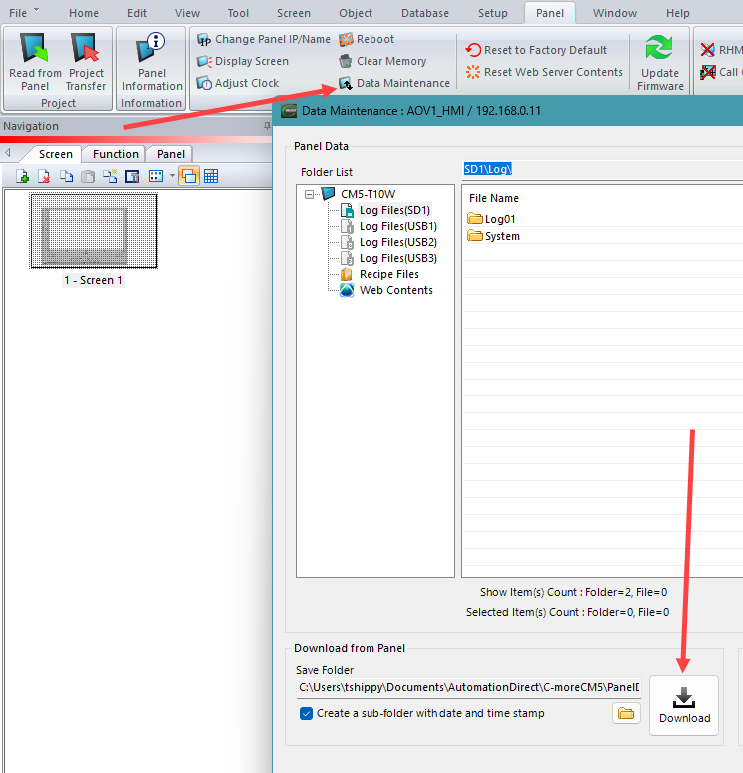
Data Maintenance
-
Connect the C-more software to the panel.
-
Open Panel > Data Maintenance.
-
Select the log files to download from the Folder list.
-
Click Download.
-
If you select more than one file, the panel compresses all files into a single download.
C-more Web Server
-
Go to Setup > Panel Network.
-
Enable the Web Server.
-
Download the change.
-
Open a browser and enter the panel IP address.
-
The C-more Web Server opens.
-
Navigate to Download Log Data > Log Manager.
-
Select the device.
Storage Device Eject
-
Use the following system tags to eject the SD card or USB drive:
-
SYS SD1 Eject
-
SYS USB 1 Eject
-
SYS USB 2 Eject
-
SYS USB 3 Eject
-
SYS USB 4 Eject (CM5-RHMI only)
-
Remove the storage device from the panel.
-
Copy the log files from the device.
-
Reinsert the storage device to remount it automatically.
Sys Copy Logto %device%”
-
Use the following system tags to copy all log files from all storage devices to a specified storage device.
-
SYS Copy LogtoSD1
-
SYS Copy LogtoUSB1
-
SYS Copy LogtoUSB2
-
SYS Copy LogtoUSB3
-
SYS Copy LogtoUSB4 (CM5-RHMI only)
-
Eject the storage device using the tags above, then remove it from the panel.
-
Copy the log files from the device.
-
Reinsert the storage device to remount it automatically.
CM093