|
|
Topic: P040 |
Tag Database |
|
|
|
Topic: P040 |
Tag Database |
|
The Tag Database allows adding, deleting and editing of tags in a project.
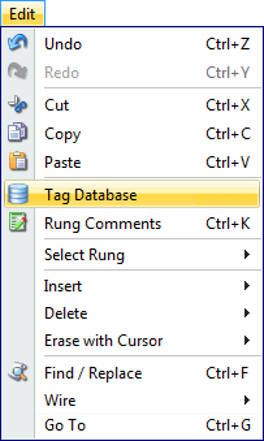
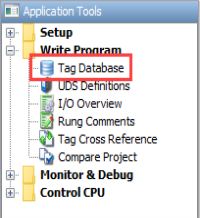
The Tag Database window can be accessed by selecting Tag Database from the Edit Menu or by selecting Tag Database from the Write Program folder of the Application Tools panel.
Once selected, a Tag Database window will open as shown below.
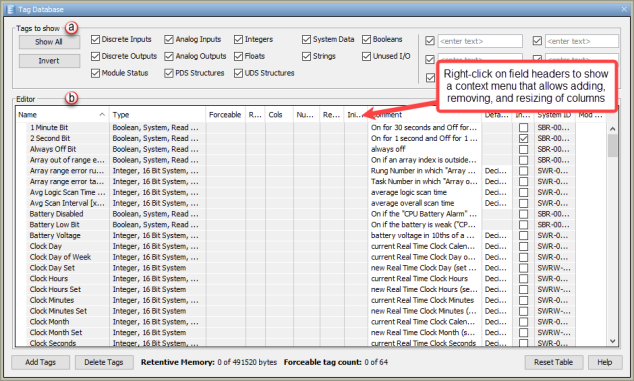
Use the check boxes across the top of the window to select which tags to display in the Editor. The selections are:
* Entering text in the Text Field will display tags with that text in the Name, System ID or Comment fields.
 The Show All button will select all of the tag types
to display in the Editor fields.
The Show All button will select all of the tag types
to display in the Editor fields.
 The Invert button is useful after eliminating
Tag Types to narrow the search. Selecting
Invert will select the Tag Types that
were previously disabled, de-selecting the
Tag Types that were enabled.
The Invert button is useful after eliminating
Tag Types to narrow the search. Selecting
Invert will select the Tag Types that
were previously disabled, de-selecting the
Tag Types that were enabled.
The following Tag information fields are available:
- Name: Name given to the applicable tag.
- Type: Data type used by the tag. This is further defined in the Data Types topic.
- System ID: Internal ID assigned to user defined tags.
- I/O Address: The respective assigned I/O Address.
- Rows: The number of Rows applicable to a 2D Array Data Type tag.
- Cols: The number of Columns applicable to a 1D or 2D Array Data Type tag.
- Num Chars: The number of Characters applicable to a String Data Type tag.
- Retentive: Checkbox indicates the tag is Retentive. If power to the Productivity CPU fails, a Retentive Tag will retain its value when power is restored to the CPU. *See Note Below.
- Init Value: Value entered in this field will be used for the Initial Value.
- Wire Label: Use this field to indicate the Wire Label info for the I/O point.
- Mod Start: Optional Modbus Starting Address (based on Function Code). Automatically asigned, but can be edited.
- Mod End: Optional Modbus Ending Address (if tag is greater than 16 bits it will assign additional addresses). Can be edited.
- Forceable: Allows the tag to be forced using Data View. A Maximum of 64 Tags may be selected as Forceable at any given time.
- Init Forced: Allows the tag to be forced upon startup from a power cycle or a stop/run transition.
- Init Force Value: Value entered in this field will be used for the tag's value upon an initial force.
- Comment: Use this field to add Comments associated with the tag.
- Remote Access: Checkbox that indicates the tag can be monitored remotely via the CPU Data Remote Monitor App.
- Default Format: Used with Integers. Allows data to be viewed in various formats, i.e. decimal, hex, etc.
- In Use: Checkbox indicates tag is used in the ladder logic.
- Include in Export: Newly created tags are automatically included in the Tag DB export.
* Note: After a power cycle Boolean status tags set to RETENTIVE in the tag database and associated with certain instruction block fields (example: STMR Done status bit) will remain ON even if the input logic to the instruction block is false. Confirming the operation of all retentive tags associated with instruction blocks is recommended.
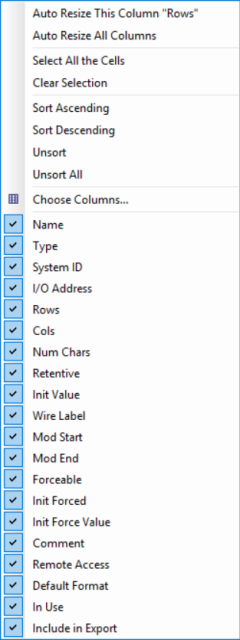
There are many Tag sorting options available in the Editor. Click any field header to sort the displayed Tags by that field. Click again to invert the sort order. Use CTRL-click to select multiple columns. Drag any of the field headers left or right to change the display order. Right-click on a field header to reveal a pop-up menu (shown above) that allows adding, removing and re-sizing fields.
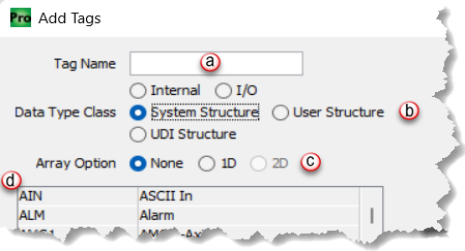
Selecting the Add Tags button will display the Add Tags pop-up window shown below. From this window, the user can add tags to the Tag Database. When adding user defined tags, the following rules apply.
Tags cannot start with:
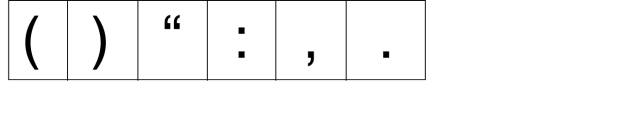
Tags cannot contain:
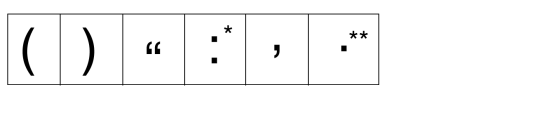
* Note: If Bit of Word is enabled, tag names cannot contain a " : " (colon).
** Note: If Structures are enabled, tag names cannot contain a " . " (period).
Note: The table below lists all the characters allowed in a tag name.
Note: Tag names cannot contain emoji characters (icons).
Symbol | Description | Symbol | Description | Symbol | Description |
Space | A | Uppercase A | a | Lowercase a | |
! | Exclamation mark | B | Uppercase B | b | Lowercase b |
# | Number | C | Uppercase C | c | Lowercase c |
$ | Dollar | D | Uppercase D | d | Lowercase d |
% | Per cent sign | E | Uppercase E | e | Lowercase e |
& | Ampersand | F | Uppercase F | f | Lowercase f |
' | Single quote | G | Uppercase G | g | Lowercase g |
* | Asterisk | H | Uppercase H | h | Lowercase h |
+ | Plus | I | Uppercase I | i | Lowercase i |
- | Hyphen | J | Uppercase J | j | Lowercase j |
/ | Slash or divide | K | Uppercase K | k | Lowercase k |
0 | Zero | L | Uppercase L | l | Lowercase l |
1 | One | M | Uppercase M | m | Lowercase m |
2 | Two | N | Uppercase N | n | Lowercase n |
3 | Three | O | Uppercase O | o | Lowercase o |
4 | Four | P | Uppercase P | p | Lowercase p |
5 | Five | Q | Uppercase Q | q | Lowercase q |
6 | Six | R | Uppercase R | r | Lowercase r |
7 | Seven | S | Uppercase S | s | Lowercase s |
8 | Eight | T | Uppercase T | t | Lowercase t |
9 | Nine | U | Uppercase U | u | Lowercase u |
; | Semicolon (only if structures is disabled) | V | Uppercase V | v | Lowercase v |
< | Less than (or open angled bracket) | W | Uppercase W | w | Lowercase w |
= | Equals | X | Uppercase X | x | Lowercase x |
> | Greater than (or close angled bracket) | Y | Uppercase Y | y | Lowercase y |
? | Question mark | Z | Uppercase Z | z | Lowercase z |
@ | At symbol | [ | Opening bracket | { | Opening brace |
_ | Underscore | \ | Backslash | | | Vertical bar |
` | Grave accent | ] | Closing bracket | } | Closing brace |
|
| ^ | Caret - circumflex | ~ | Equivalency sign - tilde |
With Structures enabled in Project Properties additional options are available to allow tags to be created using Structure Data type.
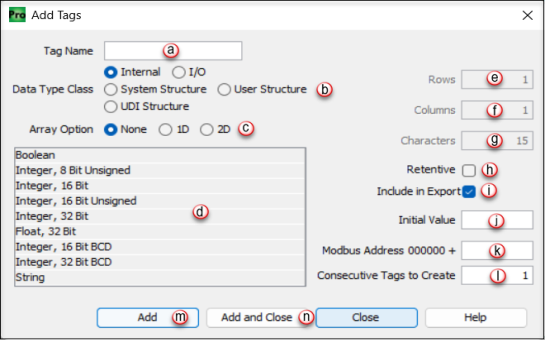
Selecting the System Structure or User Structure, or UDI Structure data type allows a user to define a Structure Name for a specific instruction:
Note: Creating a 2D array of
structures is not allowed.
Note:User Structures must be
defined in the project before they can be created in the
Tag Database (See the
User-Defined Structures help
topic, P305)
Array Option: Where applicable, this allows a new tag to be defined as a single instance, or as a 1D or 2D array.
Data Type Selector: This will dynamically change based on the Data Type Class selected. It defines the type of new tag to be created.
Note: If using
Retentive Tags in your
project, the amount allowed is dependent on the data type selected:
Maximum of 491,520 bytes
allowed per CPU; (Exception:
Maximum of 102,400 bytes allowed for P3-550 CPUs that are Rev C3 or
lower).
The user can select tags in the Editor field and then Delete the highlighted tags by selecting Delete Tags, or by using the right click option.
Note: The
Delete Tags button
will not (by default) delete existing used tag.
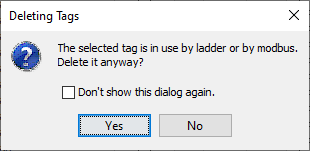
This can be changed by going to
Tools > Options > TagDB
and unchecking this option:

Reset Table Button: The Reset Table button will restore the table to original default settings.
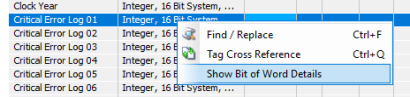
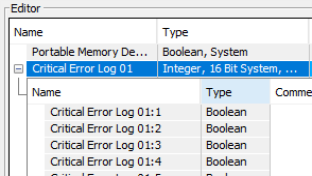
Comments for Bit of Word for Integers and Array tags allows a user to enter a comment for an individual tag Bit of Word or cell of an 1D or 2D array.
Note: Comments for BOW (Bit of Word) or Arrays are not enabled by default.

Note: For Array tags, a plus sign will already be present. You can enable all Array elements by right clicking on the main Array tag or you can enable individual elements of an Array.
Populate Comments will pass the main level tag comment down to Bit of Word elements for a tag.
![]()
By right clicking on a tag with Bit of Word details enabled, then selecting Populate Parent Comments.
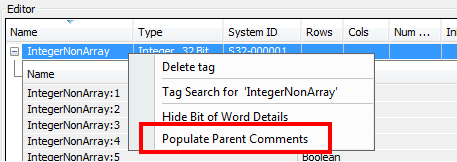
This will pass the main comment down to each of the Bit of Word elements.
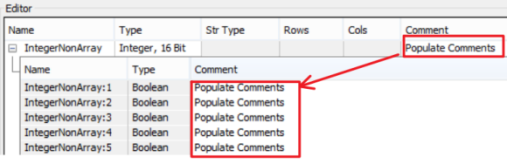
Note: You can edit individual comments after Populate Commands option has been applied.
