|
|
Topic: P032 |
Project Properties |
|
|
|
Topic: P032 |
Project Properties |
|
The Project Properties menu item provides Property information for the selected project. This information includes:
Project Properties is accessed by selecting Project Properties from the File Menu of the Main Menu.
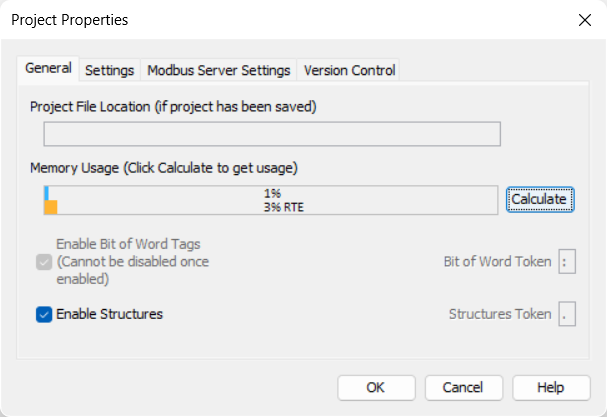
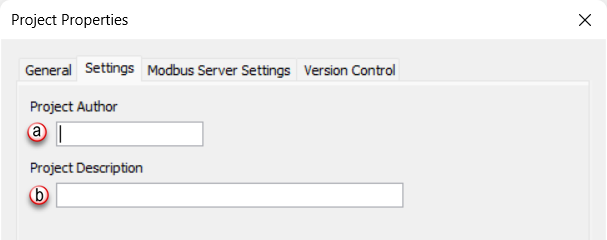
Once selected, the Project Properties window will open as shown below. There are three tabs in this window; General, Settings, and Modbus Server Settings.

Memory Usage: Provides a memory usage calculator so you can determine how much of your usable CPU memory the project is consuming.
Blue bar - Determines % how much of your usable CPU memory the project is consuming.
Orange bar - Determines the % of run time edit (RTE) memory allocation. Once this reaches 100% then run time edits are no longer allowed until a stop mode transfer is completed. Once a stop mode transfer is completed then this % will be reset.
Projects created with version 1.6 and newer, the Bit of Word token is the colon character (:), where tagnames in older projects might include the colon in a tagname, that wouldn’t denote Bit of Word. Project Settings offers an Enable Bit of Word checkbox. This checkbox is an option only when opening a project that was created with a software version older than 1.6. When the Enable Bit of Word Tags option is selected, the software scans the project for tagnames that contain the colon, i.e. “Old_Version:1”. These tagnames are then listed as shown below. If no tagnames contain colons, then the feature is enabled and a colon will now represent the bit level of an associated word.
Existing tagnames containing a colon must be changed to use the Bit of Word feature. The Change Tag Names window allows the user to replace the colon in all existing tags at one time. Choose a new character in the “Replace : with” field and select the Preview button to display the renamed tags in the New Tagname column. Once satisfied, select Change Tagnames to implement the change.
To use Bit of Word when programming: The dropdown box that lists tags where a Boolean tag would usually be used includes numeric tags shown with a colon suffix added to the tagname.
Select the tag and type in the bit number (default is 1), and select OK.
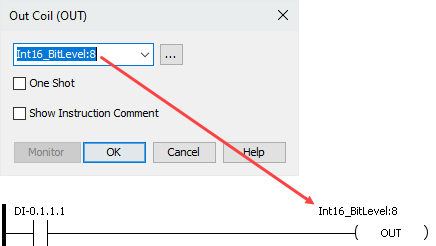
Note: The Bit of Word format can be used only in instructions (except Communications category).
When using Data View, double-click in the View As column to change the display to Binary (must be online with the CPU) to show each bit contained in the selected word, as shown below.

Note: If enabling Structures on a project created in an older version of the GUI, any tag previously created tag with '.' in the tag name will need to be converted. You can modify the token to a character of your choice. Example: Motor1.start will be converted to Motor1-start by default.
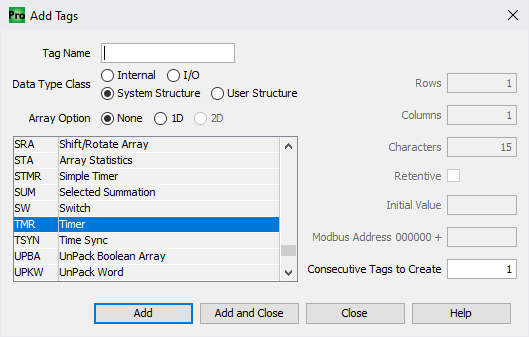
You can add a Structure to a project by first adding it from the TagDB:
Or directly from ladder:
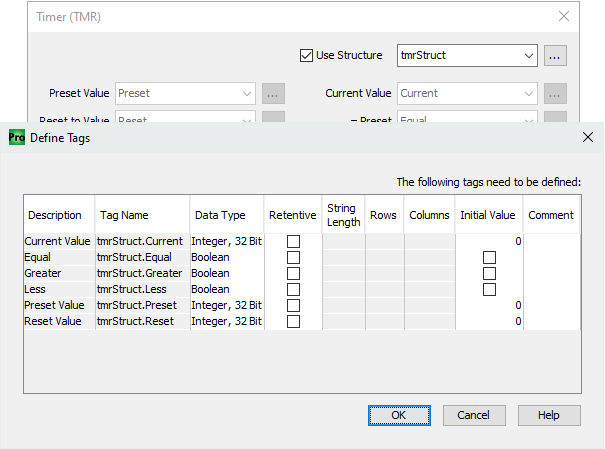
When placing an instruction into the ladder with Structures enabled, the user is allowed to assign a structure that was either previously created in the tag database or to create a new one:
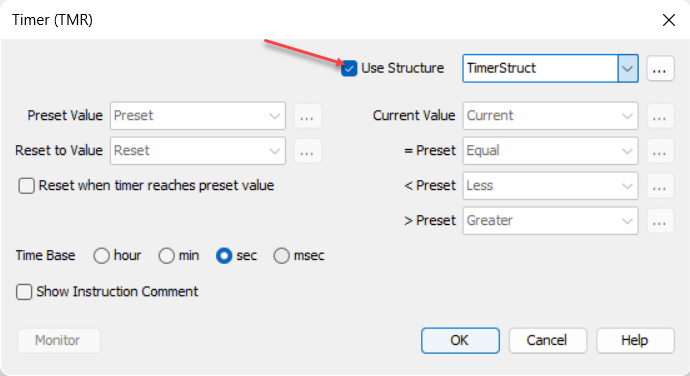
If an instruction is using a structure data type, the name of the structure will be displayed in the header of the instruction as seen below:
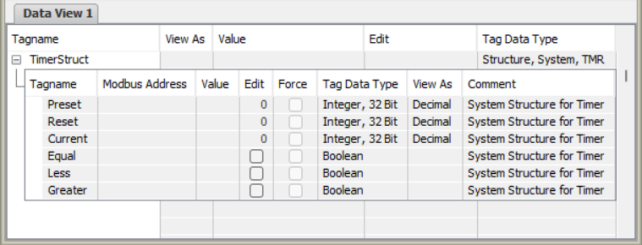
Structures can be viewed in Data View as an entire data type or each element can be specified.
Structures can be used along with Bit of Word in Boolean instructions:

By unchecking the Use Structure field you can then choose which of the individual structure elements to continue using, or change to other tags or constants:
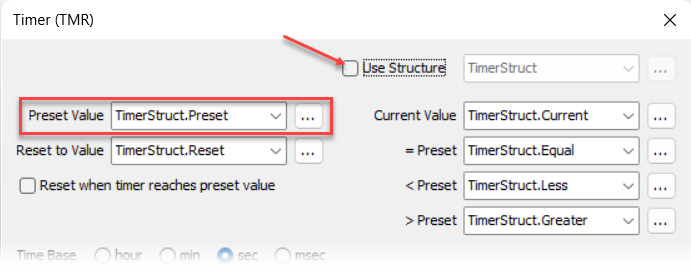
The newly created user tag (userDefPreset_Value) is now used along with the other structure elements. Since the instruction no longer uses all of the structure elements, the instruction header will have the structure name removed.
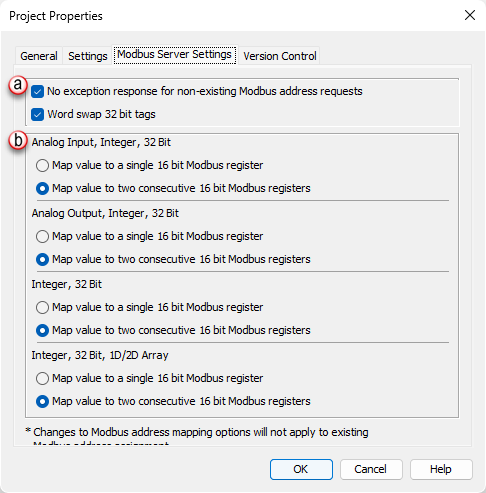
- No exception response for non-existing Modbus address requests: Choose whether to respond with an exception if a client requests a non-existent Modbus address due to consecutive registers. A write request to a non-existent start address will elicit an exception response regardless of this setting.
- Word swap 32-bit tags: Choose whether to swap the high and low words of 32-bit tags as they are sent to clients.
- Map value to a single 16-bit Modbus register: Select this option to map the data to a single 16-bit Modbus register.
- Map values to two consecutive 16-bit Modbus registers: Select this option to map the data to two consecutive 16 bit Modbus registers.
Note: To preserve the data, be sure the value of the 32-bit tag can be represented as 16-bit signed.
Version Control Settings Tab
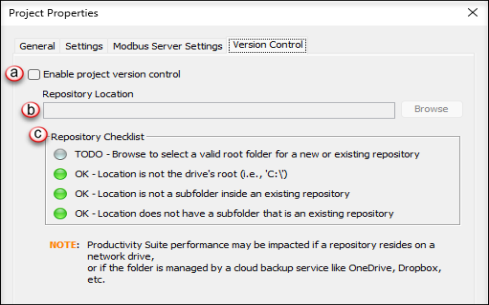
NOTE: To integrate with an external code repository hosting platform, ensure the necessary software is installed and properly configured.