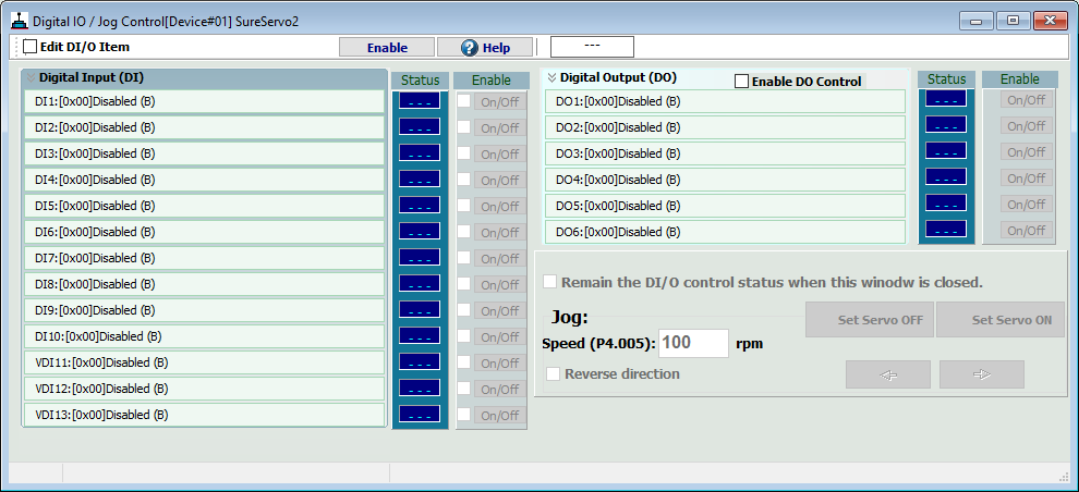
The Digital IO window lets you force Digital Inputs and Digital Outputs ON and OFF from the software. Please note:
Software control is conducted via one-way communication, if more than one screen is open, you will be unable to read the status of DI/O.
Before closing this screen, please disable all checked and enabled functions to return the IO to local control.
Please ensure software communication is fully enabled and properly connected during operation.
Digital inputs and outputs can be controlled as follows:
Click the Enable button to allow software control of each digital input. Once clicked, this button will toggle to Disable. Click the Disable button to turn off software control for all items on this screen.
With control enabled, the Status column will display ON or Off for each digital input. When initially enabled this will match the current servo hardware settings. Check the box in the Enable column for an input you wish to control, then press the On/Off button to turn the DI on or off. The status should change as you press the button.
For Digital Output control, check the Enable DO Control checkbox to enable DO controls. This enables (or disables) all of the digital outputs at the same time, unlike the DIs which are enabled or disabled individually. Once enabled, use the On/Off button next to each DO to turn it on or off.
To change the configuration of any of the digital inputs, check the Edit DI/O Item checkbox. Doing so will switch the screen to edit mode as shown below.
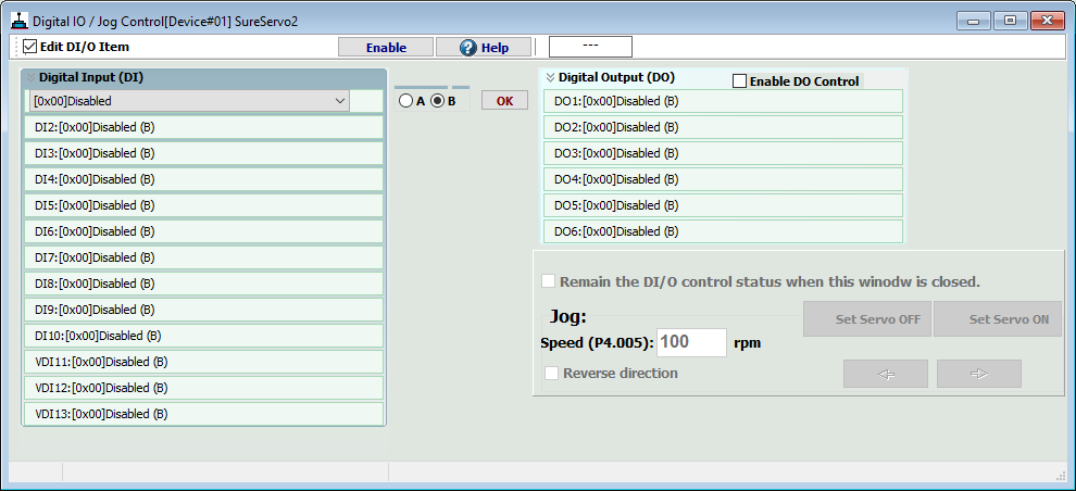
From this screen you can click any of the DIs or DOs to open a drop down menu with input or output configuration options:
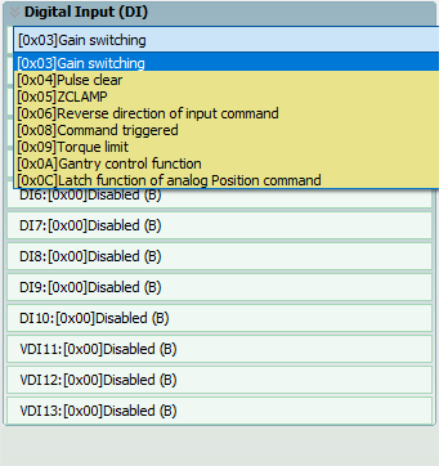
Select the desired setting, then choose A or B from the selector to the right of the drop down and press OK:

A sets the input as Normally Open (NO) while B sets the input to Normally Closed (NC). This will change the functionality of enabling or disabling the specific input. For example, if DI1 is set to Servo Enable and the current state is OFF (servo is not on), going to this screen and changing the setting from A to B would immediately enable the servo, as the OFF setting now means the servo is enabled while the ON setting would mean the servo is disabled.
Once all your desired changes have been made, uncheck Edit DI/O Item to return to the DI/DO control screen.