|
|
Topic: P082 |
Options |
|
|
|
Topic: P082 |
Options |
|
Click on the bullets below to navigate to relevant section of topic.
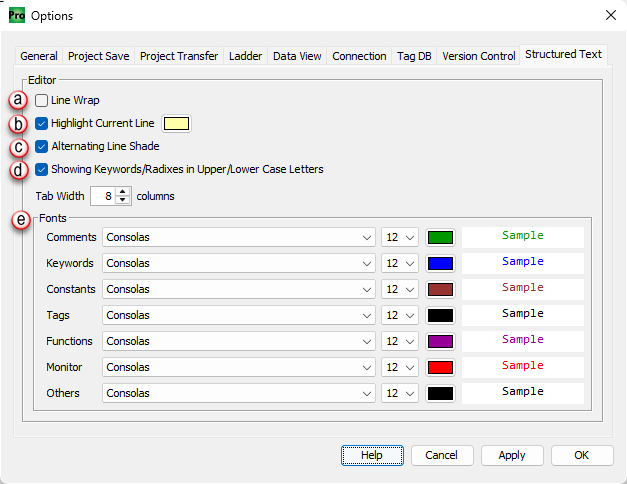
The Options selection provides setup Options for Saving Projects, Transferal of Projects and Ladder Editor Settings.
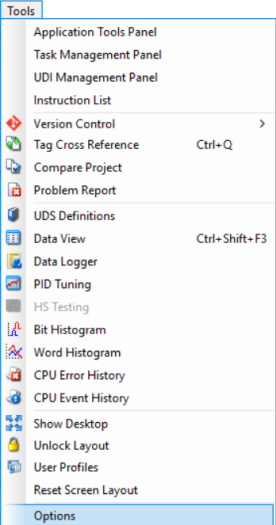
Options is accessed from the Tools Menu of the Main Menu.

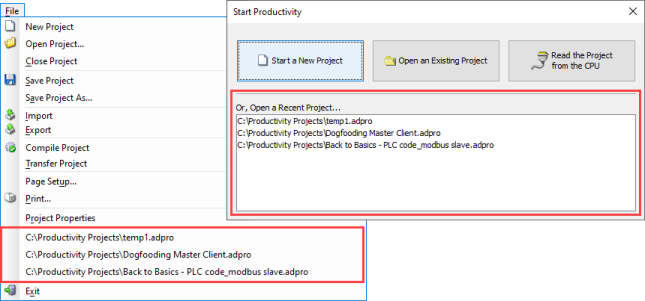
As seen in the above graphic, the General Tab allows the user to select the number of recent projects to remember from 0-9 (default = 4). These projects are listed in the FileMenu of the main toolbar and Open a Recent Project panel, as seen below.
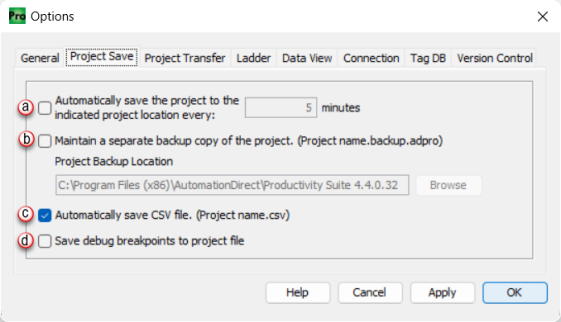
The Project Save Tab provides the following selections:
The Project Transfer Tab provides the following selections:
![]()
- Upload current retentive values and copy to initial values: When the project is transferred from the CPU, the current retentive values in the CPU will overwrite the initial values in the project file. Use this if you intend to save a snapshot of your CPU project, including values that could be reloaded to the CPU or loaded into a duplicate CPU to replicate the existing system.
- Transfer documentation (instruction and ladder rung comments): Allows all Instruction & Ladder Rung Comments to be transferred and stored in the controller as part of the project. This is very beneficial if you are accessing a controller with a PC/laptop that was not used to create the original project.
- Transfer GS drive configuration: Transfers the GS Drive configurations that were set up using the Hardware Configuration feature of the software to the CPU connected drives.
- Copy current retentive tag values to initial values: During Stop Mode transfer of a project with retentive tags, copies the current value of these tags from the CPU into the initial values of the project being transferred. For more information see the Copy Current Retentive Tag Values topic.
The Ladder Tab provides the following selections:

- Normal: A solid line with no effects.
- With Shadow: A solid line with a drop down shadow.
- Normal: A single pin line.
- Double: A double pin line.
Note:This setting is only applied to newly created tasks.
Note: Once selected, this setting is applied on project compile.
Note: To delete empty columns less than column 11 you will have to use the Edit>Delete>Column from the top menu or right click on the column of the rung and choose Delete> Column.
- The Wrap Tag Name option allows the user to choose at what character count to start wrapping the tag name. The tag name will only wrap if the tag name is wider than the column it resides in. Minimum characters is 1 maximum is 32.
- The Text Alignment option allows the user to align all text either left, center, or right justified. For tag names, it will justify within the column the instruction is in.
Note: These are global settings for the GUI and will be applied to all tasks in a project.
- Task Comment, Rung Comment, Instruction Comment, and Tag Name will display any associated text specified for these selections.
- Tag Detail will display any text entered into the comment column in the tag name database and will display the physical address if it is physical I/O.
- Block Detail will display all the tags associated with a block instruction. If none are chosen, then only the block instruction name will be visible.
- Monitor Mode allows the GUI software to go into Monitor Mode automatically rather than having to choose Monitor Mode from each task when the software connects to a CPU and the project is the same in the CPU and the PC.
- Alternate shading adds shading to every other rung in the ladder.
Note: When using Extended ASCII Characters in comments or tags the display font of Tahoma will need to be changed (recommended Arial) for it to be displayed correctly in the ladder editor window.
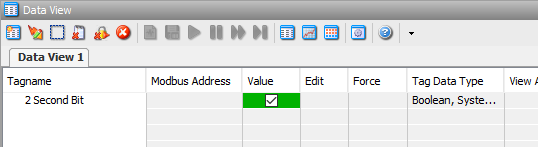
The Data View Tab provides the following selections:
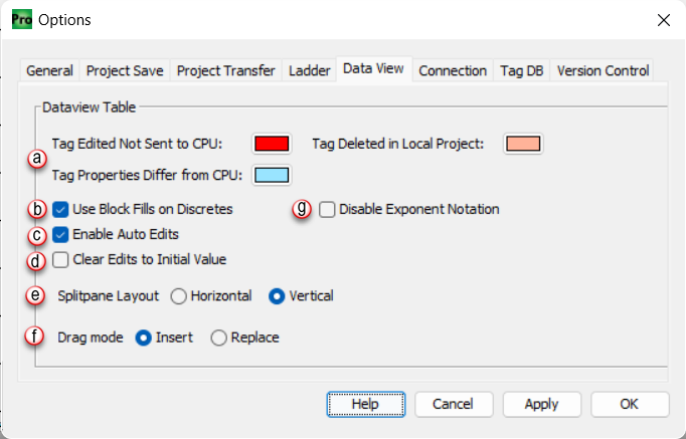
- Tag Edited Not Sent to the CPU: This indicates a value entered in the tag edit column that has not been sent to the CPU.

- Tag Deleted in Local Project: This indicates that a tag has been deleted from the Local project.

- Tag Properties Differ from CPU: This indicates that the Tagname or Tag Data Type has been modified.

Note: If a tag is deleted or modified causing a color indication (mentioned above) and then the tag is added or modified back to it's original state, you will need to delete the tag from the Data View window and add it back in to clear the color indication.
Disable Exponent Notation: Select this check box to disable any Exponential Notations. Disables scientific notation for all Floating-Point values in data view. Sometimes the exponential notation hinders viewing the data in fields with embedded numeric data.
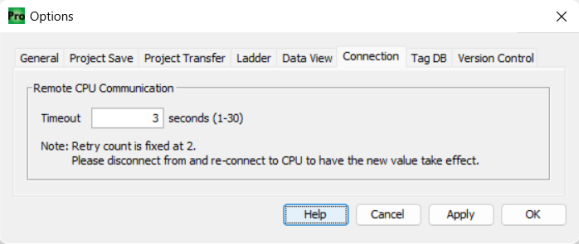
The Connection Tab allows the user to select the amount of time (in seconds) after which a timeout error will occur when attempting to connect to a remote CPU. Note that changes in the timeout setting do not affect the retry count which is fixed to two attempts.
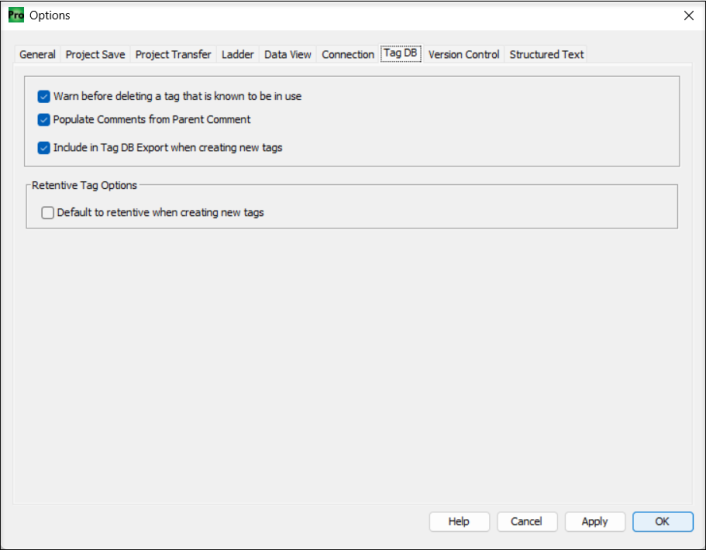
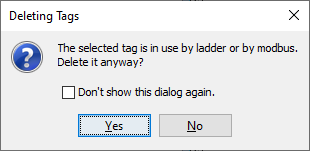
The Tag DB Tab allows the user to select whether or not to receive a warning before deleting a tag marked as 'in use' from the Tag Database. If selected, the following message will appear when trying to delete an 'in use' tag.
Populate Comments From Parent Comment — When enabled, this global option passes the main-level comment down to all associated child elements.
Include in Tag DB Export when creating new tags — When enabled, this global option ensures that any newly created tags are automatically included in the Tag DB export.
The Retentive Tag Options selection allows a user to configure the behavior of the software so that new tags are created as Retentive by default. This setting does NOT affect the creation of a User Defined Structure definition. Nor does it affect the addition of pre-defined structure or user defined structure tag groups. This checkbox also does not affect the retentive setting of tags that are imported.
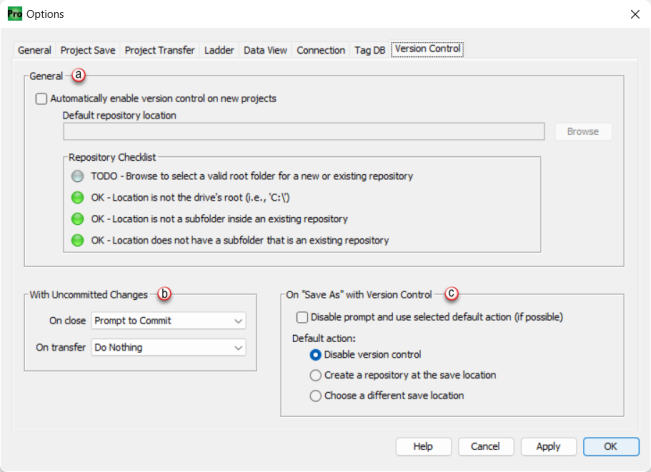
Note: If a Git repository does not already exist at the selected location, the system will automatically create one.
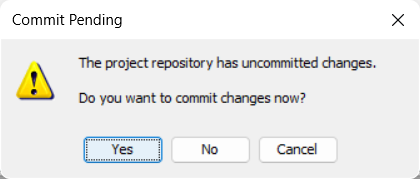
With Uncommitted Changes
The above selections have the same three options:

No – Closes or exits the project without displaying the commit dialog.
Cancel – Cancels the close/exit operation, retaining the project's current state without committing changes.
If the repository contains unsaved changes, the system displays the following options:
Save Only – Saves the project file without committing changes to the version control repository.
Save & Commit – Saves the project file and opens the commit dialog for version control.
No – Exits without saving the project file or committing changes.
Cancel – Cancels the close/exit operation, preserving the current state without committing changes.'
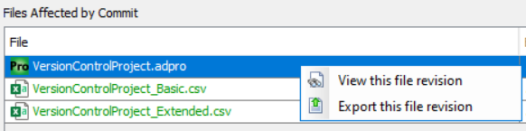
Files Affected by the Commit
The Files Affected by Commit section provides the following actions for files modified in a specific commit by right clicking on a file in the list:
Note: If a project file is exported, its repository location is retained. When opening the exported project file, if it is saved outside the repository location, the user will be prompted to choose a new save location the first time they attempt to save the project.
Commit - Saves project changes to the repository. Users can initiate a commit manually or be prompted to commit changes upon project closure or system exit. Any file type stored within the repository is eligible for committing.
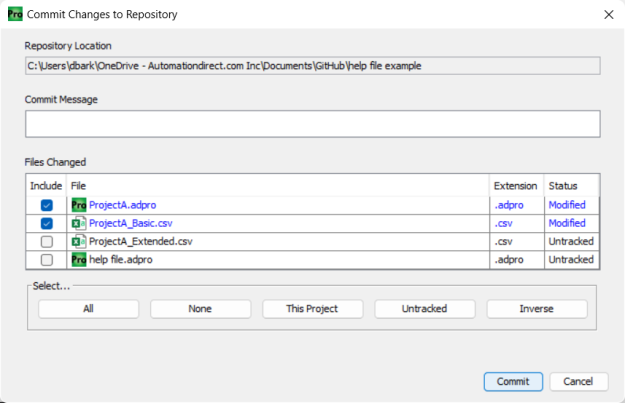
Note: A commit message is required and cannot be blank.
- All: Selects all files for a commit.
- None: Deselects all files.
- This Project: Selects only files related to the current project.
- Untracked: File(s) have not been previously committed.
- Inverse: Reverse of currently selected file(s).
Note: Only files with the "Include" checkbox selected are committed, but those files can be committed at a later time.
Note: By default, modified files are selected for inclusion but can be deselected for commit at a later time.
Note: Ignored files (decided by the rules in the .gitignore file, if present) cannot be committed.
Disable prompt and always use selected default action – Disables prompt if possible and defers to one of the selected defaults below: