|
|
Topic: P028 |
Transfer Project |
|
|
|
Topic: P028 |
Transfer Project |
|
Transfer Project allows Transfer of saved projects in the Productivity Suite software to the CPU or to a Removable Media device. It also allows Transfer of projects from the CPU or a Removable Media to the Productivity Suite software.
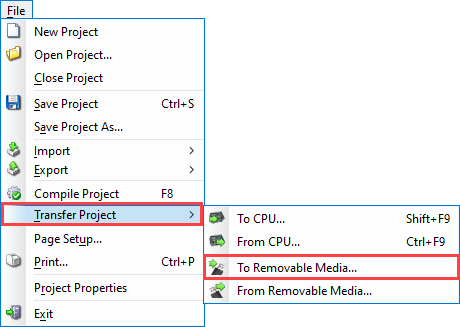
Transfer Project is accessed by selecting Transfer Project from the File Menu of the Main Menu.
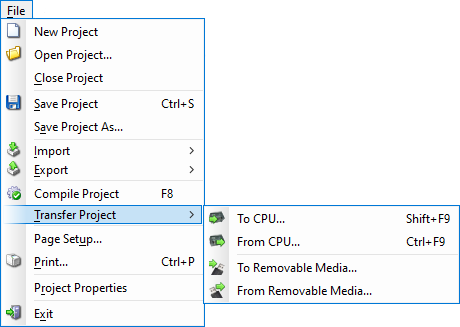
The user is then provided a menu for selecting the type of Transfer to be made:
Note: The CPU must be Online to select from the sub-menu and Transfer a Project.
Note: CPUs without a built-in display do not allow project transfer from Removable Media. If using a CPU without a built-in display, the Transfer Project To Removable Media… option will be grayed out in the software.
There are two transfer types available when transferring the project to the CPU, Runtime and Stop Mode. See the Runtime vs. Stop Mode Transfer topic for more details.
Open a project and select "To CPU" from the Transfer Project menu. The project will then be Transferred to the CPU from the PC. During the transfer, one of two status windows will appear. The dialog shown below will appear for all Runtime transfers or for Stop Mode transfers when "Copy current retentive tag values to initial values" is not checked. This option is located on the Options window, which is accessed from the Tools > Options > Project Transfer.
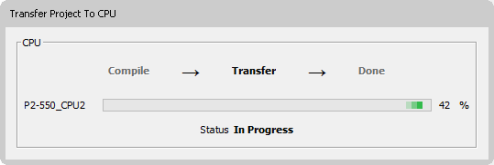
The dialog shown below will appear for Stop Mode transfers when "Copy current retentive tag values to initial values" is checked. This option is located on the Options window, which is accessed from the Tools > Options > Project Transfer.
![]()
There are 2 methods for Transferring projects from the CPU.
Method 1
When going Online, if there is a project in the CPU, you will be asked to choose between using the PC project or copying the project from the CPU.
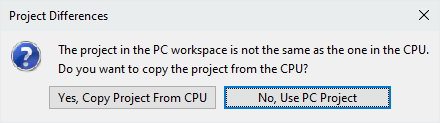
If you select "Yes, Copy Project From CPU", the project in the CPU will be Transferred from the CPU to the PC.
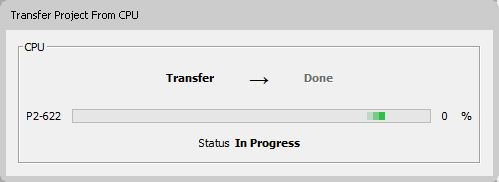
Method 2
Once Online with the CPU you can Transfer the project by selecting "From CPU" on the Transfer Project menu. The project will be Transferred from the CPU to the PC. During the transfer a status window will open displaying the progress.
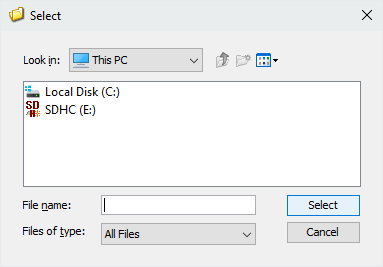
To Transfer a project to a Removable Media, select "To Removable Media" from the Transfer Project menu. A Transfer Project to Removable Media window will be displayed. Choose the Removable Media to transfer the project to by entering the Removable Media location or select the Browse button to display a window to Select the Removable Media.
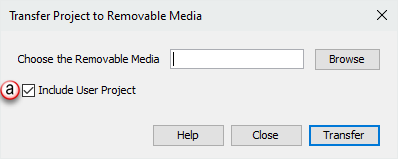

Once the Removable Media has been chosen, select "Transfer" on the Transfer Project to Removable Media window. The project will be Transferred from the PC to the Removable Media. During the transfer a status window will open displaying the progress.
Note: P Series CPUs ONLY support up to a 32GB FAT formatted USB pen drive (P3 Series) or MicroSD card (P2 Series).
To enable project transfer via Removable Media to a CPU, see the example below for a P2-622 CPU:
To Transfer a project from a Removable Media, select "From Removable Media" on the Transfer Project menu. A Transfer Project from Removable Media window will be displayed. Choose the Removable Media to transfer the project from by entering the Removable Media Drive location or select the Browse button to display a window to Select the Removable Media.
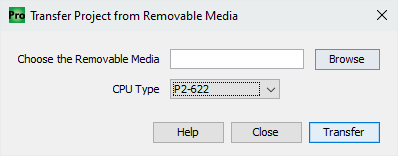
Once the Removable Media has been chosen, select "Transfer" on the Transfer Project from Removable Media window. The project will be Transferred from the Removable Media to the PC. During the transfer a status window will open displaying the progress.
It is now possible for an OEM to download a file from Removable Media without the .adpro file. This will keep unwanted users from having the ability to connect with the GUI and view ladder code. In addition, they will not be able to transfer from the CPU to pen drive thus protecting the OEM source code.
Note: You must first select the "Enable project transfer to/from Removable Media" checkbox in the P2-622 CPU Module Configuration.
Next, choose the removable media and open the folder (named to match the CPU type (e.g. P2-622)) on the Removable Media. The following files should be in this folder:
Note: The Project.lst and Web.arch files only apply to projects with a P2-622 or newer CPU with built-in display.
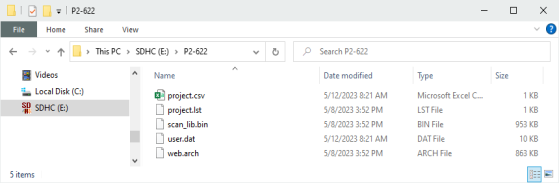
If the Include User Project checkbox was selected when transferring the project to Removable Media, then delete the project.adpro file from this folder.
Note: Without the project.adpro file, once the files are transferred to the CPU, neither the software nor Removable Media will be able to retrieve the project, an error will be generated as shown below:
![]()
You may now send this file to the end user and transfer via the Removable Media. Follow the steps to Transfer Project To the CPU from Removable Media.
Project transfer To/From Removable Media and CPU, see the example below: