Write Your First NC Program
The purpose of this tutorial is to go through the basic workflow to create and execute an NC program with the XMC motion controller.
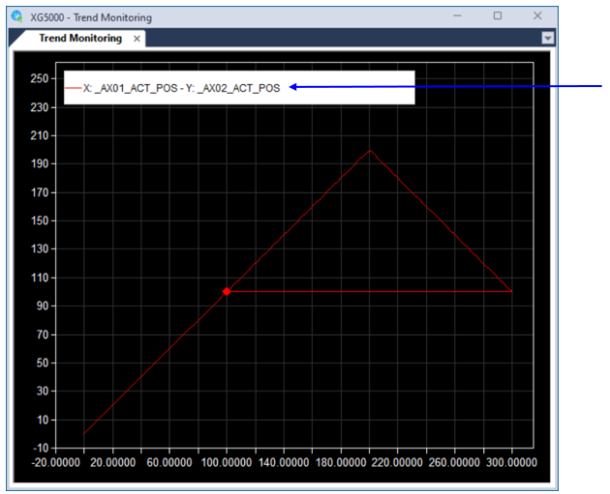
With this tutorial, you will create an NC program to move the X and Y axes in a triangle shape starting from the origin as shown below.
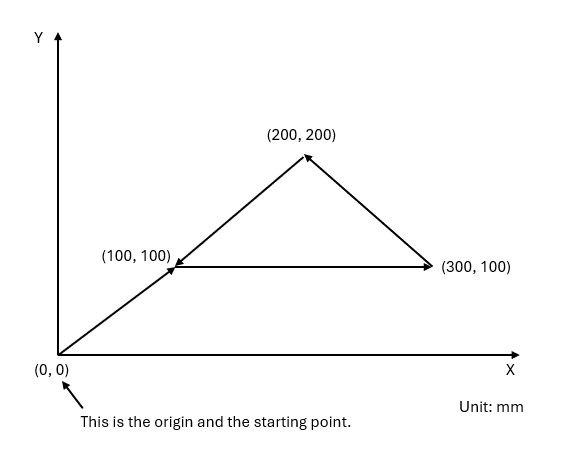
The sample project for this tutorial is here. This tutorial will go through 9 steps to write your first NC program.
| Step | Action |
|---|---|
| 1 | Start up the XG5000 software. |
| 2 |
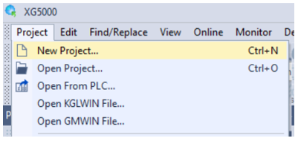
Select the pull-down menu Project è New Project…
|
| 3 |
Configure the following parameters in the New Project window and click the OK button.
|
You need to add 2 EtherCAT drives to this project manually or automatically if they are connected to the EtherCAT port on the XMC controller.
Add the EtherCAT drives manually
Right-click on Slave in the Project window and select Add Item è Add Slave…

If you need more information on this method, refer to Manually Adding Slaves to an XMC Project
Add the EtherCAT drives automatically
Connect XG5000 to the XMC controller and put the XMC controller in STOP mode. Execute EtherCAT Slave è Auto Connect from the pull-down menu Online.
(The Auto Connect command is grayed out if the XMC controller is in RUN mode.)
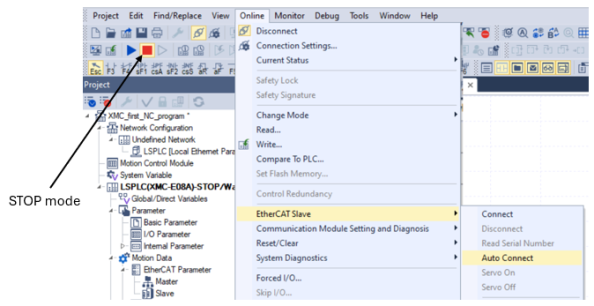
If you need more information on this method, refer to Performing Auto-Connect to Automatically Add Slaves.
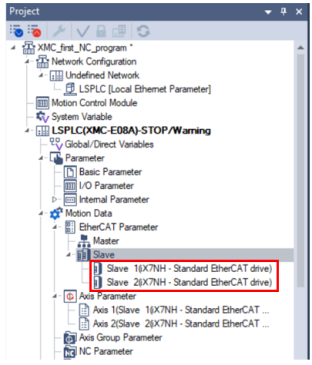
After adding 2 EtherCAT drives, they are displayed in the Project window.
| Step | Action |
|---|---|
| 1 |
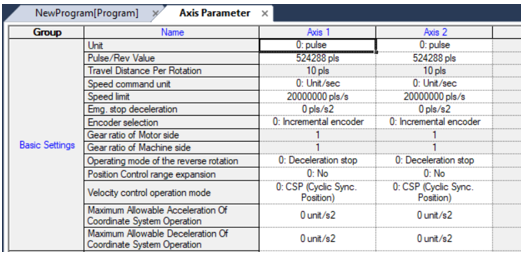
Right-click on Axis 1 in the Project window and select Open.
The Axis Parameter window opens.
|
| 2 |
Set the Unit parameter to 1: mm and the Speed command unit parameter to 1: Unit/min for both Axis 1 and Axis 2.
|
| Step | Action |
|---|---|
| 1 |
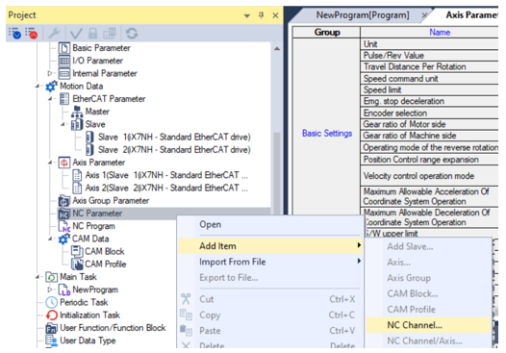
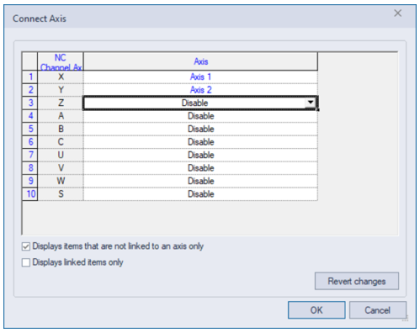
Right-click on NC Parameter in the Project window and select Add Item è NC Channel…
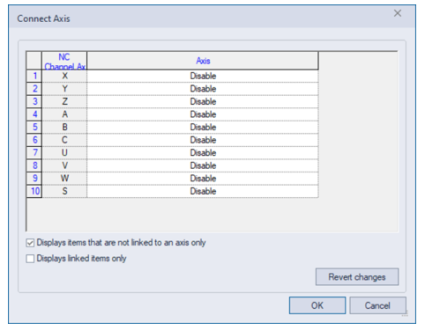
The Connect Axis window opens.
|
| 2 |
Assign Axis 1 to X axis and Axis 2 to Y axis. Then click the OK button.
NC Channel 1 is added to the project.
|
| Step | Action |
|---|---|
| 1 | Disconnect XG5000 from the XMC controller if they are connected. |
| 2 |
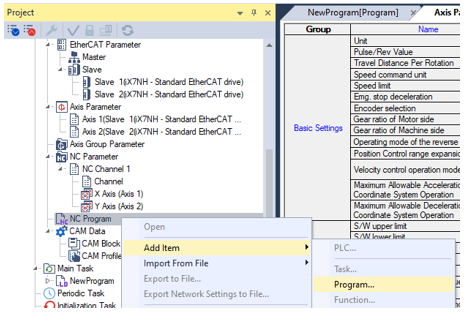
Right-click on NC Program in the Project window and select Add Item è Program…
|
| 3 |
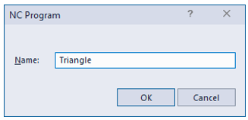
Enter Triangle in the Name field and click the OK button.
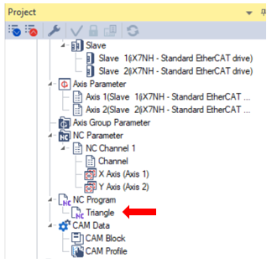
The NC program Triangle is added to the project.
|
Double-click the NC program Triangle in the Project window to open the editor then write the following program:

Or, you can copy and paste the following text.
% This is your first NC program.
G21 G90
G00 X100 Y100
G01 X300 Y100
G01 X200 Y200
G01 X100 Y100
M30
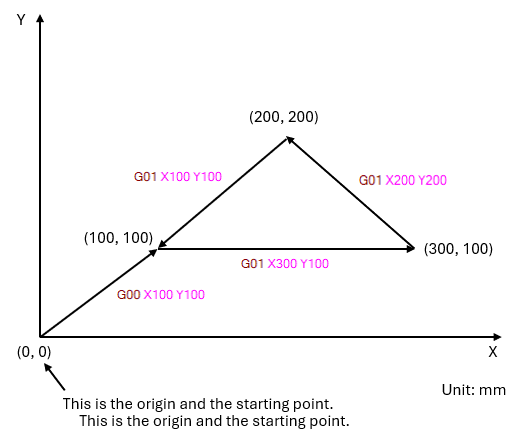
Here is the explanation of the NC program:
G00, G01, G21 and G90 are G-code.
M30 is M-code.

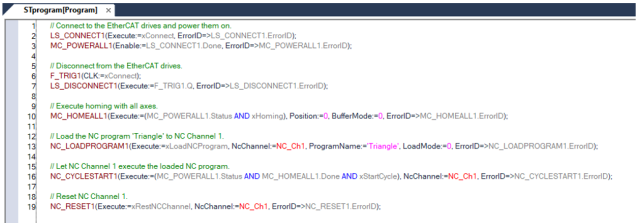
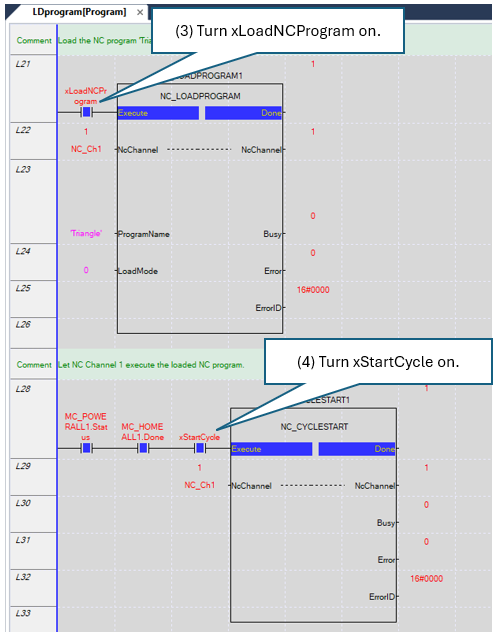
To have the NC channel execute an NC program, you need to load the NC program into the NC channel first. Then you let the NC channel execute the loaded NC program. The following is a sample program to have the NC Channel 1 execute the NC program Triangle.
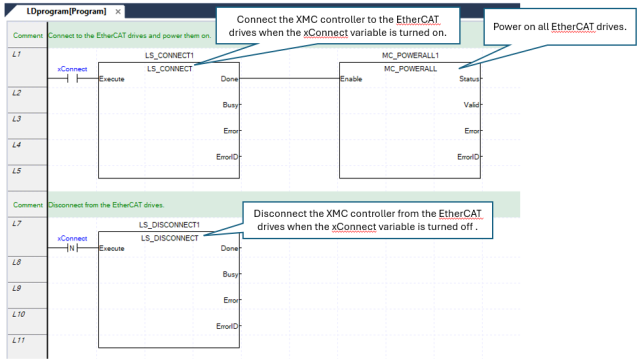
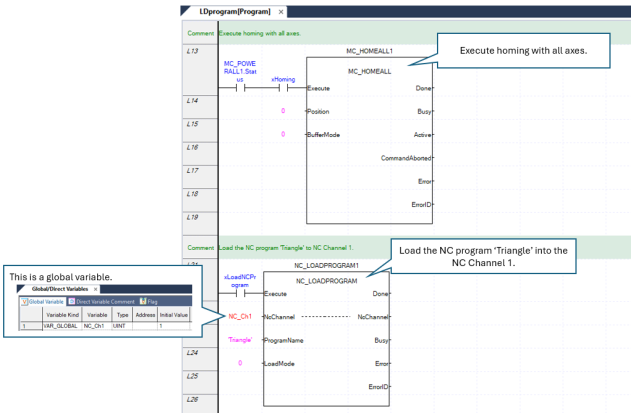

The following is the Structured Text version of the same main task program:
| Step | Action |
|---|---|
| 1 |
Select the pull-down menu Online è Connection Settings…
and configure the connection method.
If you need more information on this connection settings, refer to Getting Connected out of the Box (USB and Ethernet). |
| 2 |
Select the pull-down menu Online è Connect to connect XG5000 to the XMC motion controller.
|
| 3 |
Select the pull-down menu Online è Write…
Select all check boxes and click the OK button to download this project into the XMC motion controller.
|
| 4 |
Put the XMC motion controller in RUN mode and enable the monitor mode.
|
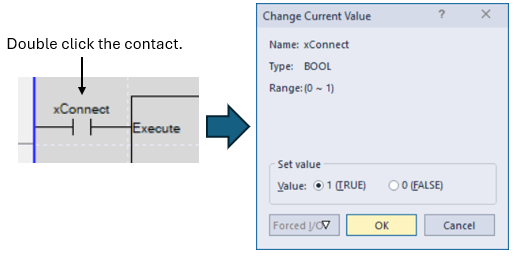
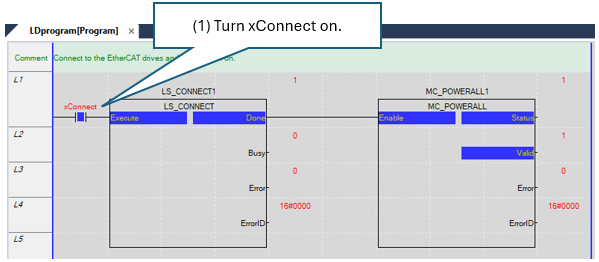
Turn on the 4 variables below one by one. To turn each valuable on, double-click the contact to open the Change Current Value window. Make sure 1 (TRUE) is selected as the value and click the OK button.

If you open the NC program Triangle, XG5000 indicates the block that the XMC motion controller is executing currently in yellow.

You can also monitor the execution with the Trend Monitoring window.
Monitoring the following 2 flags:
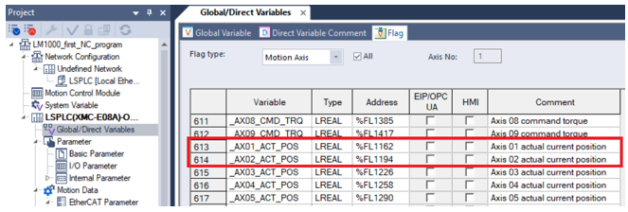
If you need more information on the Trend Monitoring window, refer to Trend Monitoring Functionality
LM1000
