| CLICK Project Loader Ladder and Firmware - With Intelligent Modules
|
Topic: CL342

|
Description
This method of CLICK Project Loader is used to open a CLICK Loader File with Intelligent Modules and write the CLICK Project to the CLICK PLC with or without the Password protection. If you want to make a Backup before writing the new CLICK Loader File please go to CL343 - Make Backup Copy of PLC.
About CLICK Loader File
Please refer to the How to Use the CLICK Project Loader topic in this Help File.
Setup
Below are the steps to write a CLICK Loader File to a CLICK PLC WITH Intelligent Modules:
Step 1
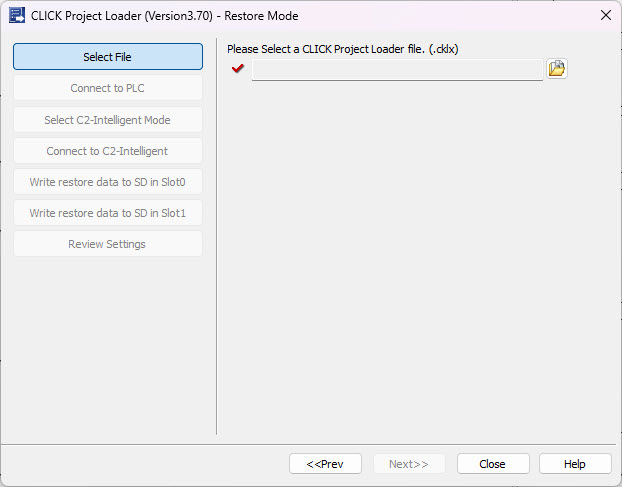
Ensure the Write Project Loader File radio is selected and press Next>>

Step 2
Select the CLICK Project Loader File that was sent from the OEM user. Click the browse button  located on the right side of the test field in the image below to open the Open window.
Step 3
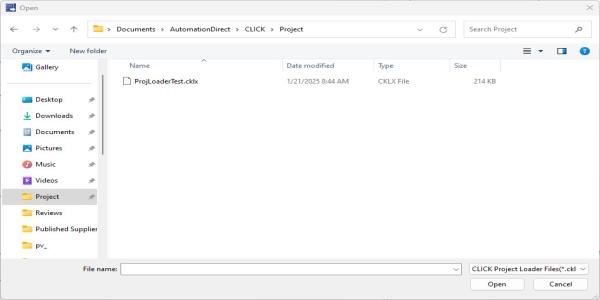
Select the proper CLICK Project Loader File and click Open.
Step 4
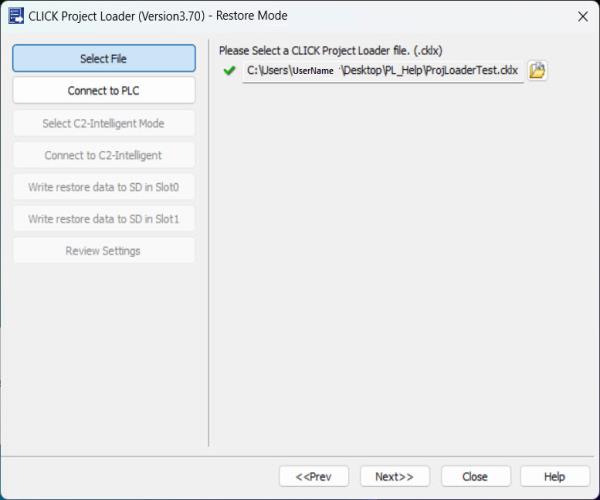
Ensure file path looks correct and text box has a Green Check  beside it. Then press Next>> button on the Project Loader screen.
Step 5
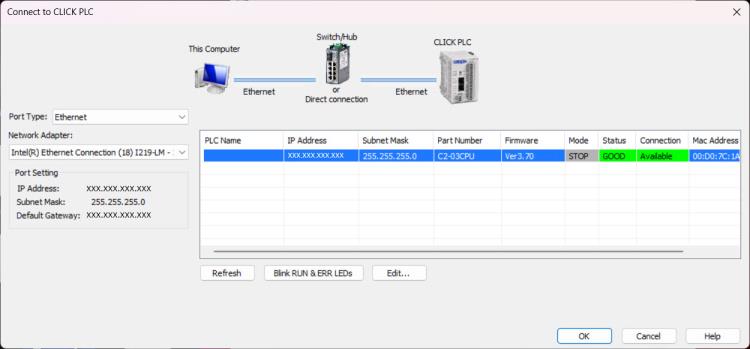
Press the Setup button to select the target CLICK PLC to restore to.
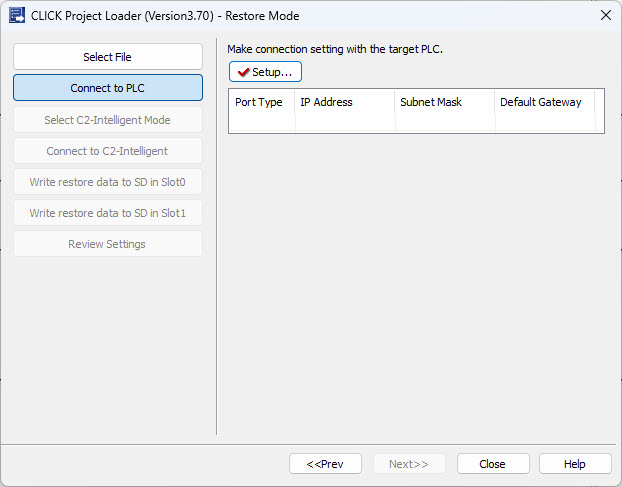
Highlight the appropriate CLICK PLC and press OK.
Step 6
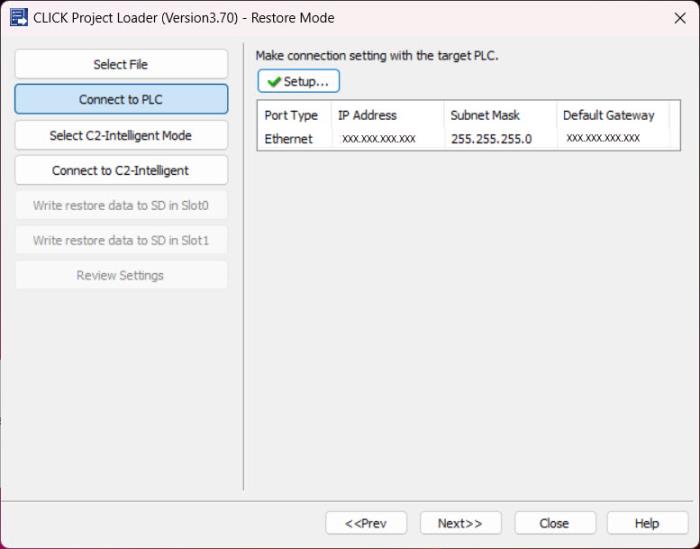
Ensure CLICK PLC IP Address is correct and Setup has a Green Check beside it. Notice the Project Loader detected the CLICK PLC has Intelligent Modules and has new selections available. Then press Next button on the Project Loader Wizard.
Step 7
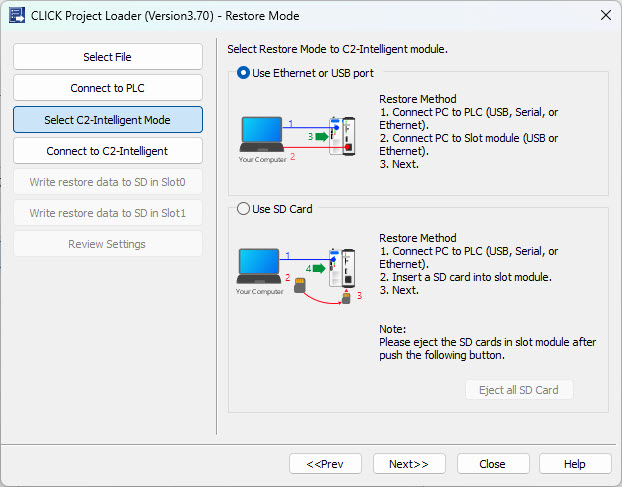
Decide what method you want to restore the Intelligent Module and click the below link that matches:
Restore using Ethernet - Step 8
Ensure Use Ethernet or USB port radio is selected and press Next>>.
Restore using Ethernet - Step 9
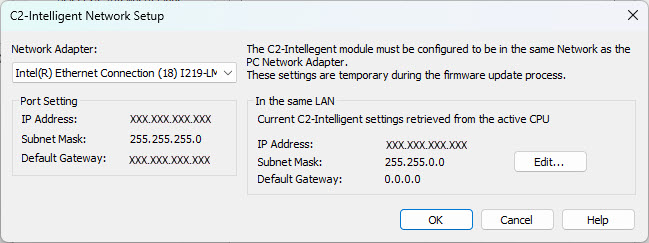
In the drop down menus select Ethernet. Then press Setup to open the Network Setup screen.
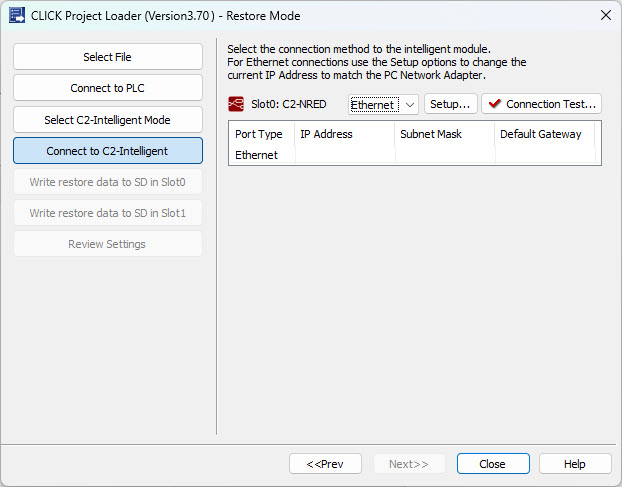
On the Network Setup screen, choose your Network Adapter and temporarily set your Intelligent module IP Address to the same Network as your PC using the Edit button.
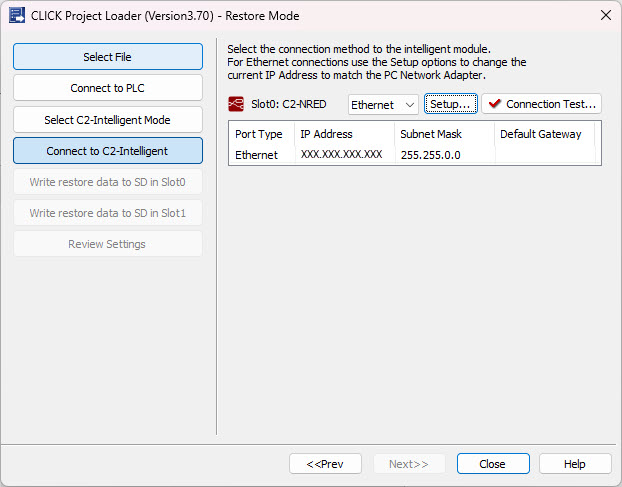
Restore using Ethernet - Step 10
Ensure IP Address is correct and press Connection Test to check communication between Intelligent Module and PC.
After Connection Test is complete you will receive the following pop-up.
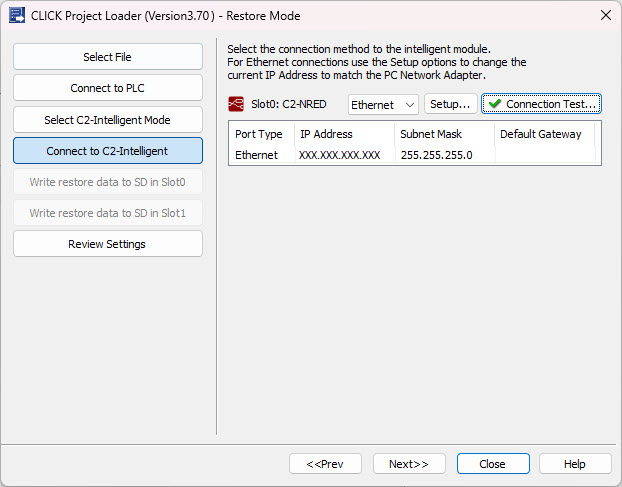
And the Check Mark beside Connection Test will turn green. Now press Next>> to continue.
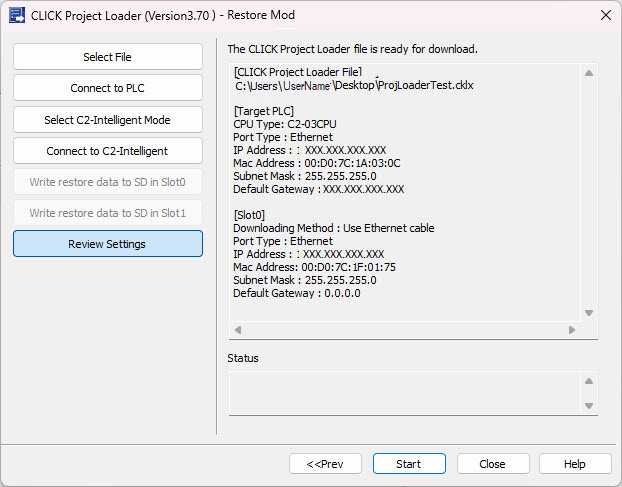
Restore using Ethernet - Step 11
Ensure all data is correct on the Review screen and press Start.

|
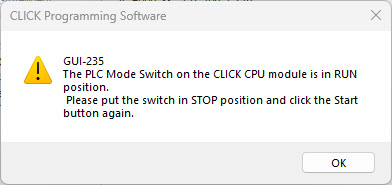
Note: The PLC Mode Switch must be set to the STOP Mode in order for the CLICK Project Loader to proceed. If the PLC is set to RUN Mode, an Error window like the one shown below will display.
|
|
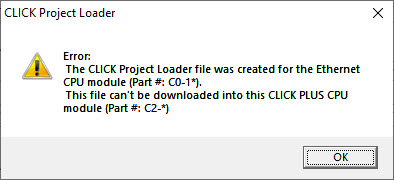
Note: Starting with Ver3.40 the Project Loader will check the CPU part number and prevent from downloading an incompatible project file. There are three groups of compatible CPUs:
- C0-0x CLICK Serial CPUs
- C0-1x CLICK Ethernet CPUs
- C2-x CLICK PLUS CPUs
|
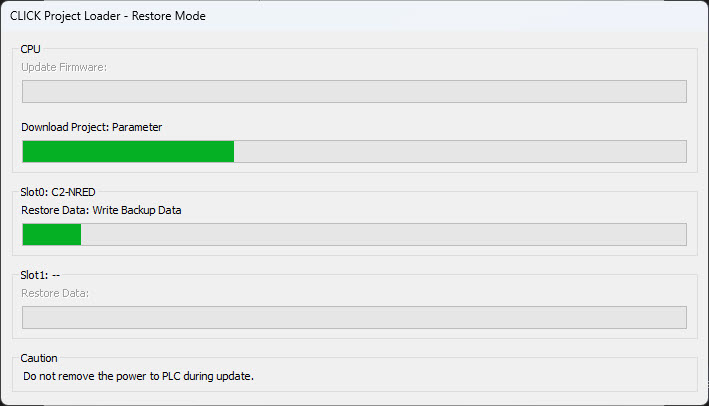
Loading bar shows status as CLICK PLC and Intelligent Module is Restored.
Once all the CLICK Project Loader tasks are Completed, the Operation Complete window shown below opens, indicating all tasks Completed successfully.
Restore using USB - Step 8
Ensure Use Ethernet or USB port radio is selected and press Next>>.
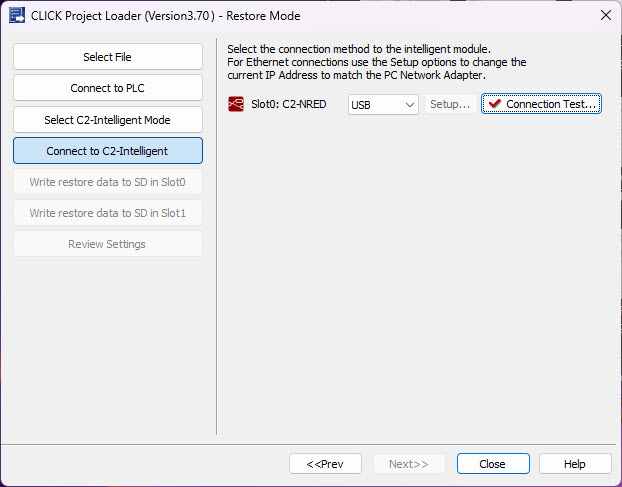
Restore using USB - Step 9
In the drop down menus select USB. Then press Connection Test.
After Connection Test is complete you will receive the following pop-up.
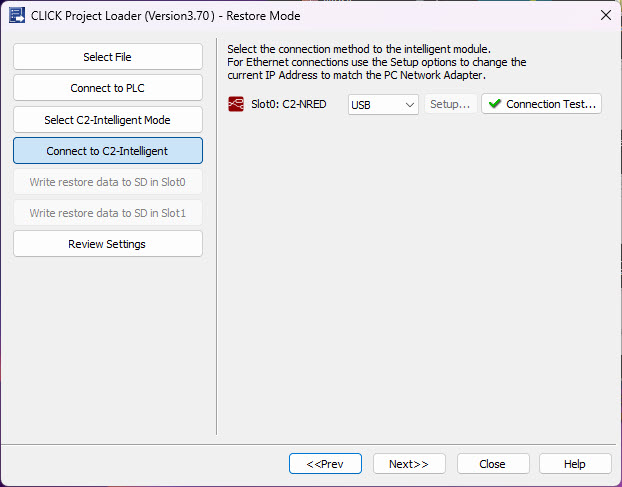
And the Check Mark  beside Connection Test will turn green. Now press Next>> to continue.
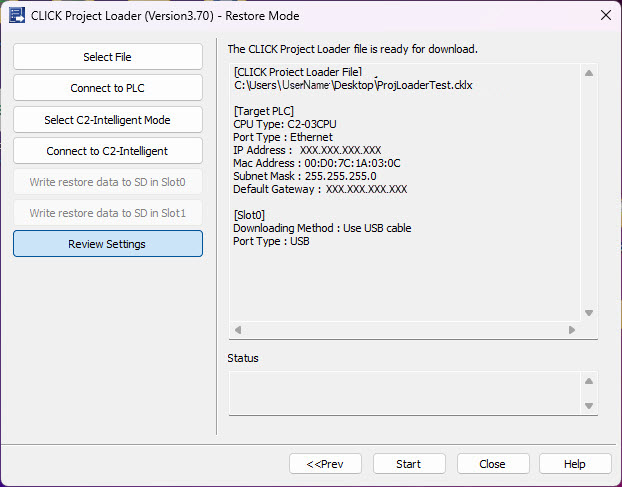
Restore using USB- Step 10
Ensure all data is correct on the Review screen and press Start.
|
Note: The PLC Mode Switch must be set to the STOP Mode in order for the CLICK Project Loader to proceed. If the PLC is set to RUN Mode, an Error window like the one shown below will display.
|
|
Note: Starting with Ver3.40 the Project Loader will check the CPU part number and prevent from downloading an incompatible project file. There are three groups of compatible CPUs:
- C0-0x CLICK Serial CPUs
- C0-1x CLICK Ethernet CPUs
- C2-x CLICK PLUS CPUs
|
Loading bar shows status as CLICK PLC and Intelligent Module is Restored.
Once all the CLICK Project Loader tasks are Completed, the Operation Complete window shown below opens, indicating all tasks Completed successfully.
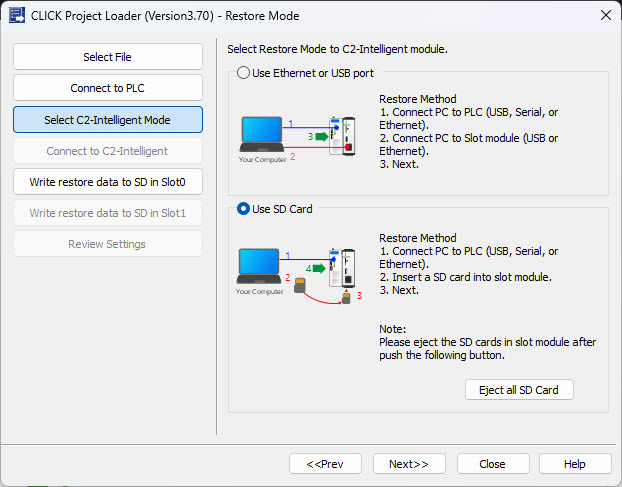
Restore using SD Card - Step 8
Ensure Use SD Card radio is selected follow instructions on screen and press Next>>.
Restore using SD Card- Step 9
Follow on screen directions and use the drop down to select where to Write to.
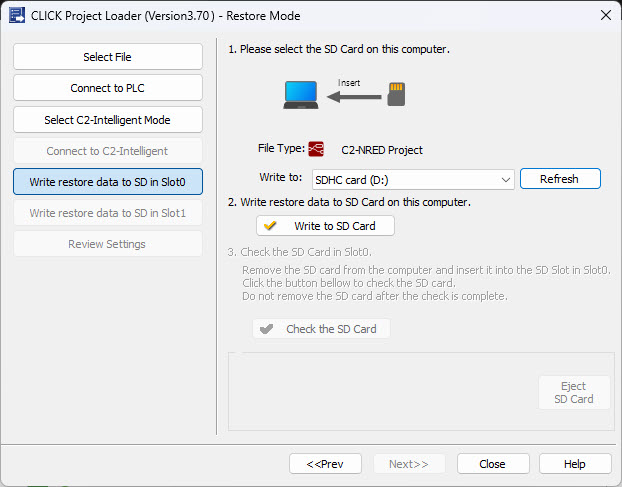
Once SD card location is selected press Write to SD Card and the following Dialog pops ups once complete.
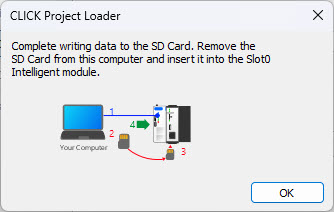
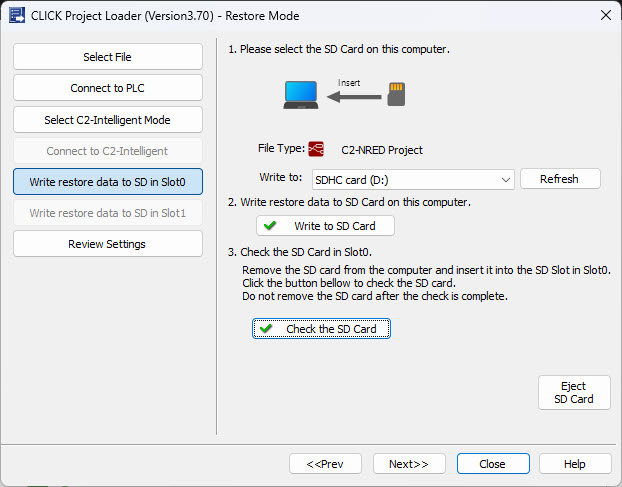
Insert SD card into the Intelligent Slot Module as directed and Press OK. Next press Check the SD Card and if loaded correctly the Check Mark should turn green. Press Next>>.
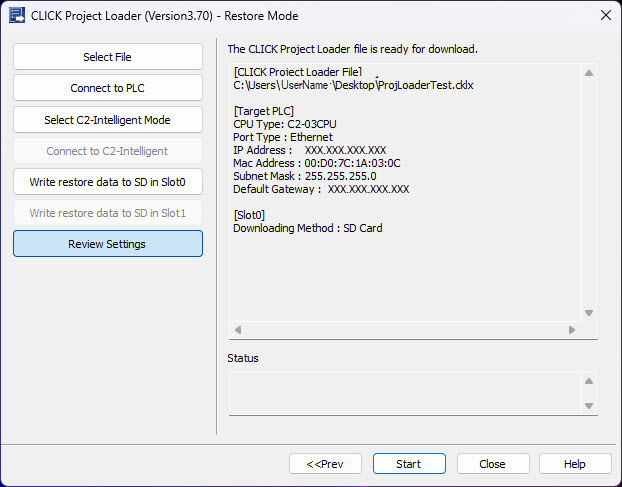
Restore using SD Card- Step 10
Ensure all data is correct on the Review screen and press Start.
|
Note: The PLC Mode Switch must be set to the STOP Mode in order for the CLICK Project Loader to proceed. If the PLC is set to RUN Mode, an Error window like the one shown below will display.
|
|
Note: Starting with Ver3.40 the Project Loader will check the CPU part number and prevent from downloading an incompatible project file. There are three groups of compatible CPUs:
- C0-0x CLICK Serial CPUs
- C0-1x CLICK Ethernet CPUs
- C2-x CLICK PLUS CPUs
|
Loading bar shows status as CLICK PLC and Intelligent Module is Restored.
Once all the CLICK Project Loader tasks are Completed, the Operation Complete window shown below opens, indicating all tasks Completed successfully.
Related Topics:
How to use the CLICK Project Loader
About the CLICK Loader File
About Loader Password Protection
Export CLICK Project Loader File