Bitmap Button Object |
Topic:
CM165 |
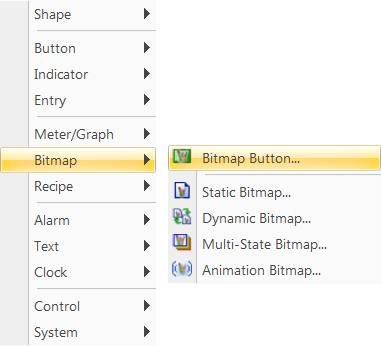
The Bitmap Button Object is accessed from Bitmap in the Object Menu or the Object List.
The General Tab of the Bitmap Button Object setup enables you to enter and edit settings that affect the look and operation of the Bitmap Button.
To add a Bitmap Button object to your project, do the following:
- From the Object menu, select Bitmap and then Bitmap Button
— or — - from the Object list, scroll to Bitmap and click Bitmap Button and drag it to the work area
- The Bitmap Object - General tab window opens.
— or — - from the Object list, scroll to Bitmap and in the Parts List, click a bitmap button and drag it to the work area.
- The Bitmap Button window opens displaying the General tab.
 or
or 
- The Bitmap Button window opens displaying the General tab.
- Complete the fields on the screen that are common to all objects using the information in the Working with Objects Help topic.
- Complete the remaining fields on the screen using the information in the table below.
| Bitmap Button Object | |
|---|---|
| Field | Description |
| Lock | Select this check box to prevent the object's position or size from being changed accidentally. |
| Label | |
| Button and Indicator Tags | The Tag Name is the connection to the device (PLC or Controller) and to other objects. The Button tag is turned ON when the button is pressed and OFF when the button is released or pressed again, depending on the Object Type. |
| Object Type | The Object Type enables the user to choose between five types of operation for the Bitmap Button. The five choices are: Toggle: Toggles the Bitmap Button operation between ON and OFF every time the Bitmap Button is selected (pressed). Momentary On: Causes the Bitmap Button to be ON while the Bitmap Button is pressed. As soon as the button is released, it returns to the OFF state. Momentary Off: Causes the Bitmap Button to be OFF while the Bitmap Button is pressed. As soon as the button is released, it returns to the ON state. Set On: Causes the Bitmap Button to be set to the ON state when the Bitmap Button is pressed. Once it is set to ON, it remains on until a separate device, such as another Bitmap Button or signal from the PLC, turns its associated Tag Name OFF. Set Off: Causes the Bitmap Button to be set to the OFF state when the Bitmap Button is pressed. Once it is set to OFF, it remains off until a separate device, such as another Bitmap Button or signal from the PLC, turns its associated Tag Name ON. |
| OFF/ON Bitmap | |
| Read from... | Under Read From, click on the disk to select a bitmap from the PC, Symbol to open Symbol Factory, or Clipboard to paste a previously-copied bitmap. |
| Image Stretching |
Lock Aspect Ratio: Click on this check box to maintain the ratio of the graphic. This keeps the graphic proportional when changing the X or Y Axis. The object frame will change size, but the graphic will stay proportional. Stretch to Fit: Click on this check box to stretch the graphic to fit the frame. For best results, keep both options selected. |
| Transparent | See Adding Transparency to animation Bitmap Images. |
|
|
Note: Stretch to Fit is a convenient, but uses a large amount of CPU resources. When possible, use a graphics program to render the bitmap to the desired fit and save the bitmap file. Use the revised bitmap file in the object in C-more. |
