Topic: P052

Set CPU Time/Date

Set CPU Time/Date is used for configuring the Productivity CPU Date and Time.

Accessing Set CPU Date/Time

There are two methods for accessing Set CPU Time/Date:

Method 1

Use the Set CPU Time/Date Icon located on the Setup Toolbar.

Method 2

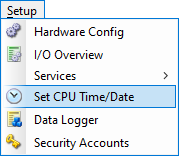
Select the Set CPU Time/Date menu item from the Setup Menu, located on the Main Menu and shown below.

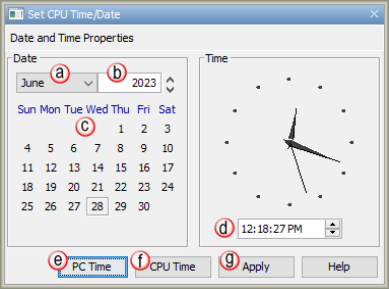
Selecting Set CPU Time/Date will display the Set CPU Time/Date window as shown below.


Note: The user must be Online with the CPU for Set CPU Time/Date to function.


Set CPU Time/Date Setup

The Set CPU Time/Date window provides the following:

  1. Month: Click the down arrow beside the Month text field to drop down a list of the Months of the year. Click on the desired Month to make a selection and close the drop down list.
  2. Year: Click the up/down arrows beside the Year text field to scroll through the Years, or manually enter the Year in the text field.
  3. Day: Click on the Day of the month to select. The days will change in accordance with the Month and Year.
  4. Time: Click on the separate Hour, Minute, Second, [AM/PM] fields and use the arrows to select new values for each.
  5. PC Time: Select the PC Time button to display the Date and Time currently set in the PC.
  6. CPU Time: Select the CPU Time button to display the Date and Time currently set in the CPU.
  7. Apply: Select the Apply button to Apply to the CPU any changes made to the Date and Time. Once the Apply button is selected, a Set CPU Date & Time popup window as shown below will notify the user that the change was applied.