Software Overview - XG-PM
Video Tutorial
The XG-PM software communicates with the motion controller in the XEM CPU module directly and supports the configuration and monitoring of the motion controller.
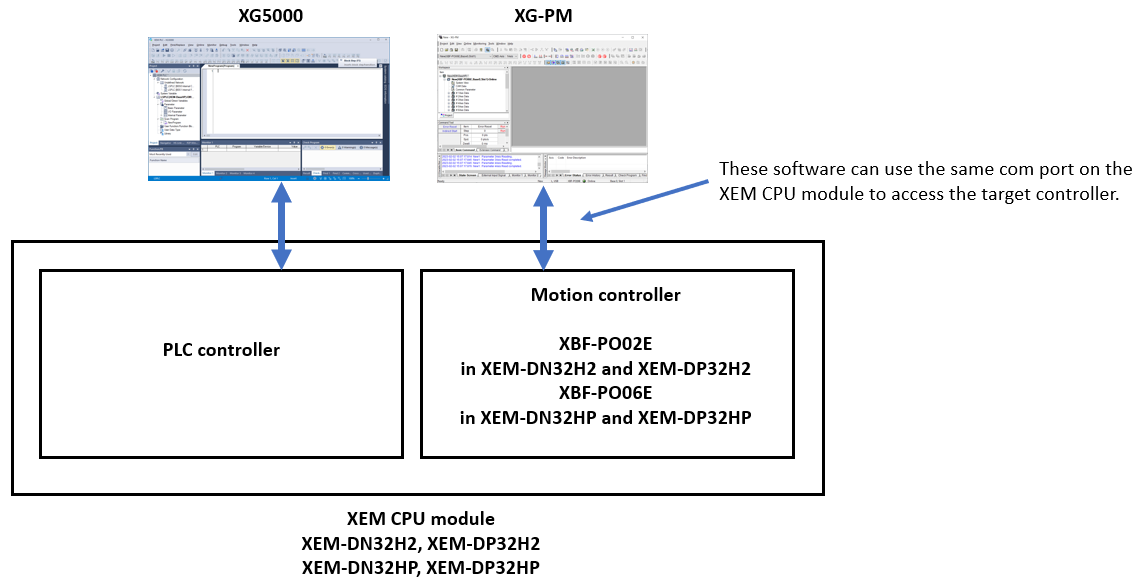
There are two methods to start up XG-PM:
Method 1:
If you already started up XG5000 and opened a project for an XEM CPU module, select Position Control in the pull-down menu Tools.
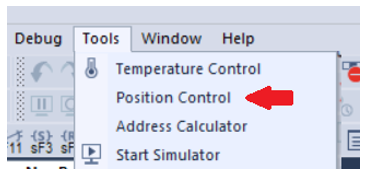
Method 2:
Select XG-PM in the Start menu under XG5000.
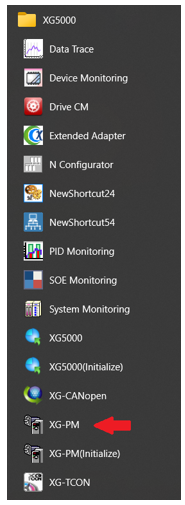
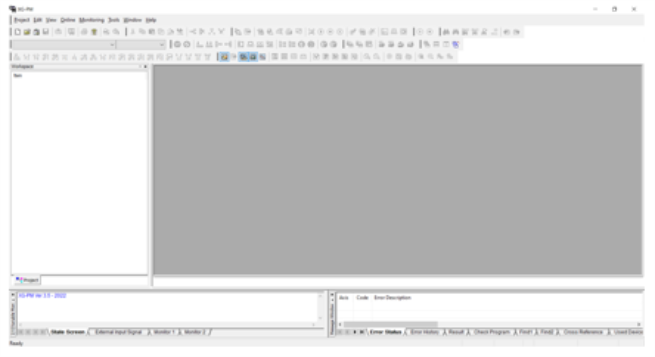
XG-PM starts up:
| Step | Action |
|---|---|
| 1 |
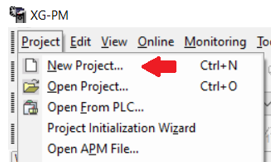
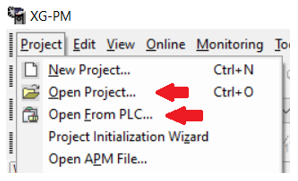
Select New Project… from the pull-down menu Project.
Note: If you created a project before, you can open the project file saved on the PC or read from the PLC.
|
| 2 |
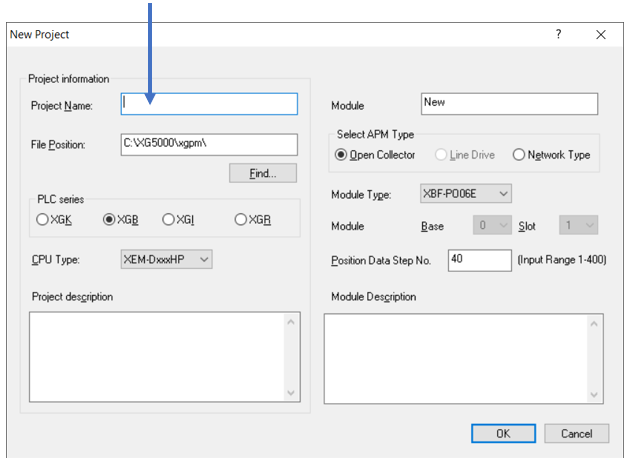
Enter the project name.
|
| 3 |
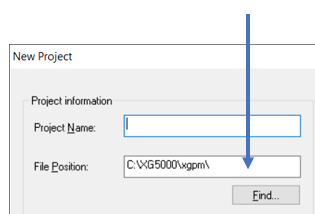
Change the location to save the project file if necessary.
|
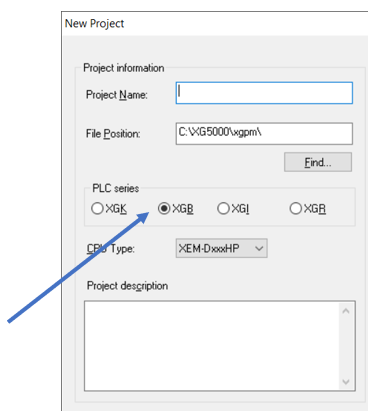
| 4 |
Select XGB.
|
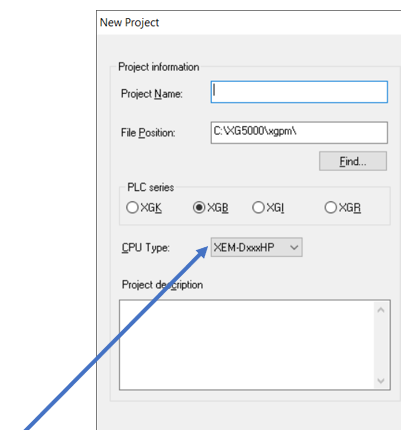
| 5 |
Select XEM-DxxxH2 for XEM-DN32H2 and XEM-DP32H2, or select XEM-DxxxHP for XEM-DN32HP and XEM-DP32HP.
|
| 6 |
Enter the module name.
|
| 7 |
Select Open Collector.
|
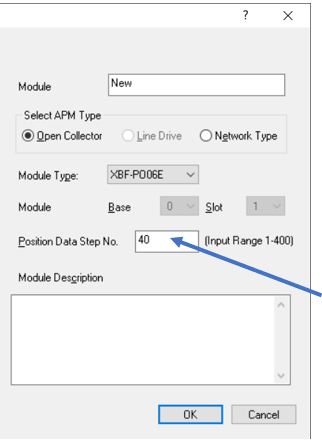
| 8 |
Change the number of steps if necessary.
|
Note: When connecting an XG5000 project and XG-PM project at the same time, XG5000 must be connected first.
| Step | Action |
|---|---|
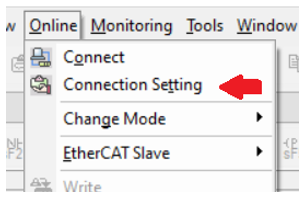
| 1 |
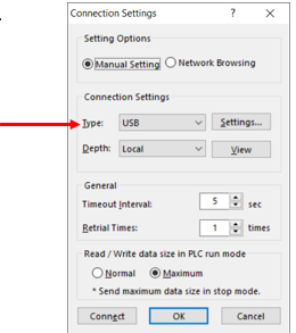
Select Connection Setting from the pull-down menu Online.
|
| 2 |
Select USB as Type. Defaults can remain for all other settings.
Press OK and go to step 3, or press Connect to finish connecting. |
| 3 |
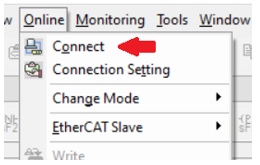
Select Connect from the pull-down menu Online to finish connecting.
|
Note: When connecting an XG5000 project and XG-PM project at the same time, XG5000 must be connected first.
| Step | Action |
|---|---|
| 1 |
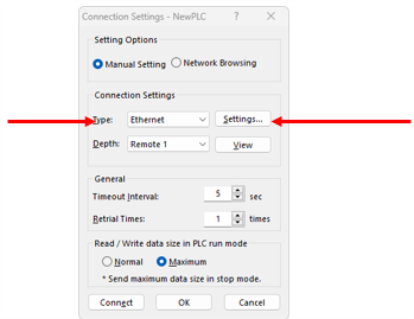
Select Connection Setting from the pull-down menu Online.
|
| 2 |
Select Ethernet as Type.
Press the Settings... button to enter IP address information. |
| 3 |
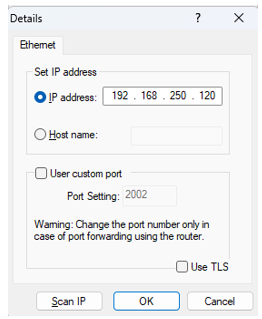
Enter the IP address of the CPU in the IP address field. Press OK when done. This example shows the default IP of 192.168.250.120.
|
| 4 |
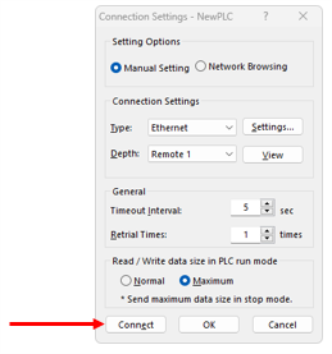
Select Connect from the pull-down menu Online to finish connecting, or click Connect in the Connection Settings window.
|
Reading the project from the XBF-PO02E and XBF-PO06E and writing to them is very powerful.
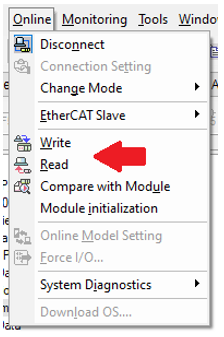
Select Write or Read from the pull-down menu Online.
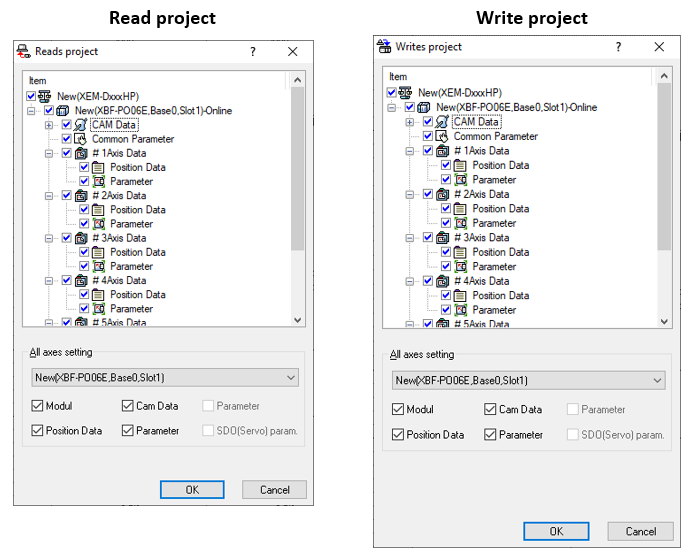
You can choose which data should be read or written by checking the check mark for each data. It is possible you can write only the Axis1 data while Axis2-6 are running.
An in-depth overview of the XP-PM GUI can be found here:
LP500
