Topic: CL157

| Completing a Rung |
Topic: CL157
|
There are two reasons why a rung may become broken and need to be extended:
Please look at the example below. It explains the rung completion using the Line Tool to complete a Reset rung for a Timer Instruction.
Certain Coil Area Devices require additional rung lines for Reset connections or for other purposes. These lines are easily added using the Line Tool.
|
|
Example:Timers that do not reset automatically, require an additional rung for the placement of the Reset Contact. In the example below, the Timer has just been placed in the rung and the Reset Rung must now be connected. |
|
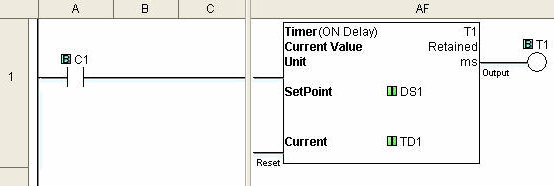
Using the Arrow Keys or the Cursor place the Edit Box at the same level as the Timer Reset line.
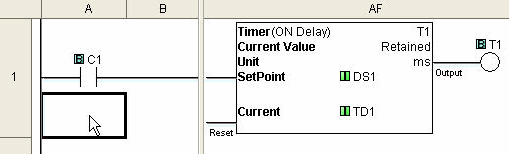
Select the Line Tool to change the Edit Box into a Blue Arrow. The Blue Arrow will replace the Edit Box until you use Restore Line Mode to return to the Edit Box.
|
|
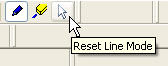
Note: While the Line Tool is in use, the cursor will toggle between a pencil cursor |
|
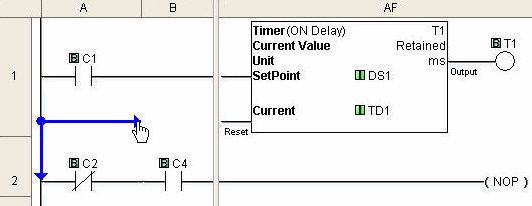
Continue to extend the line until it joins the Reset Connection on the Timer.
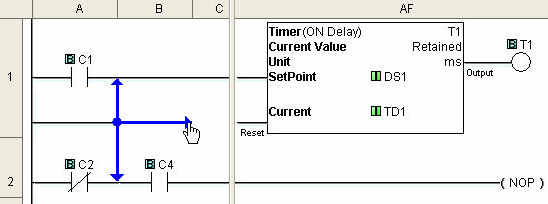
After adding the line, click on the Reset Line Mode icon or menu selection. Reset Line Mode closes the Line Tool and restores the Edit Box. You can now add contacts to the new rung, as necessary.