|
|
Topic: P340 |
UDI (User Defined Instruction) Management |
|
|
|
Topic: P340 |
UDI (User Defined Instruction) Management |
|
UDI (User Defined Instruction) Management panel is where users can copy, import, export, and configure security for UDI Definitions that can later be instantiated in ladder using the User Defined Instruction.
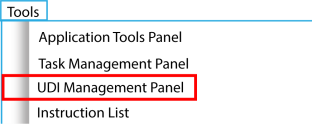
The UDI Management panel can be accessed by selecting UDI Management Panel from the Tools Menu of the Main Menu or using shortcut “Alt+T then U

Note: In the image above, if the icons are grayed out, it indicates that Structures are currently disabled in the project properties.
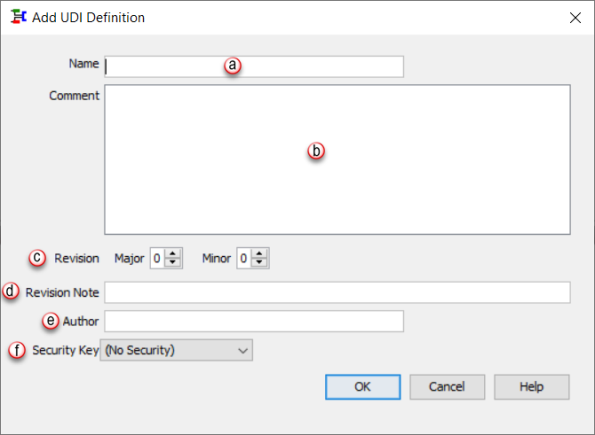
Example: The Revision will read as “1.0revA” when the user enters a 1 in Major, leaves the Minor as 0, and types “revA” into the Suffix field.”
Note: To remove an assigned security key from a definition, select the definition and the (No Security) option and move the (No Security) option to the definition by clicking the ![]() button, enter the password, and then the security key will be removed from that definition.
button, enter the password, and then the security key will be removed from that definition.
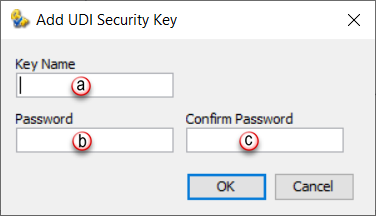
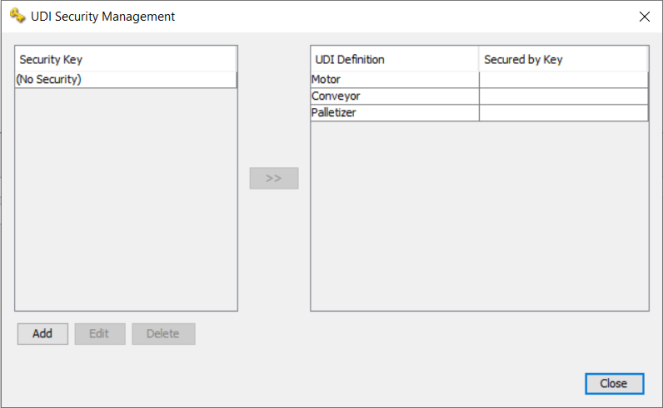
Key name: Must have a unique name for the UDI Security Key. A maximum of 32 characters are allowed.
Password: The password for the security key.
Confirm Password: The text entered in the Password and Confirm Password fields must match exactly. Passwords must be between 8 and 128 characters in length and there are no restrictions on the types of characters used.
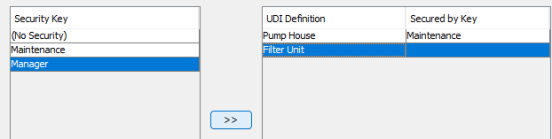
To assign a key to an existing UDI definition select a definition from the available list (multiples can be selected) and
Then select a security key. Move the security key to the chosen definition(s) by selecting the ![]() button.
button.
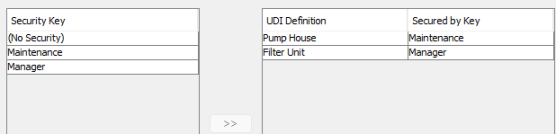
Note: To remove an assigned security key from a definition, select the definition and the (No Security) option and move the (No Security) option to the definition by clicking the ![]() button, enter the password, and then the security key will be removed from that definition.
button, enter the password, and then the security key will be removed from that definition.
Edit allows a user to modify the key name or update the password. When changing key name, the current password must be entered to allow the changes.
Delete will delete the security key and remove it from any assigned definitions. A valid password for that key is required prior to deletion.

Note: If a UDI that has security enabled will allow a user to instantiate the UDI and assign parameters but will not allow access or editing of the definition without the end user entering the proper password.
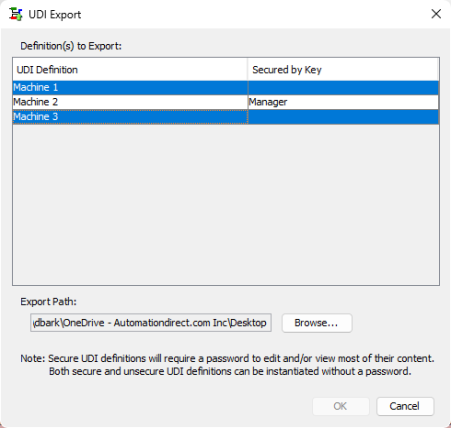
Note: If Security is enabled on an exported UDI, then a password will be required to edit the UDI Definition if it is imported into another project.
Note: When exporting a UDI Definition that contains one or more nested UDI Definitions, all definitions must be selected for export, or an error will occur.
Note: If a task fro the library is moved into a task folder that contains a task with the same name, then a copy will be generated and _1 will be appended to the task name.
Note: When moving a task from the library, any tags with names that already exist in the tag DB will not inherit any attributes.
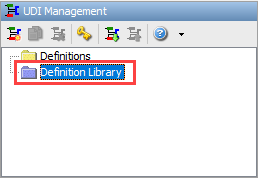
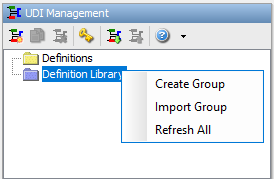
Create Group: This creates a new sub folder within the main definition library folder.
Import Group: Allows a user to import a definition group .udi.
Refresh All: Will refresh the list with any .udi files that have been recently added to folder.
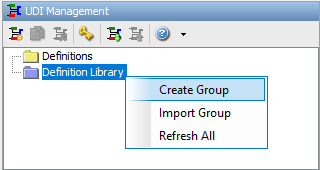
When creating a new group to add associated definitions, follow these steps:
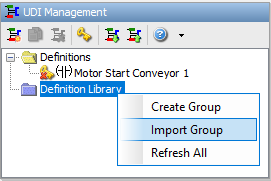
1. Right click on Definition Library.
2. Select Create Group.
3. Enter a name for the group.
Note:The group name and the .udi file name can be different.
4. Select File location and enter file name.
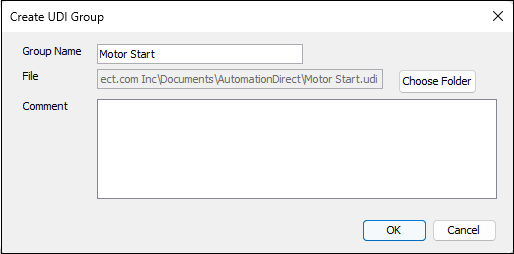
Note: The file location will be used by the software to update.
5. Select OK.
6. The new group should now be shown and updates can be added as needed.
Allows importing of .udi files into the definition library.
1. Right click on Definition Library folder.
2. Select Import Group.
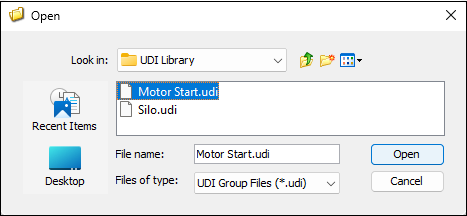
3. Select the .udi file to be imported and select Open.
4. The newly imported group along with any associated definitions will now be listed in the Definition Library.
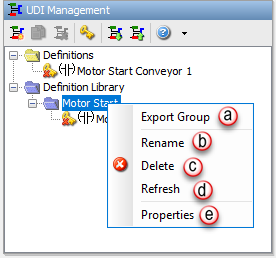
Right clicking on any group or definition name will open the context menu:
Note: Deleting a definition from the library removes it from the list of available definitions but does not remove it from file location.
To add definitions to the library, follow the steps below, either right clicking or dragging and dropping:
1. Drag a definition from any of the definitions folder to an existing Definition Library folder(s)
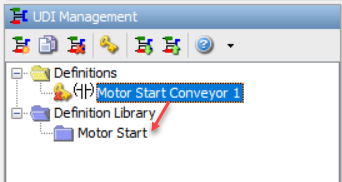
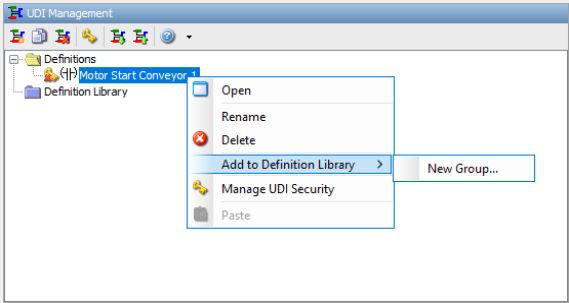
2. Right Click: Right click a definition in any of the UDI Management Folders, then select Add to Definition Library and select new group or one of the Definition Library folders:
3. The definition is added to the folder in the UDI Library.
Note: The default location for .udi files is documents/automationdirect/productivity.
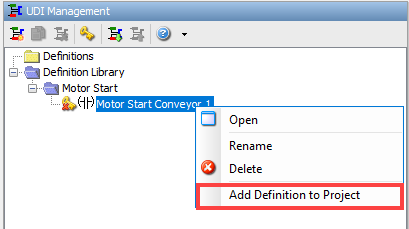
Right click on any definition to view the options in the context menu:
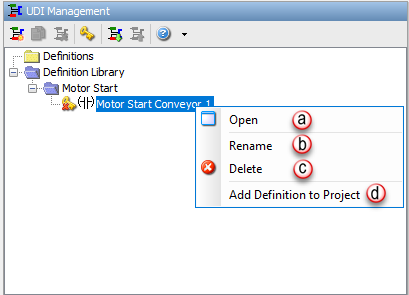
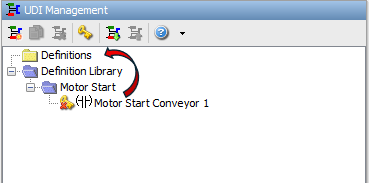
To move a definition from the UDI library into a UDI definition folder, there are two methods available for completing this action.
1. Drag a definition from the library and drop it into the designated UDI definition folder. You can drop the definition directly on the definition folder name or anywhere in that folder indicated by gray line.
Note: If a definition from the library is moved into a definition folder that contains a definition with the same name, then a copy will be generated and _1 will be appended to the definition name.
2. Right click on the definition and select Add definition to project’.
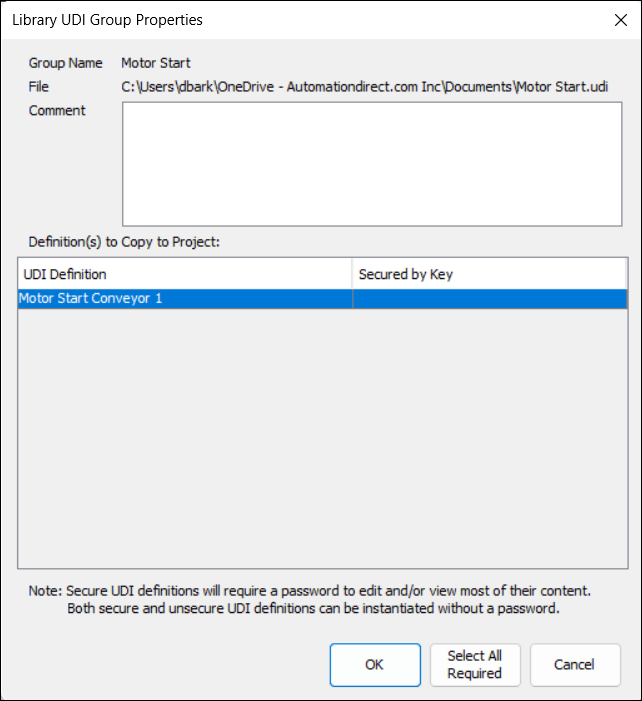
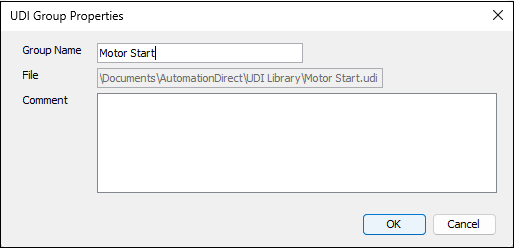
Once a definition is added to a UDI definition folder then a UDI Group Properties window will appear.