|
|
Topic: P267 |
Project Coversion |
|
|
|
Topic: P267 |
Project Coversion |
|
This topic provides information about converting an existing project using a simple and easy conversion process built into Productivity Suite software.
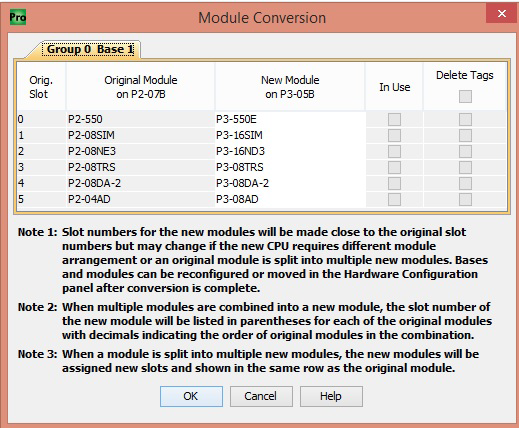
Note: Slot numbers for the new modules will be made close to the original slot numbers but may change if the new CPU requires different module arrangement or an original modules split into multiple new modules. Bases and modules can be reconfigured or moved in the Hardware Configuration panel after conversion is complete.
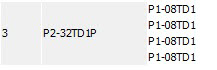
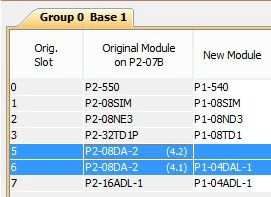
Note: When multiple modules are combined into a new module, the slot number of the new module will be listed in parentheses for each of the original modules with decimals indicating the order of original modules in the combination.
Note: When a module is split into multiple new modules, the new modules will be assigned new slots and shown in the same row as the original module.
There are three options available for conversion:
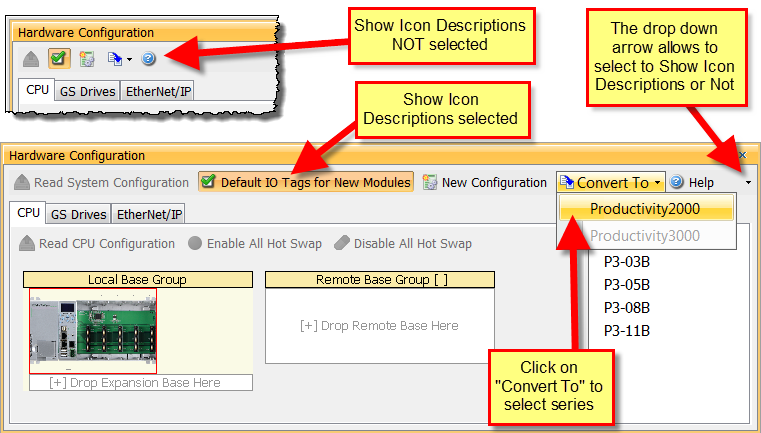
Click on the 'Convert to' option on the drop down menu in the Hardware Configuration window to access the option for converting a project between product series.
Note:The capacity of the new system, including the number of GS drives and EtherNet/IP devices, must be checked and corrected by the user if necessary before conversion begins.
In the Module Configuration window, the user will select when modules need to be deleted, the user is prompted for what to do with the I/O and Status Tags that are associated with modules being deleted. I/O and Status Tags are transferred to the new module. The module configuration settings are copied to the new module if possible, or deleted if not needed in the new module. Configuration that does not exist in existing module will be defaulted in the new module.
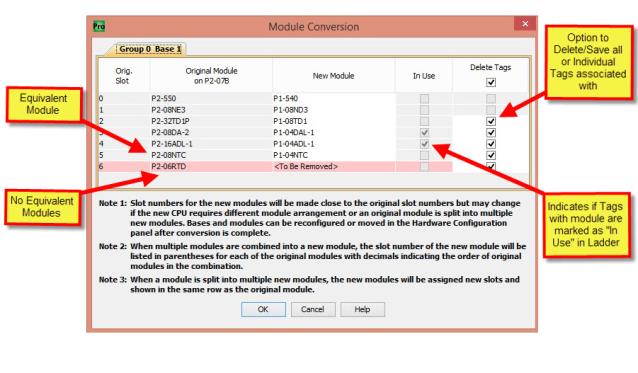
Note: Suggested new conversion modules are the closest match to the original module. These can be changed by selecting the drop window to view other module choices.
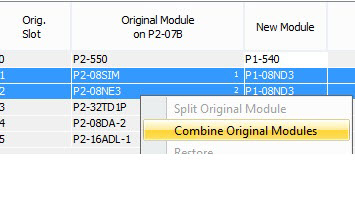
Right clicking on any module give a user the ability to split or combine module(s).
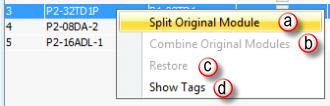
Split Original Module: Allows a larger point module to be split into smaller point module(s).
Example: A 32 Point module is being split into (4) 8 point modules. This is accomplished by selecting split (4) times.Combine Original Modules: Allow multiple smaller count modules to be combined into a larger count module.
Example: (2) 8 point modules being combined into (1) 16 point module.
Note 2 : When multiple modules are combinged into a new module, the slot number of the new module will be listed in parentheses for each of the original modules with decimals indicating the order of original modules in the combination.
Example: A 32 Point module
is being split into (4) 8 point modules. This is accomplished by
selecting split (4) times.![]()
Note: Module placement is determined by total base slot availability and any empty slots prior to the selected modules..
c. Restore: Any
applied changes (split, combine) will undo back to original
selections.
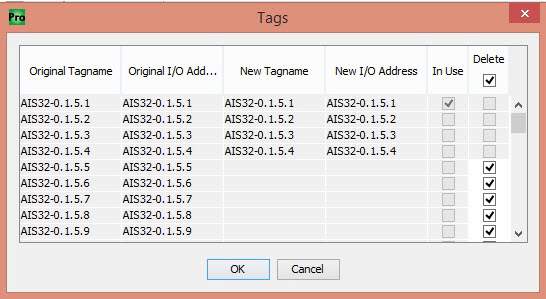
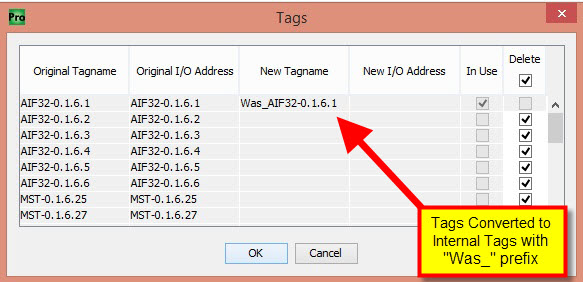
d. Show Tags: Displays all tag names & addresses associated with the converted module.
Note: Tags marked as "in use" indicate tag is currently used in ladder. If a module/address can't be converted or manually selected to not be converted the tag will be marked with a "was_" prefix.