|
|
Topic: P031 |
|
|
|
|
|
Topic: P031 |
|
|
|
The Print function allows Printing of the Ladder Logic Programs or Data View. The I/O Configuration and Tag Database can be included.
The Print menu item is accessible using three methods:
Method 1
Select from the File menu on the Main Menu.
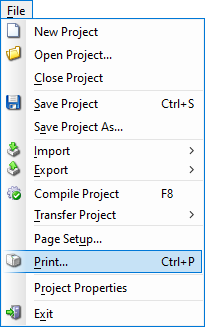
Method 2
Select the Print Icon
located on the Main Toolbar.
Method 3
Use the shortcut keys Ctrl+P.
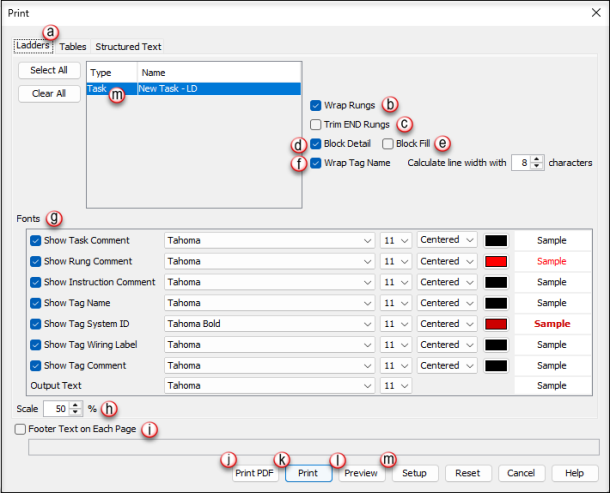
Once Method 1, 2 or 3 is selected, the Print window will open as shown below.
Method 4
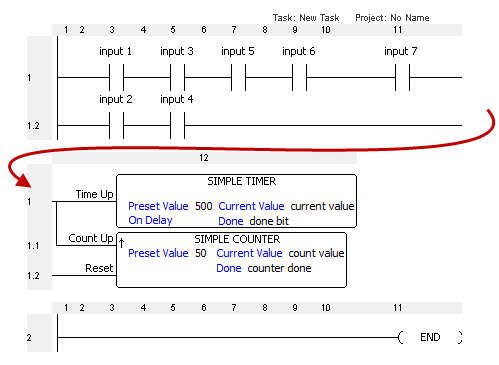
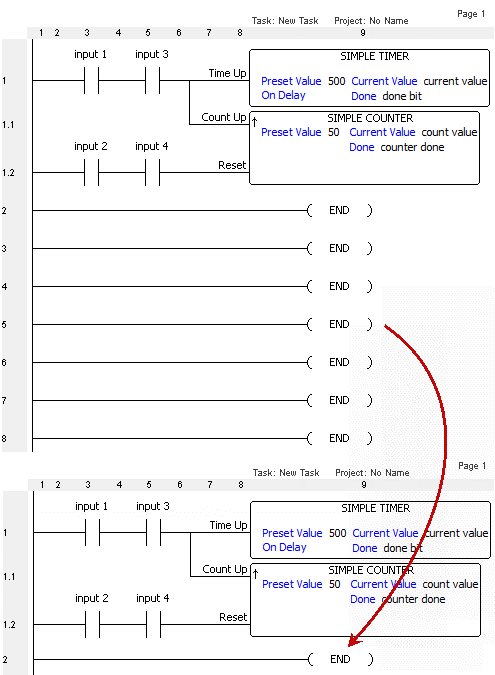
Select an entire rung or multiple rungs (by selecting a rung and using SHIFT + Down Arrow). Once rungs are selected, right click to access pop-up menu and select Print followed by Selected Rungs, or right click inside of task to print the specified task.

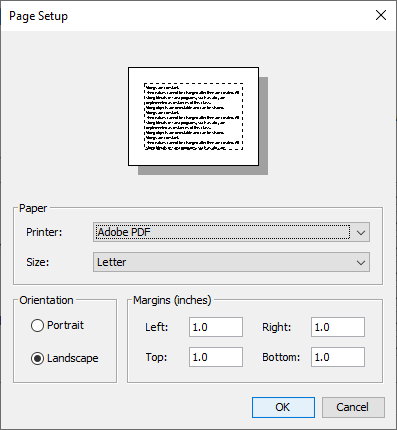
The Print window provides the following:
Example:
Tag name wrapping enabled
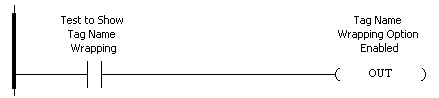
Tag name wrapping disabled

- Show Task Comment
- Show Rung Comment
- Show Instruction Comment
- Show Tag Name
- Show Tag System ID
- Show Wiring Label
- Show Tag Comment
Note: Adjusting the font size up or down will affect the overall number of printed pages.
Note: When printing comments or tags that contain Extended ASCII characters, the default font of Tahoma needs to be changed (recommended Arial) to print correctly.
Note: All settings inside the print window are now saved once you hit Print. The Reset button returns all settings to their default value.
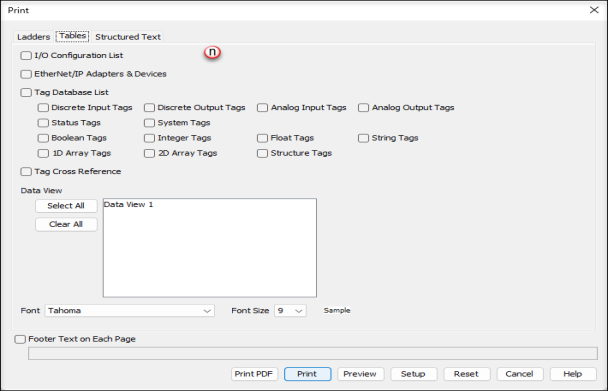
- I/O Configuration List - this option will printout the I/O hardware configuration.
- EtherNet/IP Adapter - this option will print all EtherNet/IP Adapter Settings needed to set up a Scanner device. *See example below.
- Tag Database List - this option will include all tags (all data types) including Modbus address assignments in the printout:
- Discrete Input Tags
- Discrete Output Tags
- Analog Input Tags
- Analog Output Tags
- Boolean Tags
- Integer Tags
- Float Tags
- String Tags
- 1D Array Tags
- 2D Array Tags
- System Tags
- Status Tags
- Tag Cross Reference - this option will printout all tags currently displayed in the tag cross reference window.
- Data View - this option allows you to select all or individual Data View tabs for printing.
- Font - select the font desired for table selections, a sample is provided.

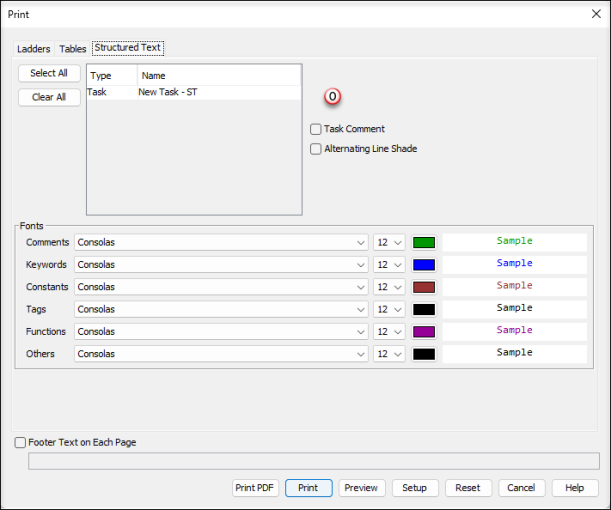
Tasks: Select a task to be sent to the printer:
Task Comment: Displays the task comment.
Alternating Line Shade: When enabled, every other line in the editor will be displayed with a shaded background, improving readability.
Fonts: Select the options for documentation visibility. Choose the comments, fonts, font sizes and colors desired on the editor printout. There are previews available to provide a viewable sample of the printed selections.