Ethernet Connection to XMC
| Step | Action |
|---|---|
| 1 |
Download and Install XG5000 software from https://www.automationdirect.com/support/software-downloads?itemcode=XG5000.
|
| 2 |
Connect Computer with Ethernet cable to the XMC. Note: Default IP address of CPU is 192.168.250.110 and default sub-net is 255.255.255.0.
|
| 3 |
Change Computer network settings to be on the same sub-net range as the XMC. Note: If you can not change the IP address setup on your PC, try the USB connection. Example:Set PC IP Address to 192.168.250.101 Set PC Sub-net to 255.255.255.0 |
| 4 |
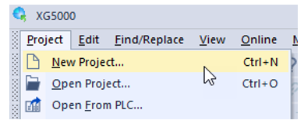
Open XG5000. Select Project menu èNew Project.
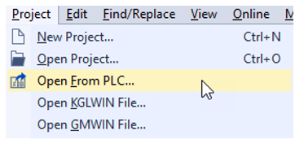
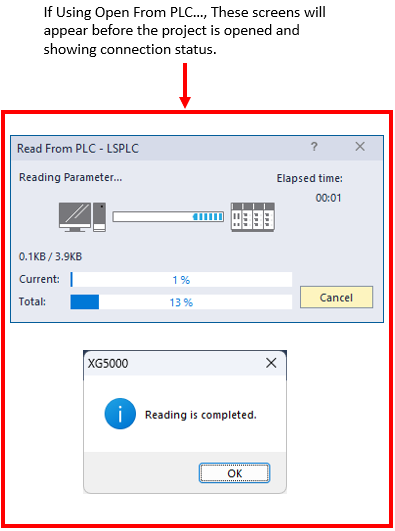
Alternatively, you can select Project menu èOpen From PLC. If you choose this method, skip to Step 7.
|
| 5 |
Fill in the information indicated below in the New Project window.
|
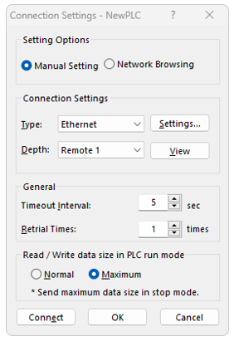
| 6 | Select Online menu èConnection Settings . . .
|
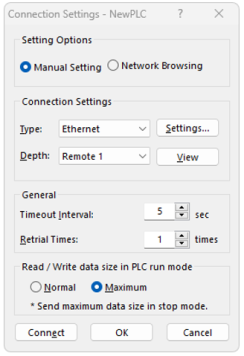
| 7 |
Select Ethernet as type. Press the Settings... button to enter IP address information.
|
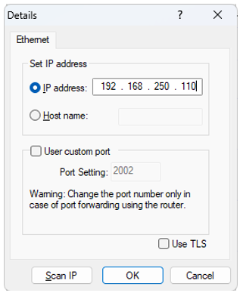
| 8 |
Enter the default IP address of 192.168.250.110 in the IP address field. Press OK when done.
|
| 9 |
Press Connect button to connect to XMC CPU.
|
| 8 |
XG5000 should display connection status at the bottom part of the software. Example Below.
|


LM002-2