XGB EtherCAT Touch Probe Setup with XPM_TPROBE and XPM_ABORTT
-
XPM_TPROBE is used to setup touch probe functionality for an Axis.
-
XPM_ABORTT is used to abort touch probe functions of an Axis.
-
The examples in this topic can be found in OnlineHelp_ECAT_Example.
XPM_TPROBE can only execute one type of Trigger input type per execution.
-
Window Mode only works with single trigger mode.
-
XPM_TPROBE only works for the XBF-PN0xB modules.
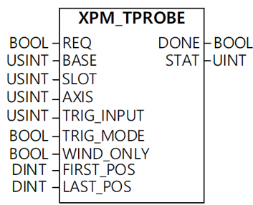
| Element Name | Element Type | Description |
|---|---|---|
| REQ | Input | Edge detected request to execute the function block |
| BASE | Input | Base number of the motion controller. Set to 0 for XEM CPU. |
| SLOT | Input | Slot number of the motion controller. Equal to slot number of XBF-PN04B or XBF-PN08B module. |
| AXIS | Input |
Axis number to control.
This can be a constant or variable. |
| TRIG_INPUT | Input |
Signal to be used as a trigger.
|
| TRIG_MODE | Input |
Trigger Mode.
|
| WIND_ONLY | Input |
Enable Position Window Mode.
|
| FIRST_POS | Input | Start position of window mode. Value can be between -2,147,483,648 ~ 2,147,483,647. |
| LAST_POS | Input | End position of window mode. Value can be between -2,147,483,648 ~ 2,147,483,647. |
| DONE | Output | Status that function block is done. |
| STAT | Output | Current status of the function block.Non-zero numbers will be an error or warning. |
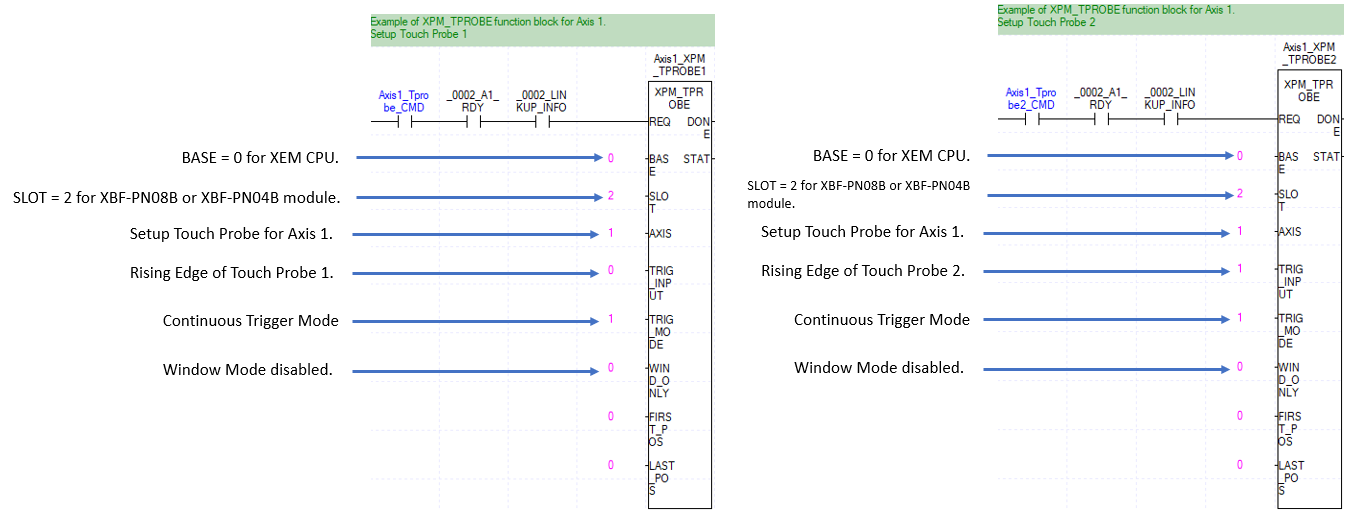
XPM_TPROBE Example
This example is Scan Program LP621_XPM_TPROBE_ABORTT_Example in the OnlineHelp_ECAT_Example.zip file.
-
In this example Axis 1 is used to setup the touch probes with XPM_TPROBE.
-
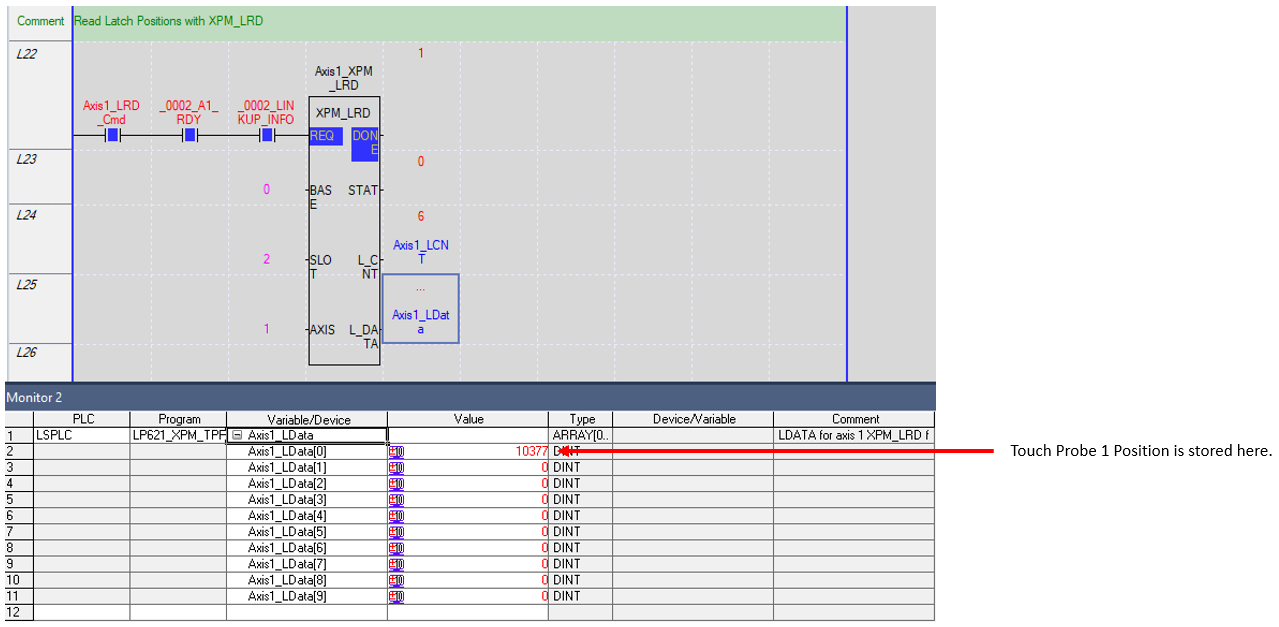
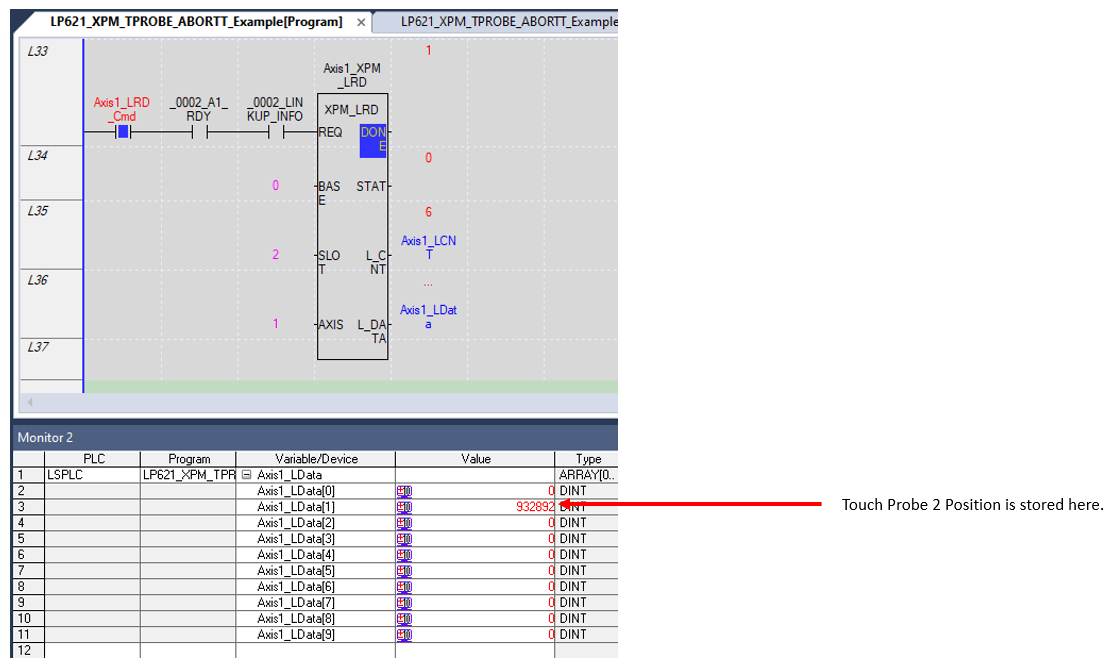
XPM_LRD can be used to read the latched touch probe positions. It is always stored in the first element of the data array.
-
Execute XPM_ECON to connect EtherCAT network.
-
Execute XPM_SVON fbs to power on axes.
Using XPM_LRD and Monitor Mode for Latched Positions
XPM_LRD is used to read the latched positions after activating the touch probe with XPM_TPROBE.
-
The position when the touch probe activates is stored in the L_DATA array.
-
To read the position for Touch Probe 2, Touch Probe 1 must be enabled also.
XPM_ABORTT only works for the XBF-PN0xB modules. It is used to cancel a trigger setup with XPM_TPROBE.
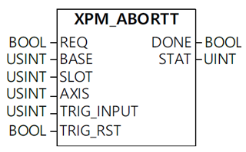
| Element Name | Element Type | Description |
|---|---|---|
| REQ | Input | Edge detected request to execute the function block |
| BASE | Input | Base number of the motion controller. Equal to 0 for built-in position control. |
| SLOT | Input | Slot number of the motion controller. Equal to slot number of XBF-PN04B or XBF-PN08B module. |
| AXIS | Input |
Axis number to control.
This can be a constant or variable. |
| TRIG_INPUT | Input |
Signal to abort.
|
| TRIG_RST | Input |
Trigger Reset setting.
|
| DONE | Output | Status that function block is done. |
| STAT | Output | Current status of the function block. Non-zero numbers will be an error or warning. |
XPM_ABORTT Example
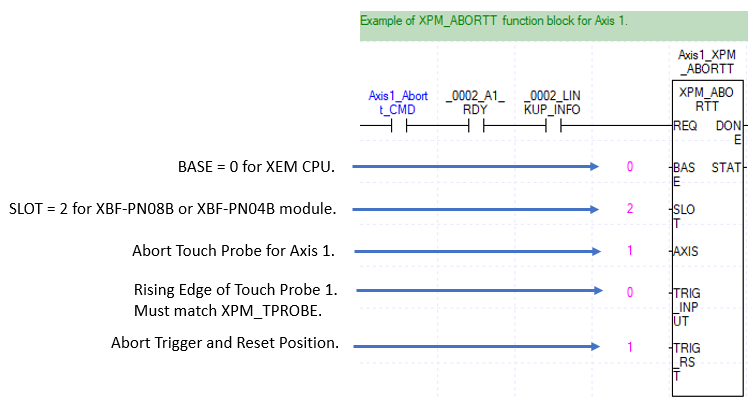
This example is Scan Program LP621_XPM_TPROBE_ABORTT_Example in the OnlineHelp_ECAT_Example.zip file.
XPM_ABORTT must be setup with the same parameters as XPM_TPROBE to cancel the correct touch probe configuration.
| Step | Action |
|---|---|
| 1 |
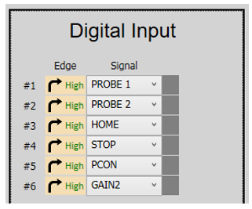
Connect to the iX7NH Servo Drive with Drive CM Software. Press the Digital Input button.
|
| 2 |
Assign touch probe 1 and 2 inputs to the digital input #1 and #2.
|
| 3 |
Press the Save to Memory button to save settings.
|
| Step | Action |
|---|---|
| 1 |
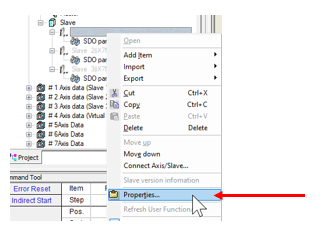
Open the XG-PM project. In the Workspace window, Right-click on the servo drive to configure and select Properties. XG-PM must be disconnected to edit the PDO.
|
| 2 |
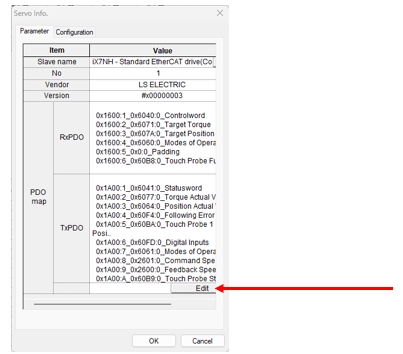
On the Servo Info screen, click the Edit button.
|
| 3 |
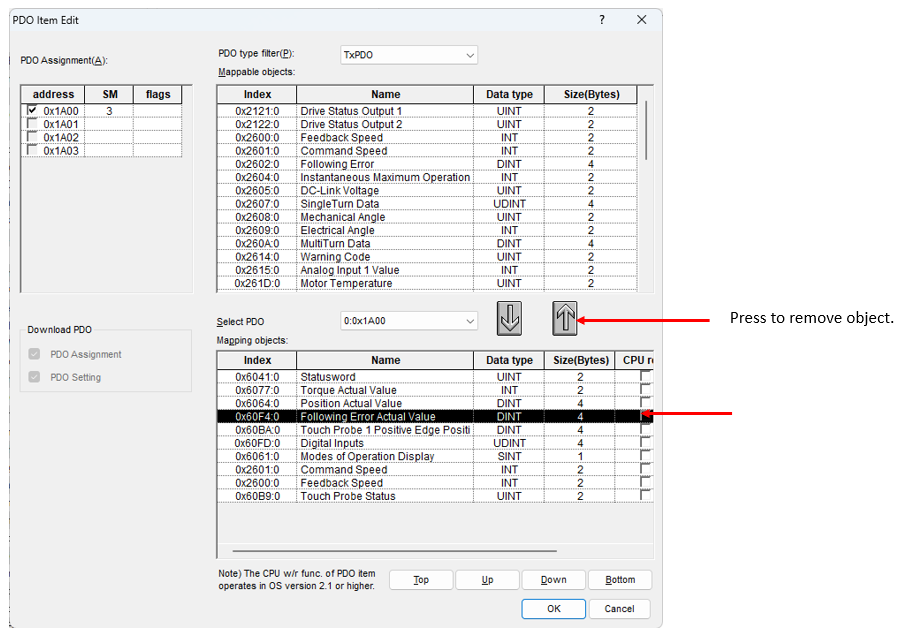
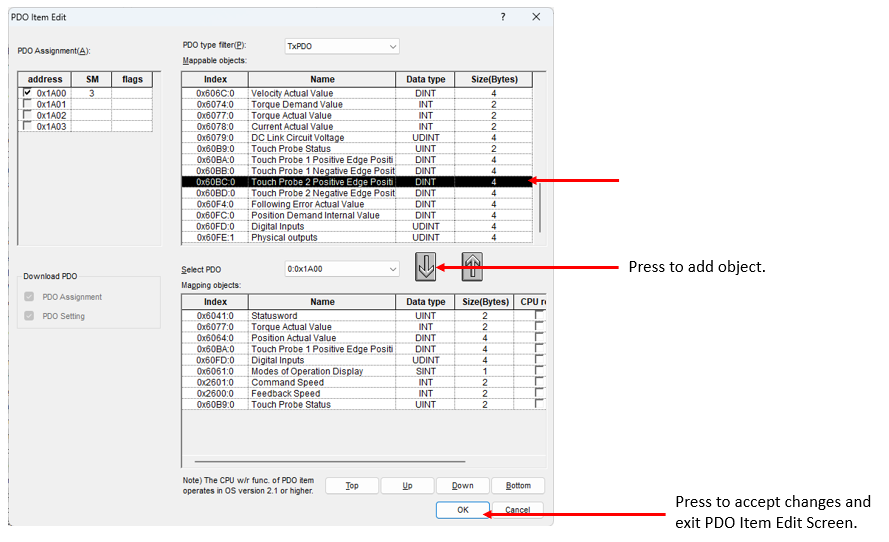
In the PDO Item Edit screen, select an item in the mapping objects to remove. This example shows Following Error Actual Value. Press the Up arrow to remove the selected object.
|
| 4 |
In the Mappable objects window, find the appropriate Touch Probe 2 object to add. This example shows Touch Probe 2 Positive Edge Position. Press the Down arrow to add the object to the mapping objects sections.
|
| 5 | Save the XG-PM project and connect to the XEM CPU. Write the project to the XEM CPU. |
LP621

