Connecting XEM CPU to StrideLinx VPN Router
This topic covers the steps required to connect a XEM CPU to a StrideLinx VPN Router.
Hardware Used for Example
-
XEM-DN32HP CPU (other XEM-DxxxH2 or XEM-DxxxHP should work the same)
-
StrideLinx VPN router model number SE-SL3011 (Other similar models should work the same)
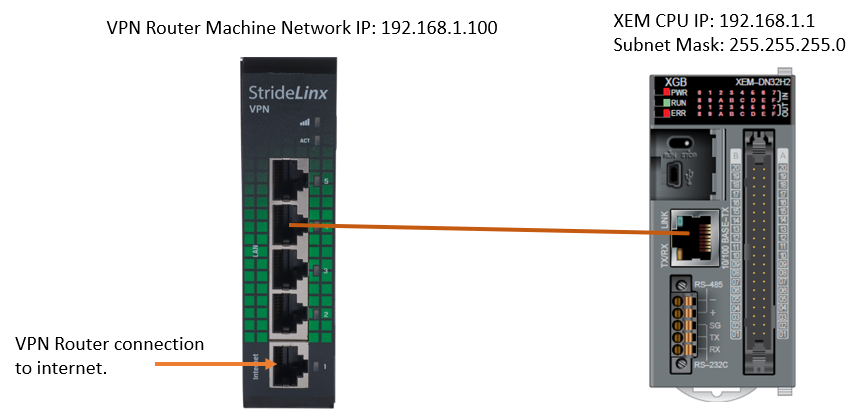
Note: Private IP address range was used for this example. Other IP address ranges are valid if they follow recommendations for getting modules to communicate correctly.
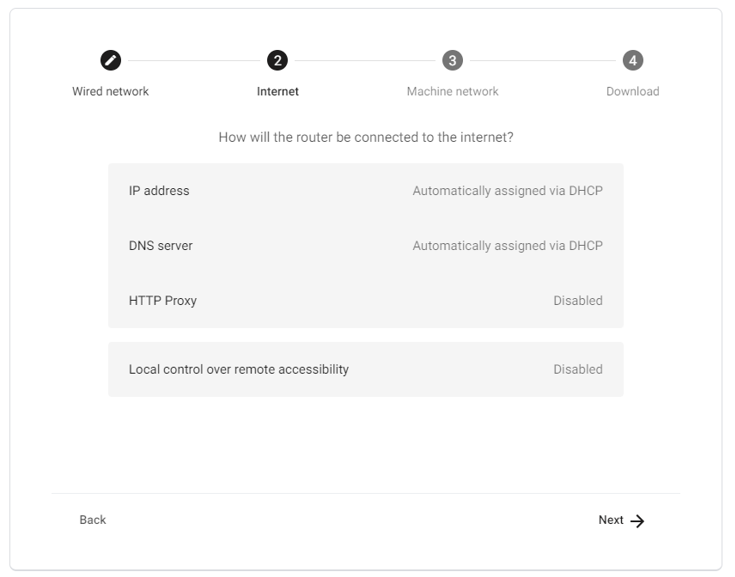
StrideLinx Portal is used to create a configuration file for the VPN router. These are the internet settings used for this example.
Access the StrideLinx portal here: https://www.stridelinx.com/portal
-
The Machine Network Settings are used for ports 2 thru 5 on the VPN router.
-
These connection points are used to connect to the XEM CPU and other devices on the machine network.
-
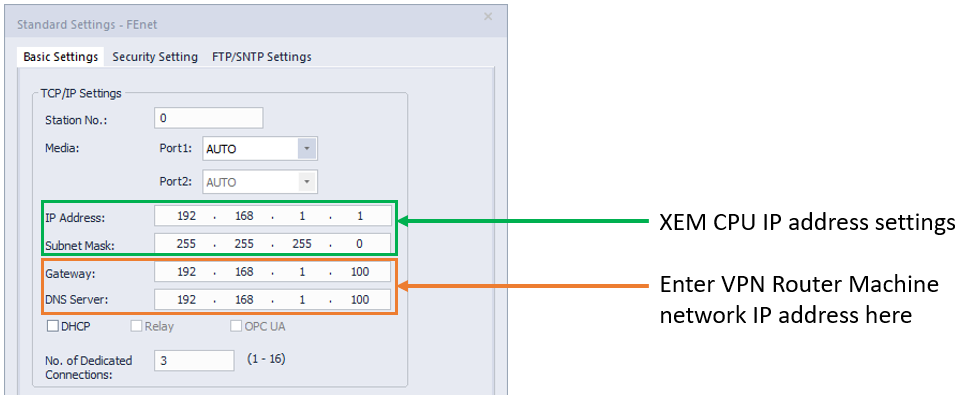
The IP address range must match the XEM CPU.
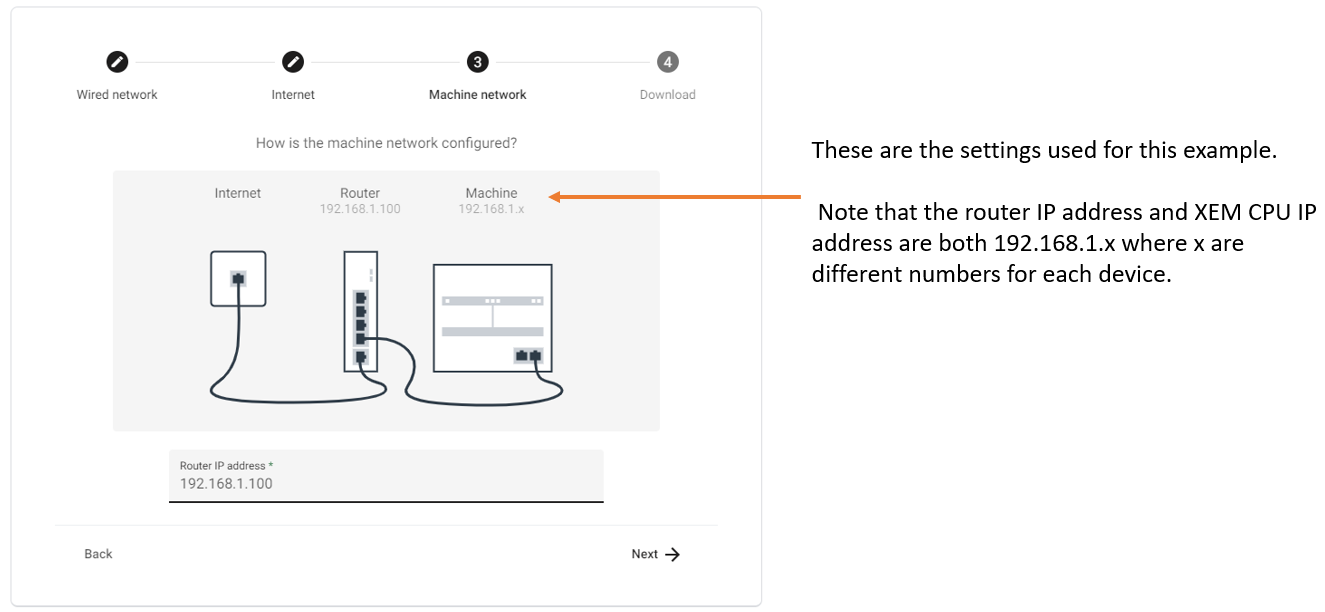
The XEM CPU IP address is being set to 192.168.1.1 with a Subnet mask of 255.255.255.0.
| Step | Action |
|---|---|
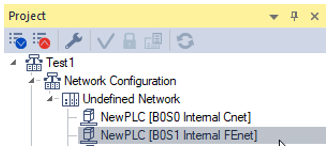
| 1 | Open XG5000 project. |
| 2 |
Open the B0S1 Internal FEnet settings.
|
| 3 |
Enter network settings in the Basic Settings tab.
|
A StrideLinx Portal account must already have been created with the VPN router successfully configured. Please see help for the chosen router model number.
| Step | Action |
|---|---|
| 1 |
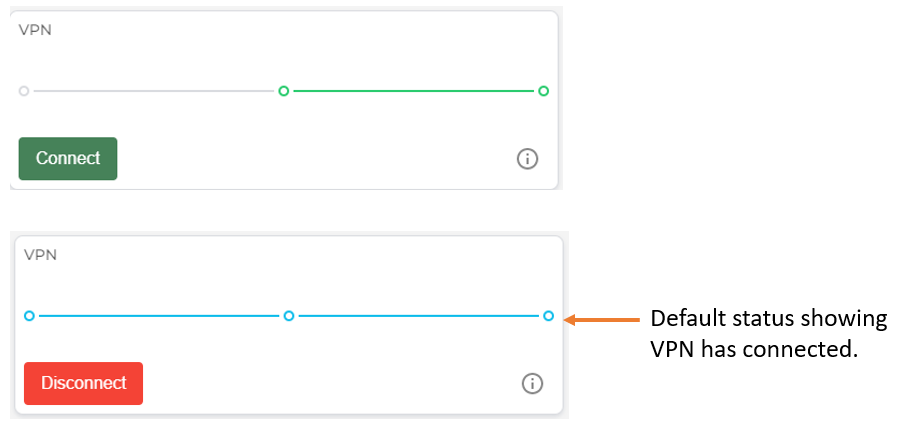
Log in to StrideLinx Portal. Press Connect button to start VPN connection.
|
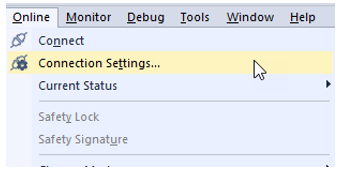
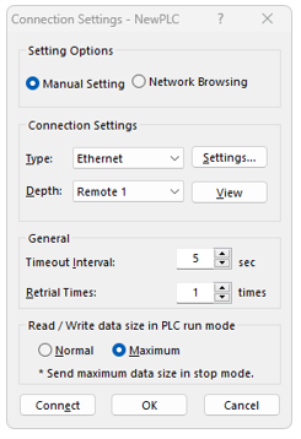
| 2 | Select Online menu è Connection Settings…
|
| 3 |
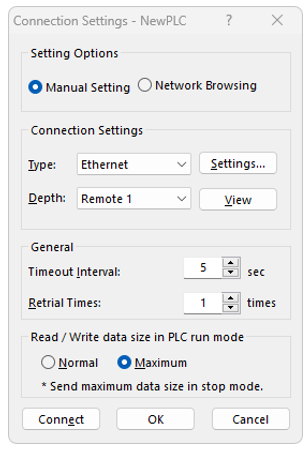
Select Ethernet as type. Press the Settings... button to enter IP address information.
|
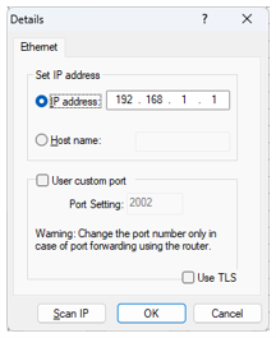
| 4 |
Enter the IP address of 192.168.1.1 in the IP address field. Press OK when done.
|
| 5 |
Press Connect button to connect to XEM CPU.
|
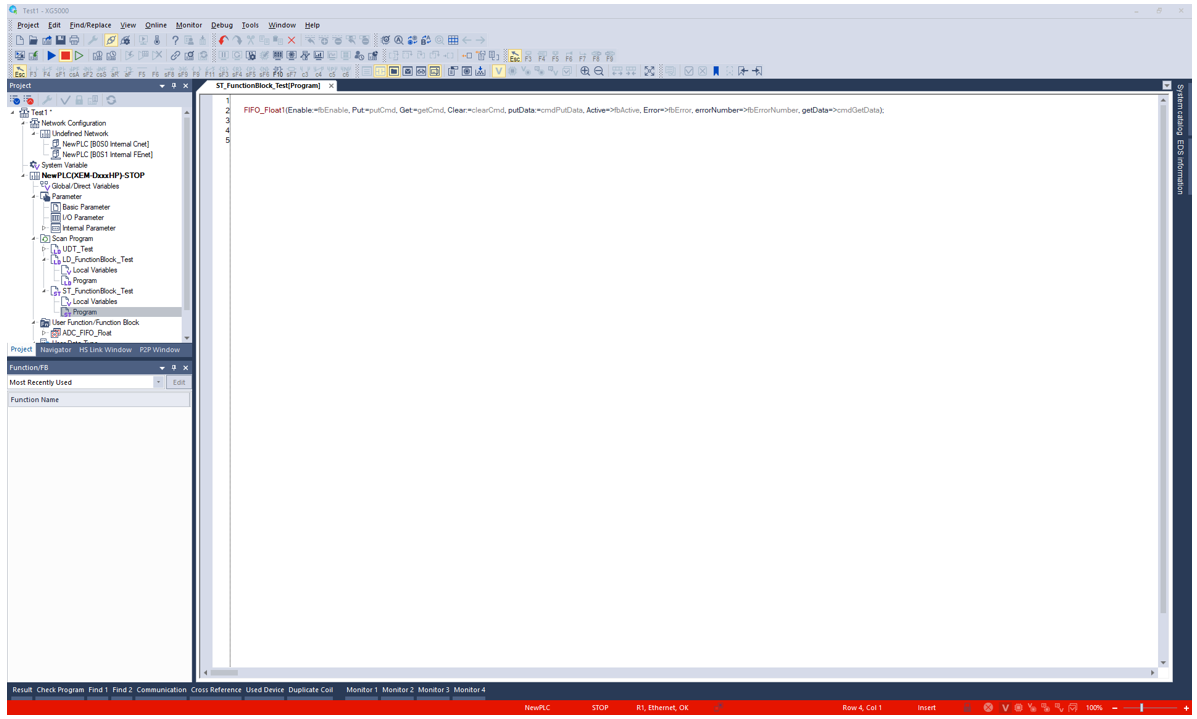
| 6 |
XG5000 should display connection status at the bottom part of the software. Example below:
|
LP212