Connect to SureServo2 with EtherNet/IP Implicit
The XEM CPU with an XBL-EIPT module can connect to a SureServo2 drive equipped with SV2-CM-ENETIP module.
-
These examples will be using the ADC created function block in the LS_SureServo2_EIP_FB.zip file (Link to file).
-
The function blocks allows speed control, position table indexing control and digital input command control.
-
Drive status is also available. This includes speed, position, and digital input status.
Note: Use the SS2 ADC Sample program Node1 10-10-112-11.par file to setup drive parameters for these examples. Other parameters should be configured for your application.
| Step | Action |
|---|---|
| 1 |
Open SureServo2 Configuration program. This example shows version V0.0.4.4.
|
| 2 |
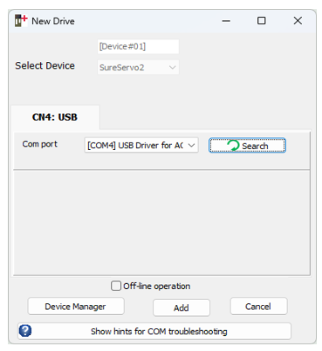
Connect to Drive over USB.
|
| 3 |
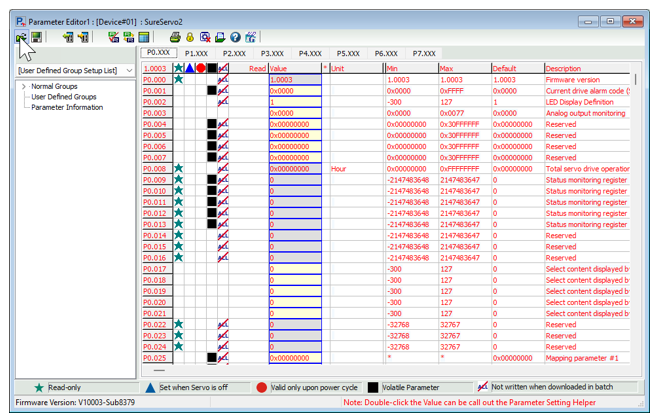
Open the Parameter Editor. Press the Open Parameter File button.
|
| 4 |
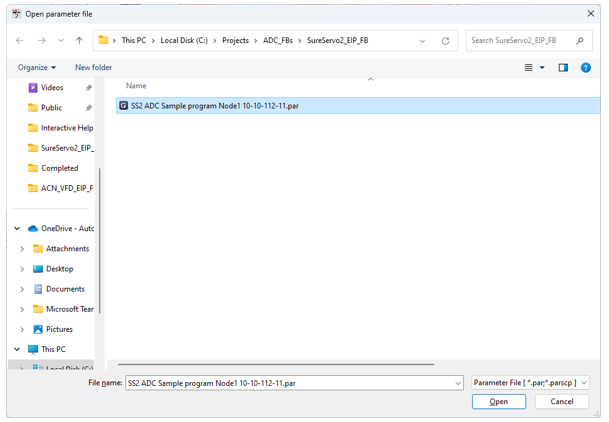
Choose the SS2 ADC Sample program Node1 10-10-112-11.par file.
|
| 5 |
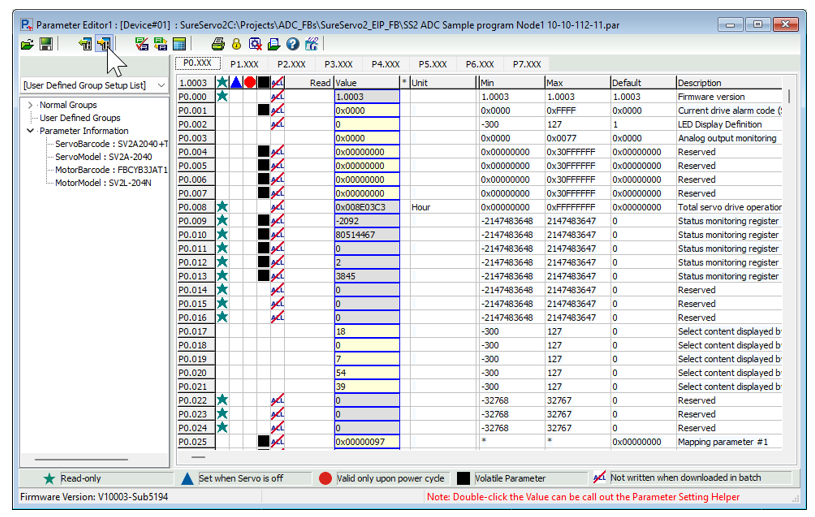
Press the Write Parameters button to download the parameters to the SureServo2. Make sure other configuration parameters are set to appropriate values for your application.
|
| Step | Action |
|---|---|
| 1 |
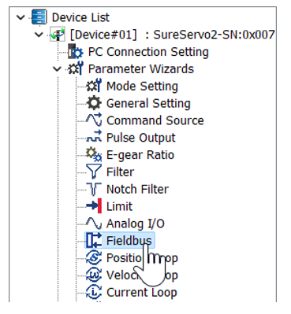
In SureServo2 configuration software, Select the Fieldbus option in the Device List.
|
| 2 |
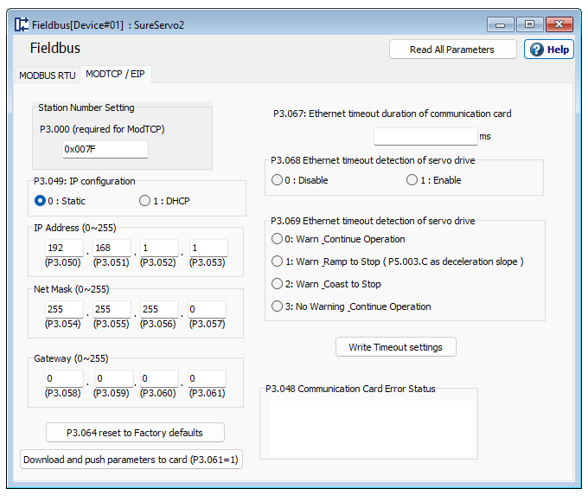
Select the MODTCP / EIP tab on the Fieldbus pop up screen.
|
| 3 |
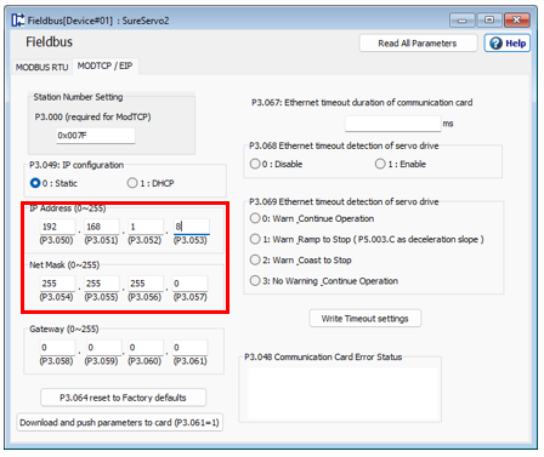
Enter the IP address of the SureServo2 drive. Make sure the IP address is in the same network range as the XBL-EIPT module and unique to that network. This example shows an IP address of 192.168.1.8 and a Sub-net mask of 255.255.255.0.
|
| 4 |
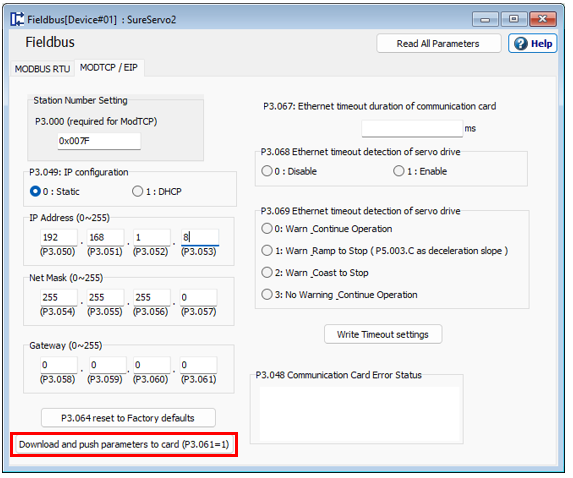
Press the Download and push parameters to card button to save the IP address to the SV2-CM-ENETIP module.
|
| 5 |
Power cycle the SureServo2 drive to use the newly set IP address. |
Note: Use the SS2 Monitoring and Mapping Parameters 05122021.eds file for this example.
| Step | Action |
|---|---|
| 1 |
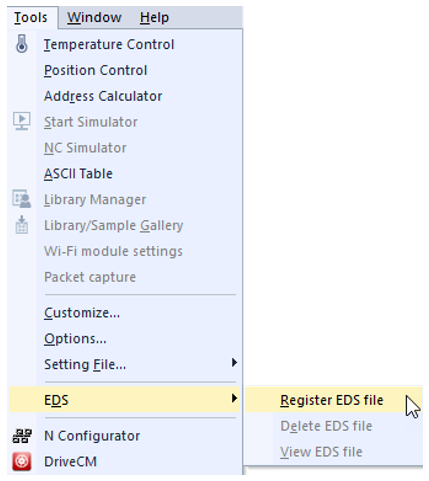
Open XG5000. Select Register EDS file from the Tools è EDS menu.
|
| 2 |
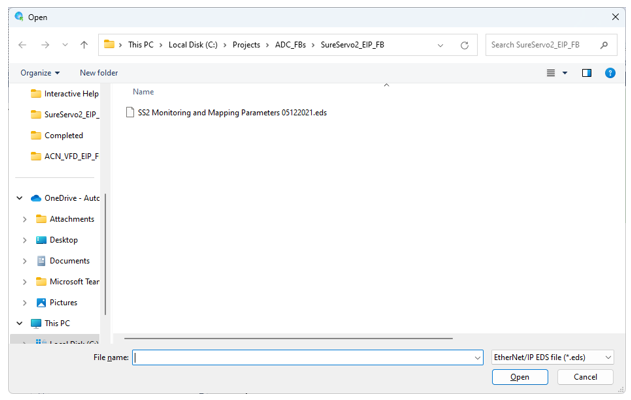
Select the SS2 Monitoring and Mapping Parameters 05122021.eds file. Press Open to register it.
|
| 3 |
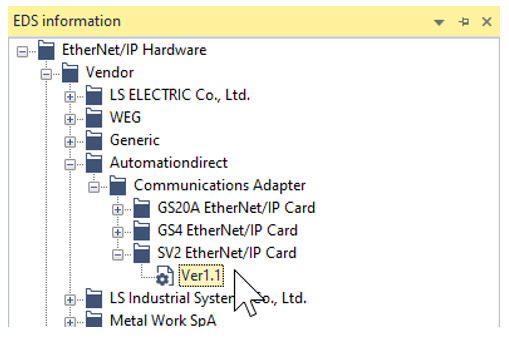
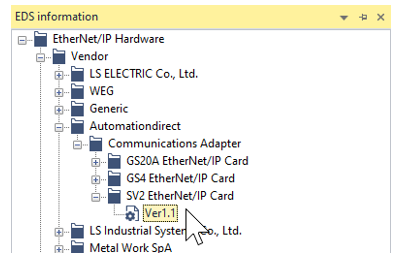
Open the EDS information window from the View menu and make sure it was imported successfully. It should show up as SV2 EtherNet/IP Card Ver1.1.
|
Note: Use the SS2 Monitoring and Mapping Parameters 05122021.eds file for this example.
| Step | Action |
|---|---|
| 1 |
In the XG5000 project, open the I/O parameter screen. Add your XBL-EIPT to the slot it is in on the PLC rack. Press Apply.
|
| 2 |
Right-click on the XBL-EIPT card under the Network Configuration portion of the Project screen. Select Add Item è P2P Communication.
|
| 3 |
Select P2P 03 if it isn’t being used. Select P2P 04 if 03 is used.
|
| 4 |
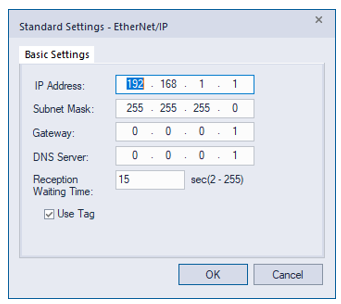
Configure the IP address for the XBL-EIPT. Make sure it is on the same network as the SureServo2. Make sure to check Use Tag to allow variables to be used in EtherNet/IP setup.
|
| 5 |
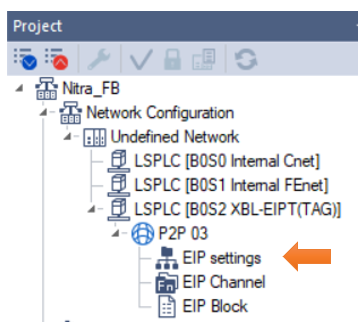
Open EIP settings under P2P 03. Drag the SV2 EtherNet/IP Card V1.1 file from EDS information screen.
|
| 6 |
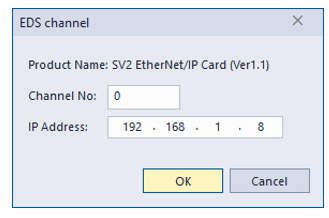
Setup Channel No. and IP Address for the SureServo2. Press OK when done.
|
| 7 |
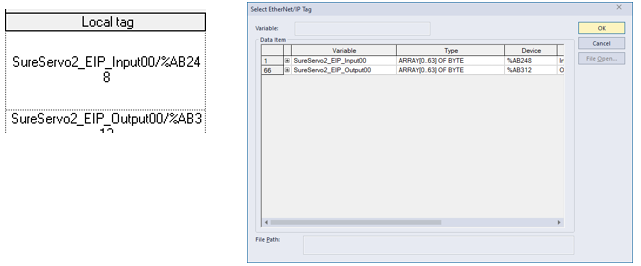
Open Global/Direct Variables. Create variables for the EtherNet/IP input and output data. Check EIP/OPC UA column for the variables. This example uses SureServo2_EIP_Input00 and SureServo2_EIP_Output00 as variable names.
|
| 8 |
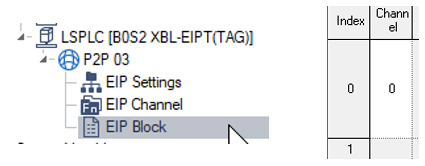
Open EIP Block under P2P 03. Enter the SureServo2 Channel number in the first column. It is 0 from our example.
|
| 9 |
Choose 0.Exclusive Owner as the I/O type. Choose Point to Point as Connection Type.
|
| 10 |
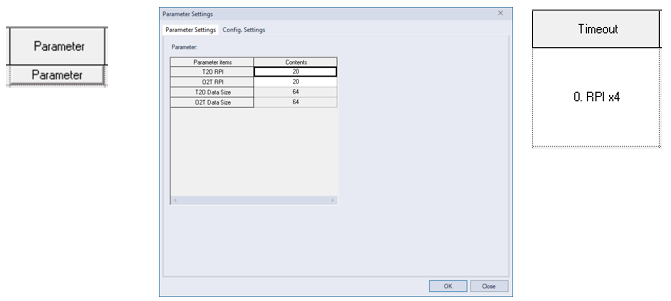
Click the Parameter button. Click OK button in the Parameter Settings window. Choose RPI x4 in Timeout.
|
| 11 |
Double-click the cell in the column Local tag to open the Select EtherNet/IP Tag window. Select SureServo2_EIP_Input00 in the upper Local tag. Select SureServo2_EIP _Output00 in the lower Local tag.
|
| 12 | Perform a Check program and Write the project to the XEM CPU. |
LP206

