Forcing I/O with XG5000
XG5000 allows the user to force I/O for machine testing.
-
Caution must be used when forcing I/O since the physical outputs will turn on the device connected.
-
Forced I/O works in both Run and Stop modes.
-
XG5000 must be online with CPU to modify Forced I/O points.
-
Forced I/O will over-write status of I/O in any programming code. This allows the user to test I/O independent of the I/O points status in the running program.
-
Forcing Inputs will not change the status of the LED light on the module.
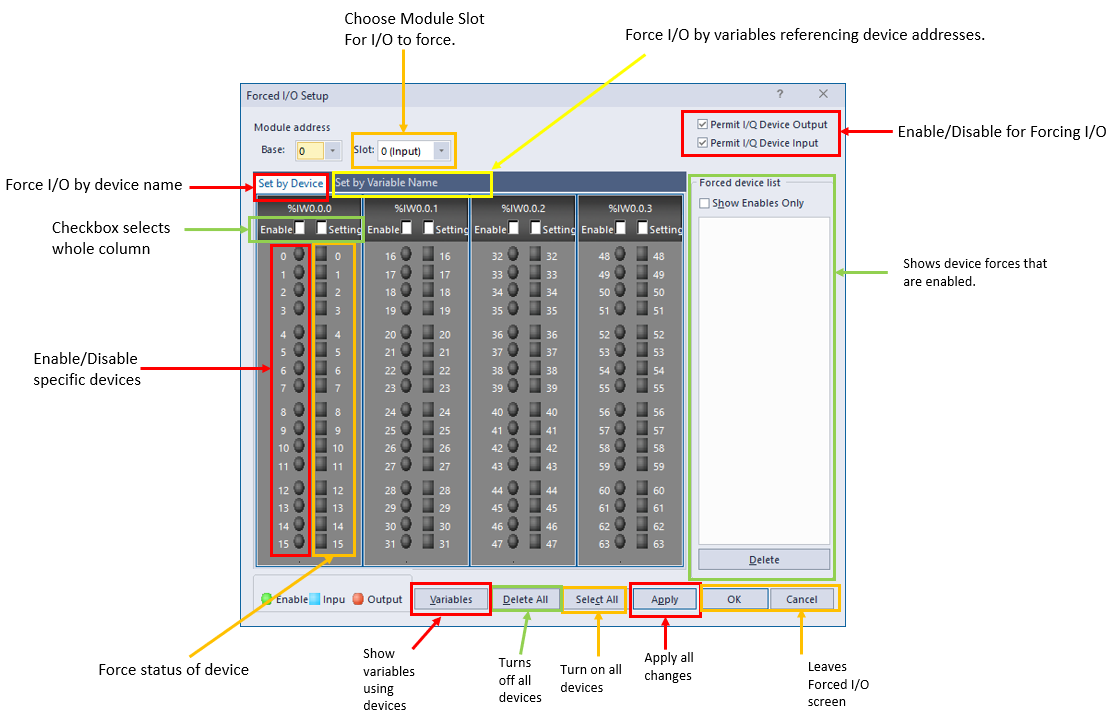
Forced I/O is found in the Online menu in XG5000.
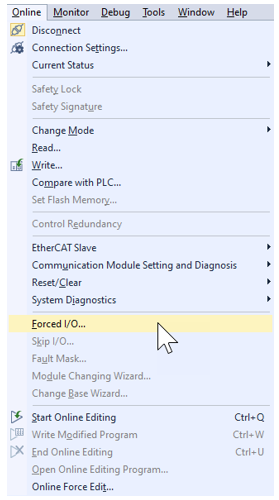
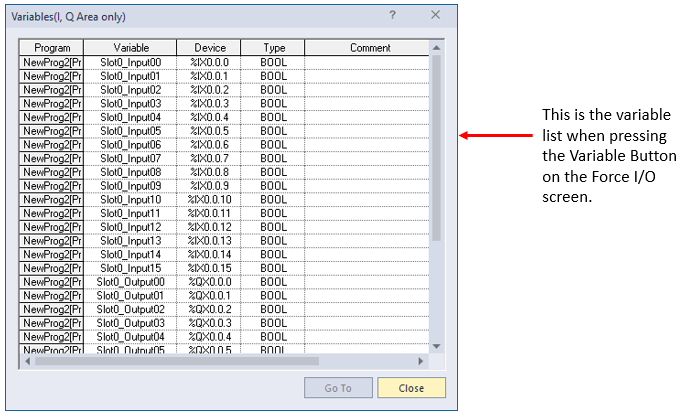
Forced I/O Variable List
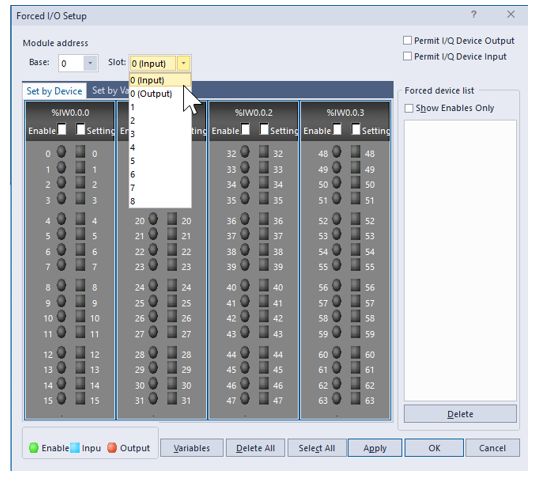
Some modules and built-in I/O will have separate slots for Inputs and Outputs even though they have same slot number. Changing the Slot in the Forced I/O will allow control of the module in the selected Slot number.
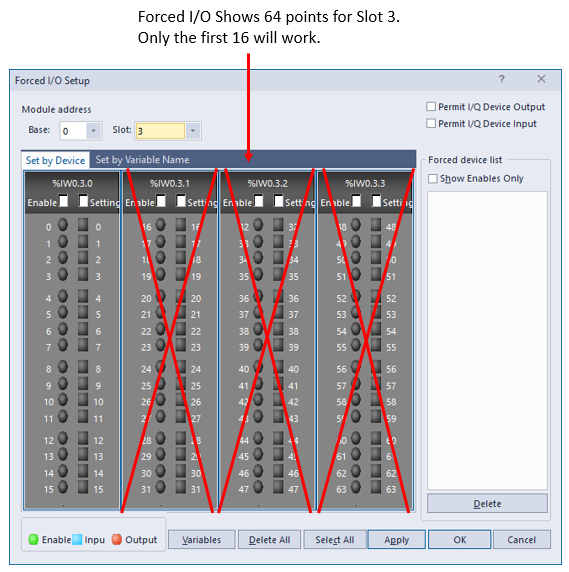
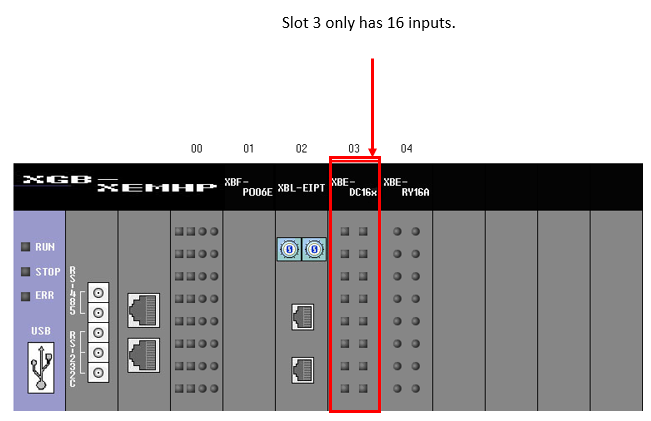
XG5000 will always display 64 I/O points on the Forced I/O screen. Only the correct number for the selected Slot will work.
| Step | Action |
|---|---|
| 1 |
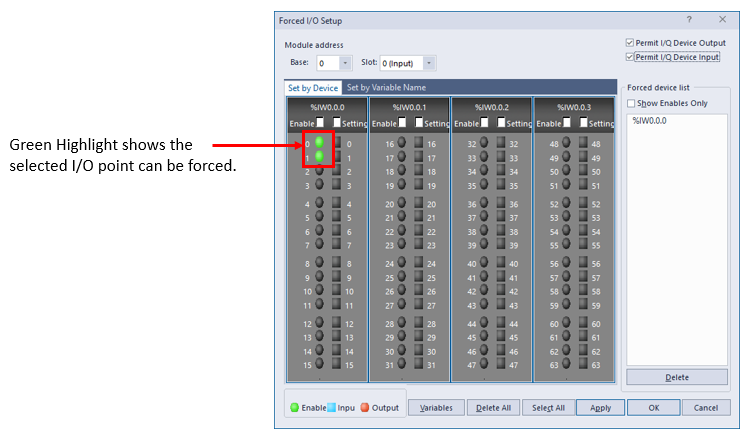
Permit the I/Q Device Output to enable forcing outputs. Permit the I/Q Device Input to enable forcing inputs.
|
| 2 |
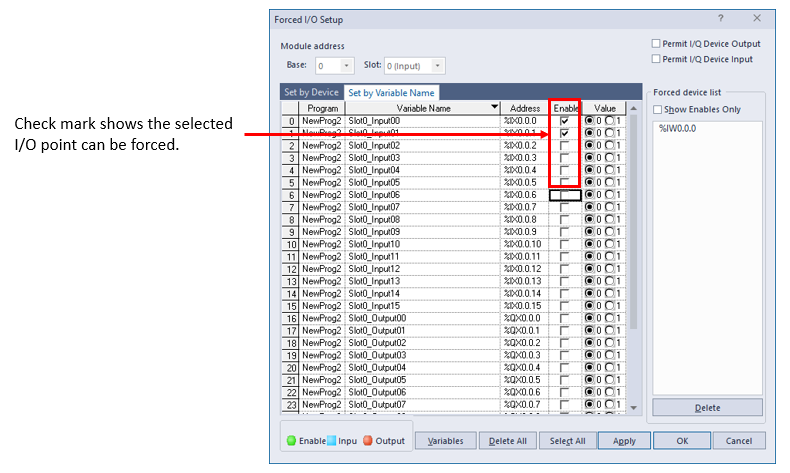
Enable the I/O Points to force.
|
| 3 |
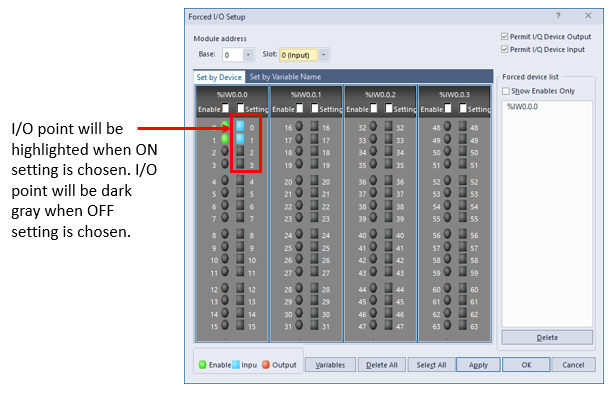
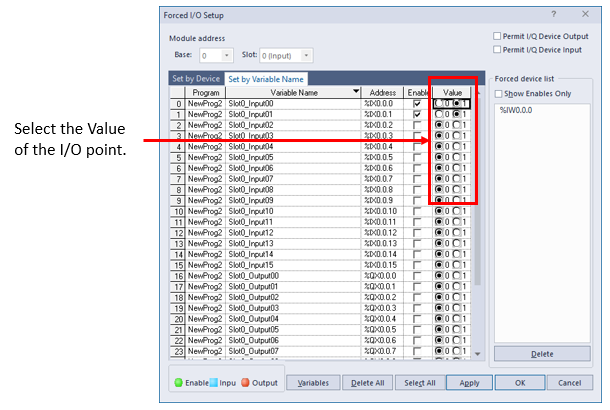
Set the status I/O point in the Setting column.
|
| 4 |
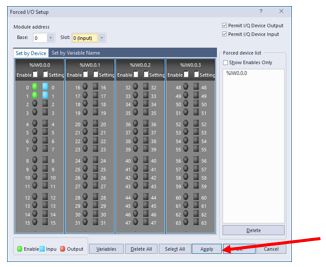
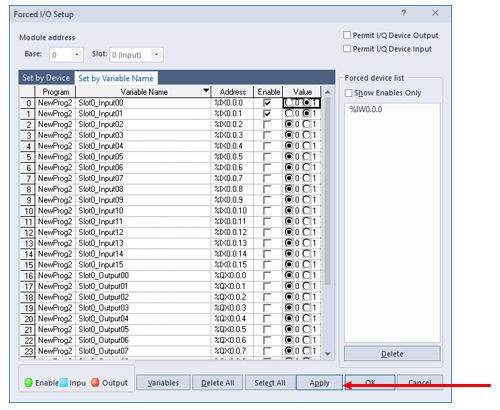
Press Apply to perform all changes made.
|
| Step | Action |
|---|---|
| 1 |
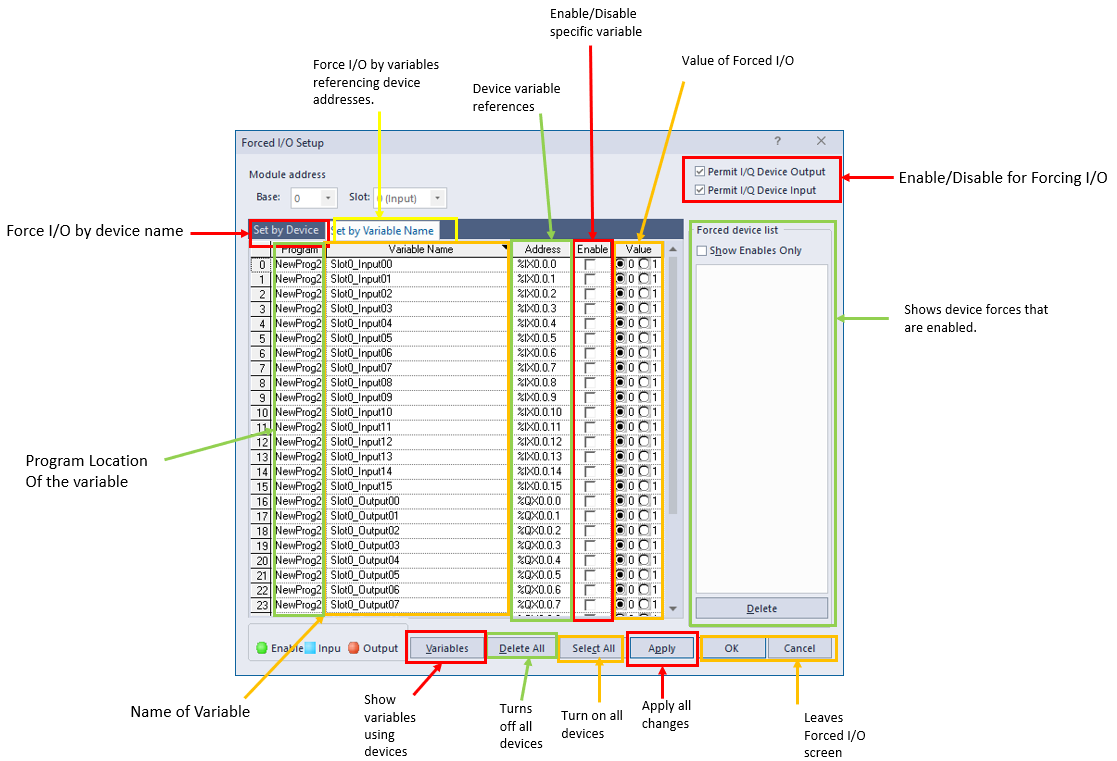
Permit the I/Q Device Output to enable forcing outputs. Permit the I/Q Device Input to enable forcing inputs.
|
| 2 |
Enable the I/O Points to force.
|
| 3 |
Set the status I/O point in the Value column.
|
| 4 |
Press Apply to perform all changes made.
|
LP112

