Event Manager Database — Export |
Topic: CM499 |
The Export Event Manager Database enables you to Export an Event Manager Database as an Excel™.xls file.
- From the Main menu, click File, select Export and then Event Manager Database.
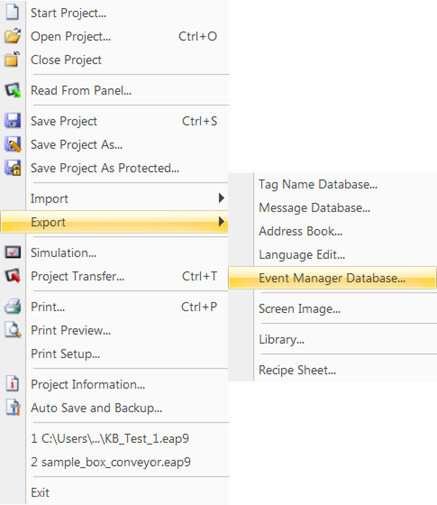
- The Export Event Manager Database window opens.
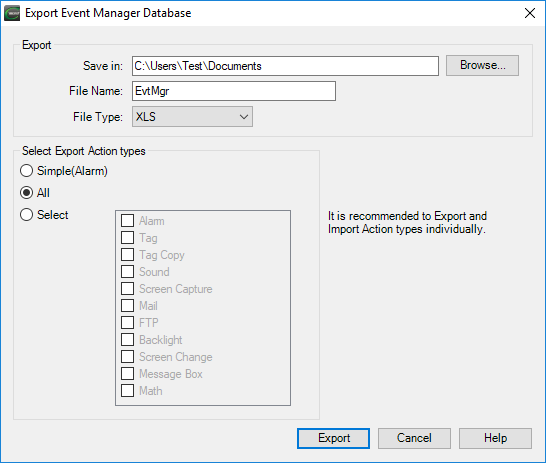
- Complete the fields on the screen using the information in the table below:
| Event Manager Export | |
|---|---|
| Field | Description |
| Save In | Enter the location where you would like to save the exported.xls file. You may also use the Browse button to open the File/Folder Browse window and choose a location. |
| File Name | Enter the name you would like to give to this Event Manager Database file. |
| File Type | The only file type available is the.xls Microsoft Windows Excel™ spreadsheet format. |
| Select Import Action | Simple (Alarm): Selecting Simple (Alarm) only exports the Alarm Actions in a simple format to expedite the export and import of large numbers of alarms. Using the Export and Import functions, you can quickly add and edit alarms using Microsoft Excel or equivalent spreadsheet software. |
| All: Selecting All exports all Event Manager actions. This file format is quite complicated because of the many different actions and options in each action. Best practice is export each action by selecting them individually with the Select option below. | |
| Select: To limit the actions that are not exported, choose Select then choose the type of action(s) to export by selecting the corresponding check box for each action. Best practice is export and import each action. | |
| Create Sample Template | Click this button to create an exported Event Manager Database file that can be used as a template. The Sample Template consists of the first ten events from the current project. These events provide an example of the correct format for events to ensure that new events created outside the project using Excel™ will import back into a project correctly. |
- When you are finished, click on the Export button shown in the figure above to begin the export process. When the export process is complete, the Export Completed window as shown below opens. Click the OK button and the application is ready to use

Editing Exported Data
You can export many fields, edit them, and then import them. You can add events by adding them in the exported file and then importing it. Take care when editing the exported file. Many of the fields require a strict syntax for Time, Data, Embedded Data, File Names, etc. Edit these fields in the Event Manager Database to ensure proper syntax is applied and no errors occur when Importing.
Additional rows must be inserted ABOVE the existing row identified as End of Record (DO NOT MODIFY THIS ROW. Do not copy and paste this row.
Example Event Manager Database with One Alarm Event Defined

- Use the MSExcel Insert command to create additional rows for new Events.
- Select the row ABOVE the row identified as End of Record (DO NOT MODIFY THIS ROW) to add rows as needed.
|
|
Note: Tag Names entered in the spreadsheet must already exist in the C-more Project or they will not import correctly. |
