Omron Host Link Module Protocol Setup |
Topic: CM336 |
The following information applies only to the Omron Host Link Module compatible with C-more Panels.
The C-more panel is the master by default.
C-more Protocol Manager Settings
- Do one of the following:
- Click the Protocol Manager button on the Home tab
— or — - Click the Protocol Manager button on the Setup tab
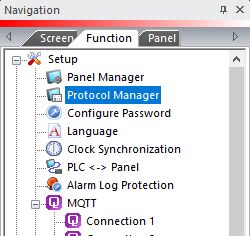
— or — - from the Navigation window, click the Function tab, click Setup and then select Protocol Manager.
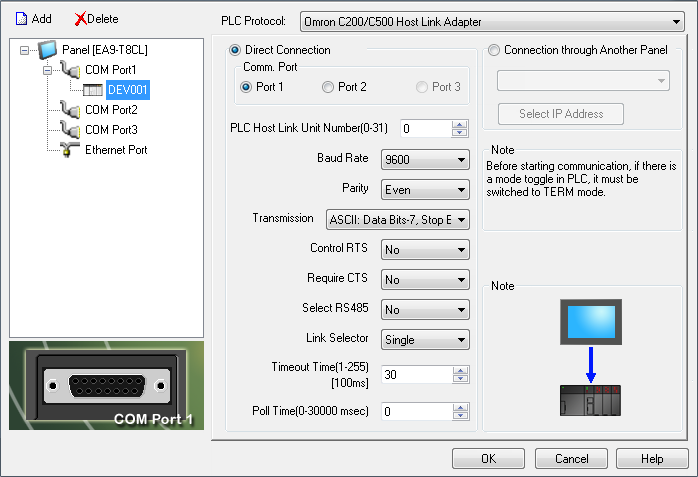
- From the Protocol Manager window, click the Device name on the tree to the left.
- The Device Setup window opens.
-
In the PLC Protocol
field, click on the down arrow
 and select
Omron C200/C500 Host
Link Adapter.
and select
Omron C200/C500 Host
Link Adapter.
When you select a different PLC Protocol than the one currently in use, the warning Message shown below appears.

- Click Yes to accept.
All of the following settings must be set the same as the settings in Protocol Manager in the C-more Programming Software. The C-more Protocol Manager is shown above with the Omron C200/C500 Host Link Adapter driver selected.
Set Up Omron Host Link Adapter Switches
Switches 1 and 2
Identify the Unit number of the module. The Unit number can be set between 0 and 31. Each Host Link Module Unit number on a single network must be unique. These settings should be the same as the settings in Protocol Manager Setup in the C-more Programming Software.
Switch 3
SW3 above sets the Baud Rate. Use the Table below as reference.

Switch 4
SW4 sets the command level, parity and transmission code. The command level specifies the security level of the port. The customer should refer to the Omron manual for more details. Any of the allowed settings will work with the C-more panel. The figure below shows a Table that can be used as reference to set the Switch 4 (SW4) parameters.
![]()
Dipswitch
The Dipswitch selector on the back of the Host Link Module specifies the Link Type and the 5 volt supply. Switches 1 and 2 are not used. Switch 3, when OFF, specifies this as a single unit network. Switch 3, when ON, specifies this as a multiple unit network. Switch 4 specifies a 5 volt supply. Leave OFF unless specified differently from the manufacturer. The CTS selector switch should be ON (in the down position).

Omron CPU Connection
- From the Main GUI screen, on the left side explorer bar select Settings.
|
|
Note: This is the correct protocol to communicate with CQM1. You must select multiple in the Protocol Manager Link Selector even if the network has a single CQM1. If the PLC serial number indicates manufacture in June 1995 or earlier, the #5 DIP switch must be OFF and CQM1 baud rate settings must be changed to match the C-more baud rate setting. You must use a cable constructed according to the User Constructed Omron FINS cable diagram in the C-more Hardware User Manual. |
- This will display the PLC Settings screen.

- On the PLC Settings screen, choose the Host Link Port tab.
- Under Communication Settings, select the Custom option
- In the Baud field, match the Baud Rate with the Panel Manager setting in C-more.
- In the Format field, click the drop-down arrow and match Parity and Transmission in the Panel Manager setup in C-more.If a Format with 7 Data bits and 2 Stop bits is selected in the PLC Settings inside Omron software, then Transmission needs to be set to ASCII in the Panel Manager of C-more. If a Format with 8 Data bits and 1 Stop bit is selected in the PLC Settings inside Omron software, then Transmission needs to be set to JIS in the Panel Manager of C-more.
- In the Mode field, click the drop-down list and select Host Link. In the Unit Number field, click the drop-down arrow until it matches the PLC Host Link Unit Number in the Panel Manager in C-more.
- With the CPU connection, the Panel Manager field Link Selector MUST be set to Multiple in C-more. There is no way to select Single for this field on the Omron CPU port setup.
- In addition, note that Dipswitch 5 on the CPU will set the CPU 9 pin serial port to fixed settings. In order for the changes made to the Host Link Port to work, that switch must be turned Off.
|
|
Note: Power cycle the Omron PLC after changing port settings. |
