Entivity (Think & Do) Modbus TCP/IP Ethernet (H2-WinPLC) |
Topic: CM330 |
The following information applies for the Entivity (Think & Do) Ethernet H2WinPLC (Modbus) PLC compatible with C-more Panels. This topic covers Entivity TCP Setup. Start with the C-more Panel Setup instructions below.
The C-more panel is the master by default.
|
|
Note: Tags for the Think & Do drivers cannot be manually created in the C-more Software. The Map File must be imported into the C-more Project. |
C-more Protocol Manager SettingsDo one of the following:Click the Protocol Manager button on the Home tab
— or —Click the Protocol Manager button on the Setup tab
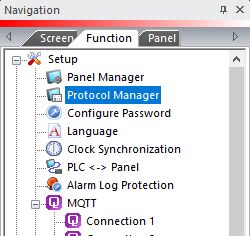
— or — from the Navigation window, click the Function tab, click Setup and then select Protocol Manager.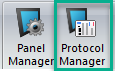
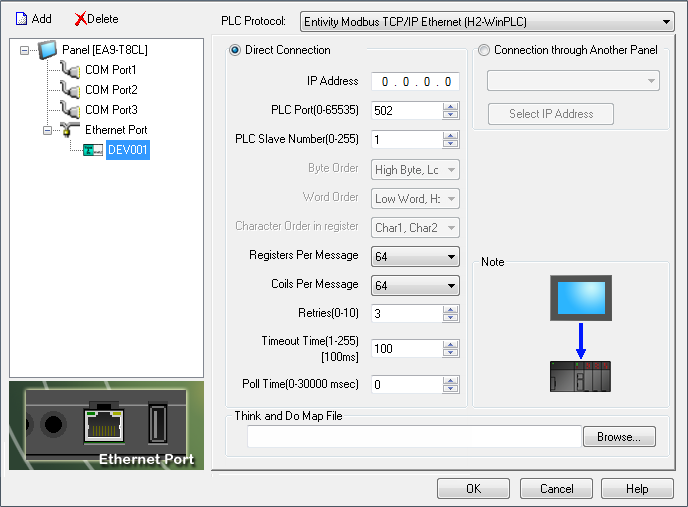
 From the Protocol Manager window, click the Device name on the tree to the left.The Device Setup window opens.
- From the PLC Protocol
field, click on the down arrow
 and select
Entivity Modbus TCP/IP
Ethernet (H2-WinPLC).
and select
Entivity Modbus TCP/IP
Ethernet (H2-WinPLC).
|
|
Note: You cannot manually create tags for the Think & Do drivers in the C-more Software. You must import the Map File. When you complete a Build Project and Save in the Think & DoSoftware, Think & Do creates a folder with the Project Name (in the ThinkNDo\Projects folder). The Map File is in folder ThinkNDo\Projects\ProjectName\RTE Windows CE - Think & Do WinPLC. |
When you select a different PLC Protocol than the one currently in use, the warning Message shown below appears.

- Click Yes to accept.
All of the following settings must match the settings in Panel Manager.
The example above shows Entivity Modbus TCP/IP Ethernet (H2-WinPLC).
To continue with the Setup process, continue with your setup below:
This Setup information is for Entivity Ethernet H2WinPLC (Modbus TCP/IP Ethernet) using LIVE software. See Studio for corresponding setup information.
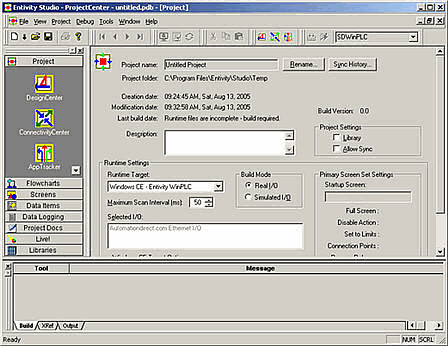
- In the Choose Runtime Target window of the Entivity Live program shown below, choose the Windows CE - Think & Do WinPLC from the drop-down list.
- Click OK.

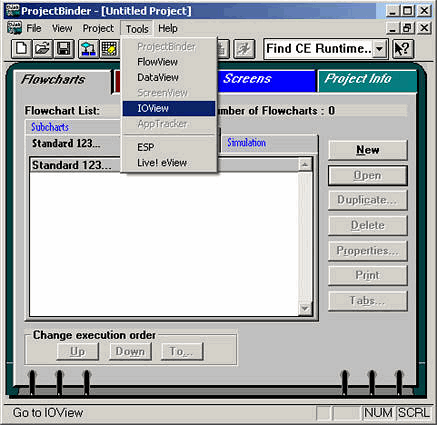
- The Project Binder window shown below opens.
- Click Tools in the Main Menu.
- Select IOView from the Tools drop-down menu as shown below.
- The I/O View window shown below opens.
- Click on Backplane I/O Driver in the upper left window.
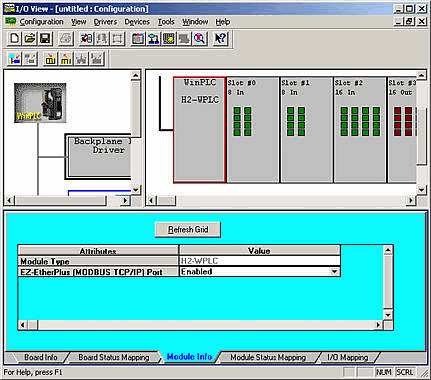
- Click on the WINPLC in the upper right window.
- Choose Module Info tab located on the bottom portion of the window.
- Choose Enabled for the EZ-EtherPlus (MODBUS TCP/IP) Port field.
Setup Entivity WinPLC RTU PLC Using Studio
This setup information is for Entivity Ethernet H2WinPLC (Modbus TCP/IP Ethernet) using Studio. See LIVE for corresponding setup information.
- Choose the Connectivity Center icon located in the Project Tab of the Explorer Window.
- The Connectivity Center window shown below opens.
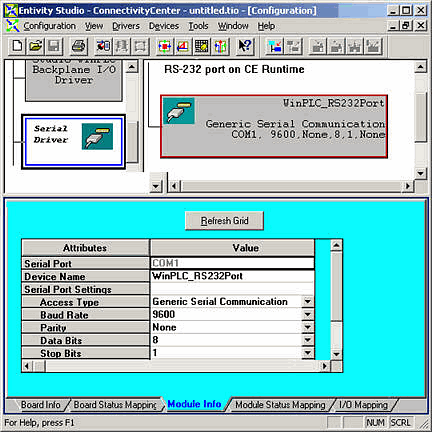
- Choose Serial Driver from the upper left window. You may have to scroll down to see it, depending upon the resolution of your PC.
- Click on the WINPLC RS232 Port window on the upper right window.
- Click on Module Info at the bottom to Set the serial port.
- Change the Access Type to Modbus Slave.
- Match the Baud Rate and Parity to your PLC setup in the C-more Panel Manager. (See Caution below).
- Choose PLC Slave Node Number 1 in the C-more Panel Manager.

|
Caution: Record your PLC settings as you change them so that you can reconnect using the same settings later if needed. |
