AutomationDirect DirectLogic Ethernet to H0/H2/H4 ECOM Modules Setup |
Topic: CM329 |
Use DirectLOGIC Ethernet protocol with:
- Direct LOGIC PLC DL05 (all models)
- DL06 (all models)
- D2-240, D2-250, D2-250-1, D2-260, D3-350, D4-430, D4-440 and D4-450 with the addition of an Ethernet Communications Module (ECOM), part numbers H0-ECOM/ECOM100, H2-ECOM/ECOM100 or H4-ECOM/ECOM100
The C-more panel is the master by default.
|
|
Note: It's important that the subnet for the C-more panel, IP address, and PC be the same in order for the devices to communicate properly. |
|
|
Note: The PLC Mode Switch must be in (TERM) position in order for the C-more Panel to communicate with the PLC. Refer to the specific PLC user manual for further details. These manuals are available online and for download at www.automationdirect.com. |
These PLC support ladder program multilevel Password protection.
This allows password protection without locking the communication port to an operator interface.
To invoke Multilevel Password, create a password with an uppercase 'A" followed by seven numeric characters (e.g., A1234567). Refer to the specific PLC user manual for further details. These manuals are available online and for download at www.automationdirect.com.
C-more Protocol Manager Settings
- Do one of the following:
- Click the Protocol Manager button on the Home tab
— or — - Click the Protocol Manager button on the Setup tab
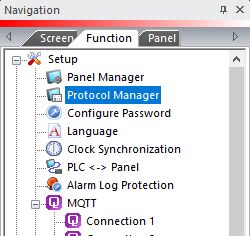
— or — - from the Navigation window, click the Function tab, click Setup and then select Protocol Manager.
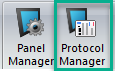
- From the Protocol Manager window, click the Device name on the tree to the left.
- The Device Setup window opens.
- From the PLC Protocol field, click on the down arrow
 and select AutomationDirect ECOM Ethernet (DL05/06/205/405).

|
|
Note: We will only be able to see the IP Address of the ECOM module if it has been assigned the same Subnet as the Network Interface Card (NIC) that is setup in the PC and they are networked together. |
When you select a different PLC Protocol than the one currently in use, the warning Message shown below appears.

- Click Yes to accept.
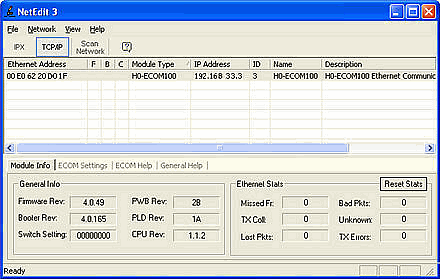
The following shows the Node List dialog box with the ECOM module highlighted for the PLC ECOM module.
- Click on the module you want to use to highlight it.
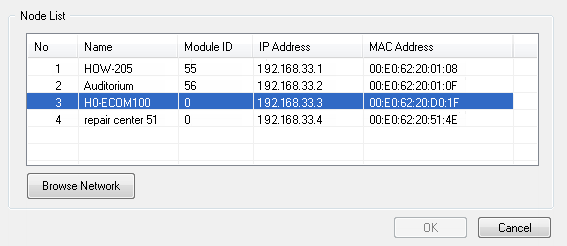
- The Module Name and IP Address are default when you click the Node List dialog box OK button. The result is shown below.
- Other parameters show default settings.

|
|
Note: The Module Name parameter imports the name assigned for the ECOM module, but the Module Name does not have to be the same as the assigned for the ECOM module. You can create any name that you prefer. |
- If the ECOM is not connected and you know the IP Address assigned to the ECOM module, then you can enter that IP Address into the parameter box manually.
- Before you click the OK button in the Panel Manager dialog box, enter a name in the Module Name box.
- The name does not have to be the same as the module name assigned to the ECOM module, although it helps track various devices in your network.
- In the example, we have selected an IP Address of 192.168.33.3, etc. It is important to make sure that the protocol in the Panel Manager matches the setup of the PLC ECOM module which follows.
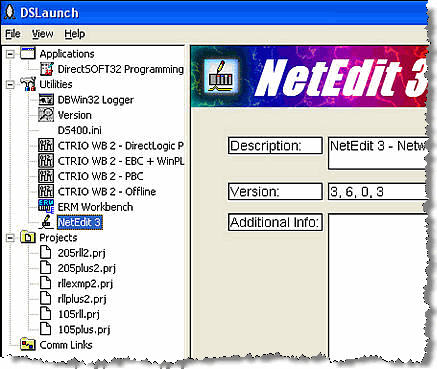
- Select the NetEdit 3 utility form the Main Menu tree.
- Select the ECOM module that we will be using with our C-more touch panel by double clicking on it.
- The General Settings dialog box will pop up. Set your Module ID Number, Name, IP Address and Subnet Mask here.
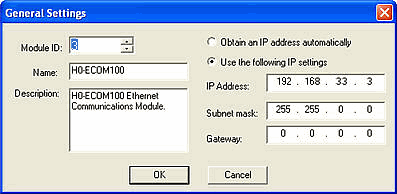
- Click OK when finished to accept.
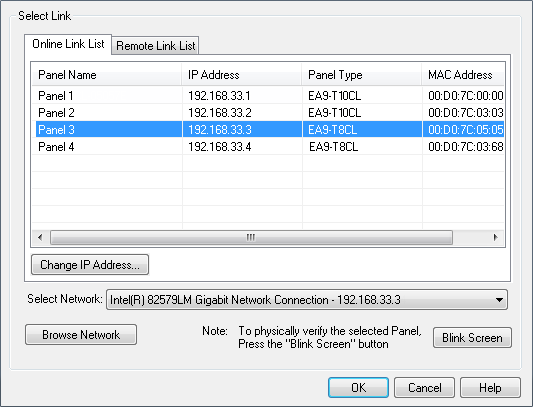
Checking C-more Panel IP Address
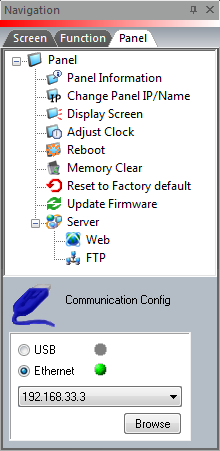
- Check the C-more panel IP Address with the Panel Tab on the C-more Programming Software's Navigation Window shown below.
- Select Ethernet under the Communication Config dialog at the bottom of the Navigation Window.
- Click the Browse button.
- The Dialog Window shown below opens.
- Identify the panel with which you wish to communicate from your PLC.
- From this window you can also select the C-more panel that you wish to communicate with from your PC.