Image Tab |
Topic:
CM221 |
Click on the Image Tab to select it. The Image Tab allows the user to enter and edit Images that will be used for display with the Muti-State Bitmap.
The Multi-State Bitmap Object is accessed from Bitmap in the Object Menu or the Object List.
When the you select the Image Tab, the setup window shown below opens.

Set Up the Image Tab Images
-
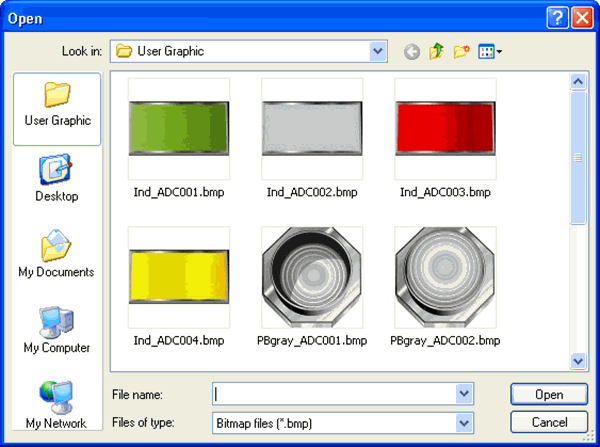
Add New: Click to setup a new Image. When you click the Add New button, a pop-up window opens displaying the images shown below.
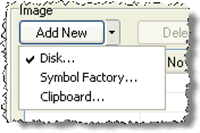
- Clicking on the down arrow
 to the right of the Add
New button allows you to select where to get the Image from shown below.
to the right of the Add
New button allows you to select where to get the Image from shown below.
- Once the Image is selected, it is placed on the table's next available line and the fields available to configure the selected Image become active on the right side of the window. To begin adding a New Image complete the fields as follows:
- Bit
#: Click on the down arrow
 to the right side of the field to select one of the
17 choices available. Click on your choice and
continue to next step.
to the right side of the field to select one of the
17 choices available. Click on your choice and
continue to next step. - Image: Click on the Disk, Symbol, or Clipboard buttons to change the selected Image.
- Lock Aspect Ratio: Tick the box to maintain the Ratio of the graphic when it's resized.
- Stretch to Fit: Tick the box to Stretch the graphic to fit the frame.
- Transparent: Tick the Transparent box. Transparent allows you to set a Transparent color for the Dynamic Bitmap Images.
|
|
Note: Stretch to Fit is a convenient, but uses a large amount of CPU resources. When possible, use a graphics program to render the bitmap to the desired fit and save the bitmap file. Use the revised bitmap file in the object in C-more. |
|
|
Note: Transparency can be effective in your project, but it also has a significant cost in terms of CPU resources and noticeably affects screen update rates. |
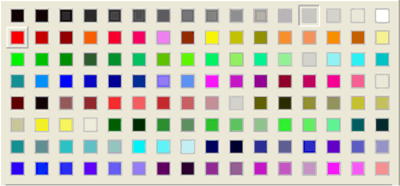
- Back Color: Tick the color box. A window opens with a Color Palette of available color choices shown below. To select a color from this palette, click on the desired color. Back Color determines the color of the background of the frame where the Multi-State Bitmap is displayed.
- Align:
Click on the down arrow of the
Align box
to set the justification of the text to left, center,
or right.
- Note: click on the field to type a Note about this Image.
- Delete: Click on this button to Delete an existing Image.
- Up and Down Arrows: Clicking on the Up or Down Arrows will scroll up or down the list of Images in the table.
