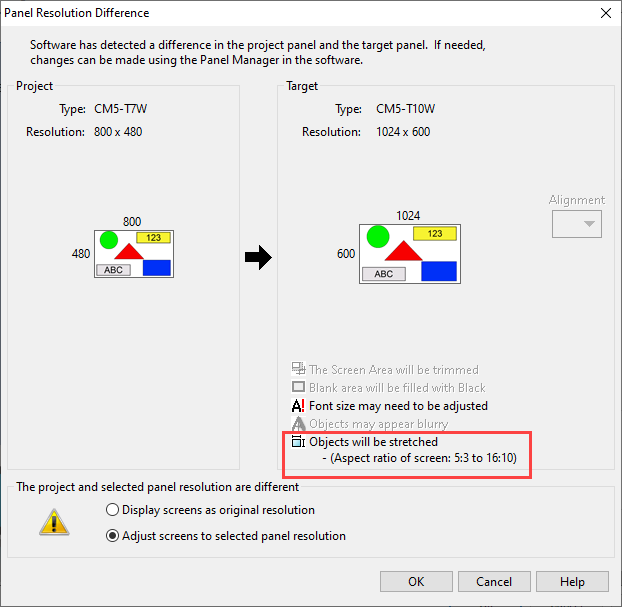
Project Resolution Difference |
Topic: CM016 |
When you change the project model or resolution, you have the option to:
- Display screens as original resolution
- Adjust screens to selected panel resolution
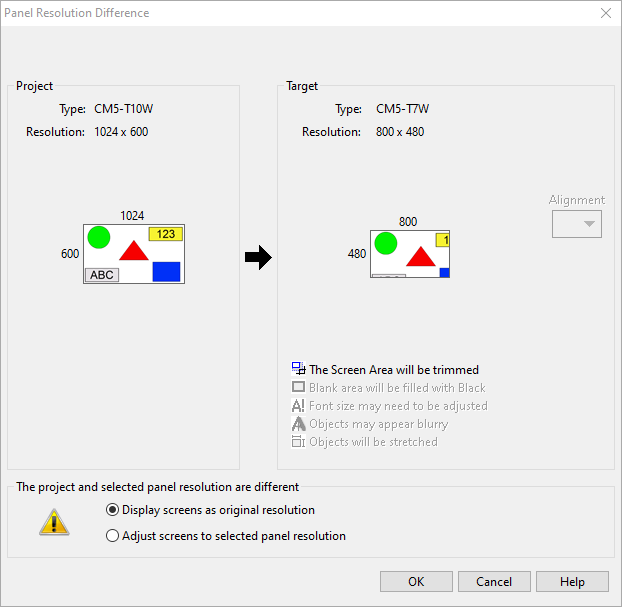
Display screens as original resolution
Select this option to match the target project screen to the original project screen pixel for pixel, regardless of the target screen pixel settings.
- Higher to lower resolution: some objects may extend off the viewing area of the screen. You can adjust object size and move objects back into the viewing area manually.
- Lower to higher resolution: all objects in the viewing area before will still be in the viewing area. There will be extra space available for more objects or for manually resizing the existing objects.
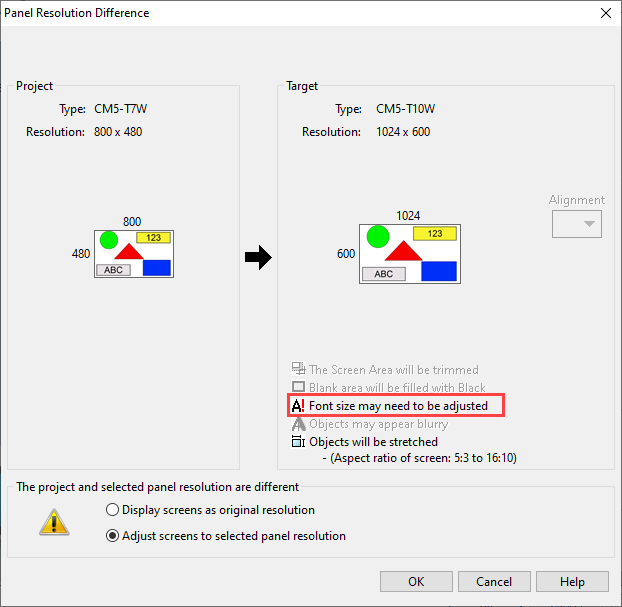
Adjust screens to selected panel resolution
- The pixel count for the project increases or decreases to fit the selected target panel resolution. You can stretch and shrink objects. The result shows in the Panel Resolution Difference window and is explained below.
- Fonts size setting is not adjusted. So fonts may appear smaller or larger and must be adjusted manually.
Target
Trimmed Screen Area
When you select Display screens as original resolution, the original project area may be too large for the selected target screen area. As a result, the screen is trimmed. This means not all objects will fit on the screen and as the screen size is reduced, the objects are left in the working area outside of the screen.
Alignment
When you select Display screens as original resolution and the target panel is larger than the original project panel there will be extra space on the screen that are blank. You may choose where to place the smaller screen area.

You may need to adjust font sizes
When you select Adjust screens to selected panel resolution and the target panel is larger than the project panel, the screens and objects are stretched. The text size is not changed. For example, a size 9 font is still a size 9 font but on a higher resolution panel, the text size will appear smaller.
To maintain the same look in the project as before, you need to increase the size of the fonts in objects.
- Use Crtl+A to select all of the objects on a screen.
- Select the Font Size Up or Font Size Down toolbar buttons
 in the Edit Menu to adjust the font size as desired.
Object stretch
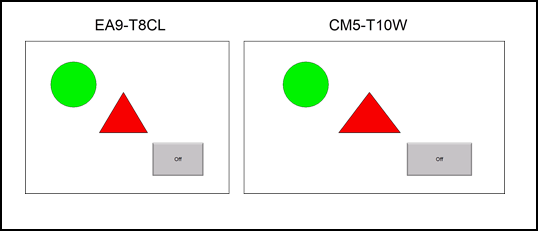
When you select Adjust screens to selected panel resolution and the target panel is larger or smaller than the project panel, objects are stretched. They may be made wider, taller, or both. The fonts do not change. If you change the Panel Aspect Ratio, for example 10in wide to 12in wide, the aspect ratio of the objects change as well.
You may not notice these changes when you convert from one size CM5 panel to another size because most of the resolutions are the same or close. But if you convert from an EA9 panel the difference is more noticeable.
|
|
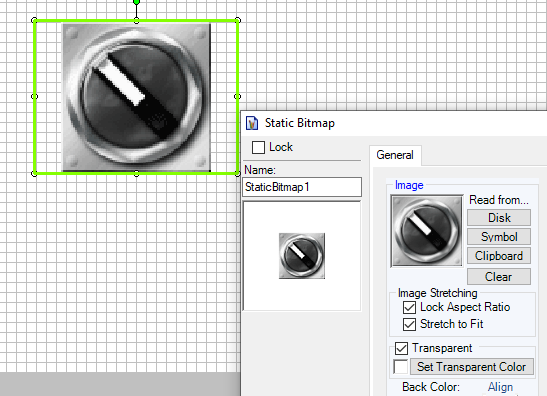
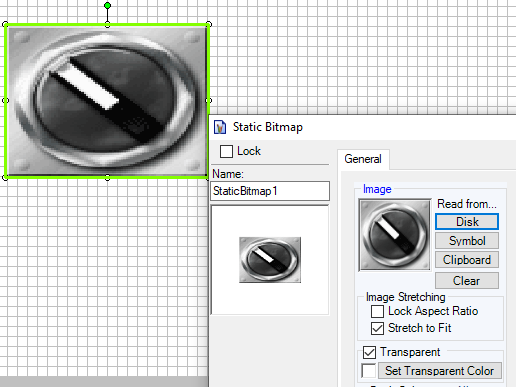
Note: If you select Lock Aspect Ratio for objects such as the Bitmap, even though the object space may change aspect ratio, the bitmap image does not. Deselecting Lock Aspect Ratio allows the bitmap to fit to the object space. |